Click on any picture to open a slideshow. Once there, you can click the link in the caption for the full-size picture.
This will end up being my third electric guitar project. Click this link for Guitar #1. Click this link for Guitar #2.
This build will be much more involved. I will be making the body from scratch, and it is my intention to buy the neck totally unfinished - no frets, etc. The neck will be cut and shaped, but I will add the frets, nut, cut the headstock to shape, and maybe do inlays in the fretboard. The body will be finished in a natural or very light stain. It will also be "bound" - the top (and maybe back) edge will have a plastic binding applied.
While in Indianapolis, I was discussing woodworking and guitar building with an IBM engineer. He told me about a lumber store nearby, so I went shopping when I went out to lunch. I bought an 8/4 (2" thick) plank of Ash, and two pieces of Curly Maple veneer.
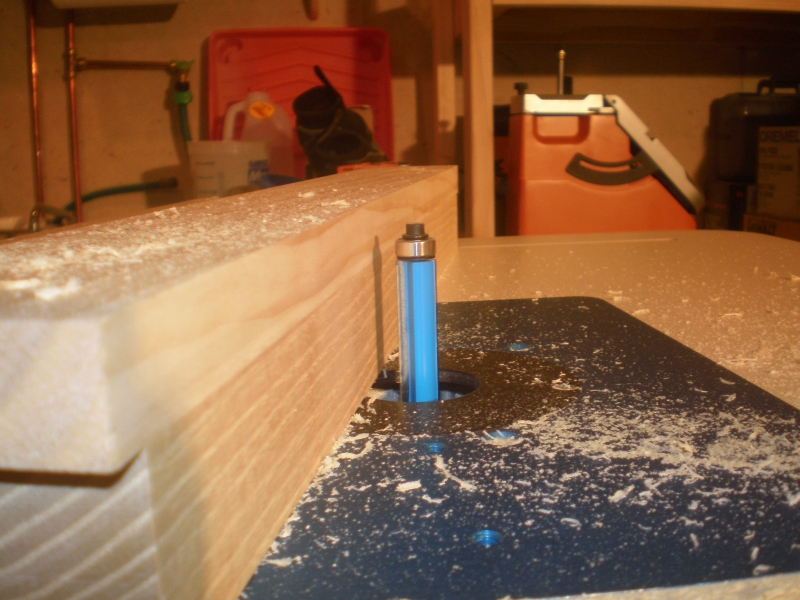 The body will be two pieces. After planing the Ash down to 1-1/2" thick, I needed to joint the edge to be glued. Since I don't get good results with my jointer, I used the router table with a long pattern bit and a straight edge. |
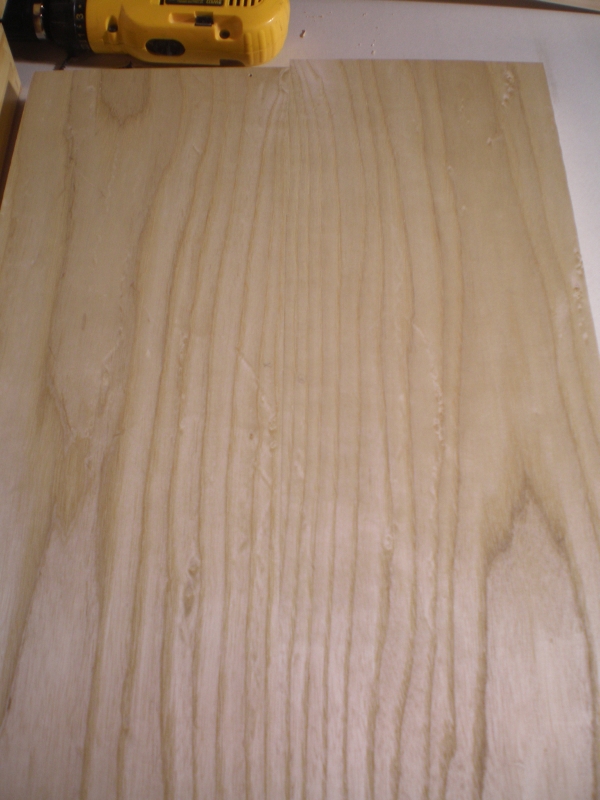 Here's the two pieces prior to being glued. |
 Glued and clamped. I will be capping this with 1/4" maple that will have the veneer on it. Before I put the cap on, I will chamber it using a drill and then router to create empty pockets. This will shave weight, and affect tone. I will not cut an F hole like the guitar above. |
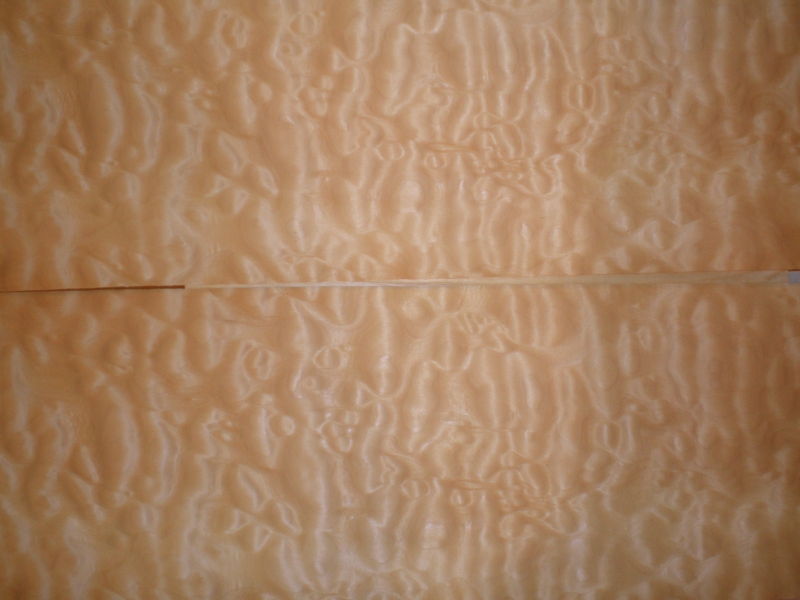 Here are the Curly Maple veneer sheets. This stuff is so good looking that I want it to show in the final product. That's why I'll finish in clear or a light stain. I'll also make a clear pickguard. And the controls will not use a plate like the guitar above. The switch and pots will be mounted right to the top from the back. |
 2/16/09 - Not much progress, I have spent time getting some tools and jigs set up. Here is the press I built to apply the veneer to a 1/4" Maple substrate. I had to plane the maple down to 1/4". I bookmatched the veneer. You can see in the picture above right that the two pieces are consecutive. That picture is not how they will appear - that is both pieces "A" side up with the right edge of one next to the left edge of the other. I flipped the one side over so the two left edges are butted together. |
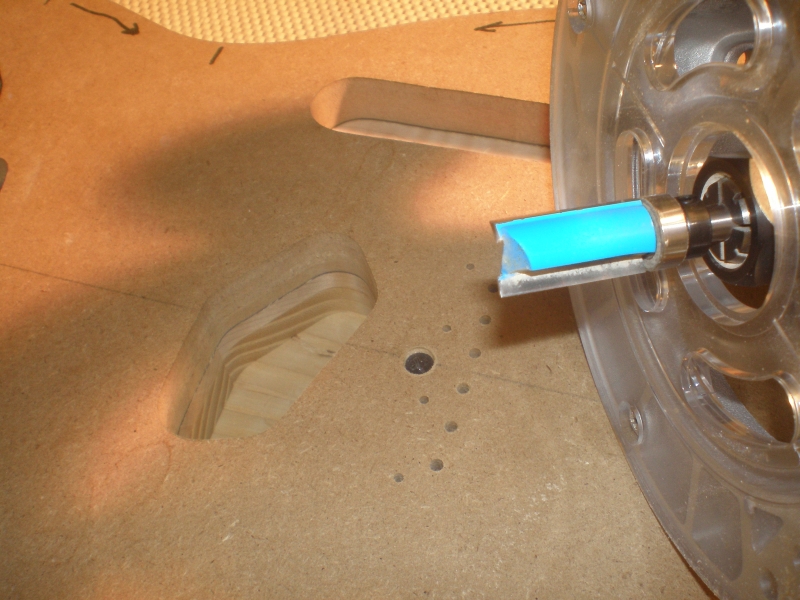
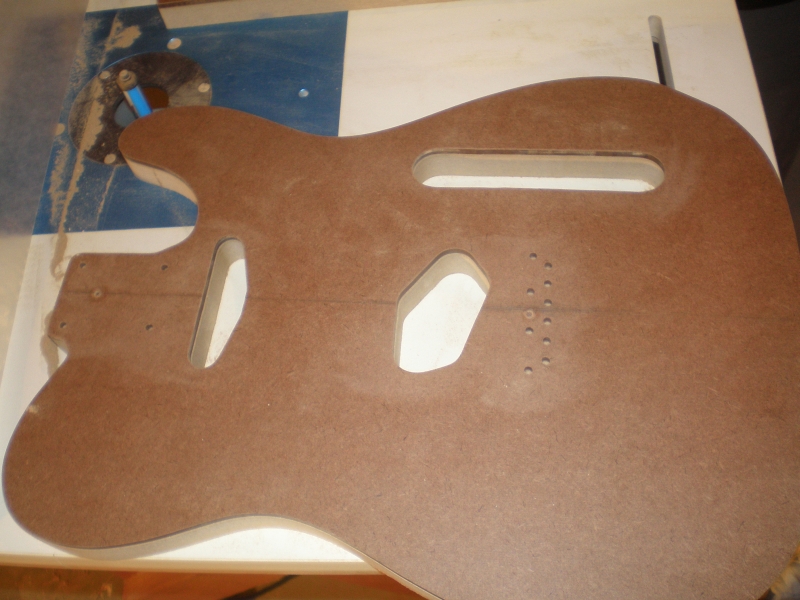 2/16/09 - Here is the other thing I have been working on. On top is the 1/4" master template I purchased. Here I am duplicating it in 3/4" MDF. I need the thicker piece so the guide bushing on the router bit will have contact as I am routing the pickup areas. The long rout for the switch and pots will not be used on this build. 2/19/09 - Template update: I discovered that the bridge I had intended to use does not line up with the holes in this template. The template is for a less modern bridge I am guessing. So I will have to make another copy of it and use my bridge for hole spacing. 2/20/09 - Template update #2: I realized that I don't need the bridge mounting holes since I will be drilling them directly in the body. The string holes will locate the bridge on the body, and then I can mark and drill the mounting holes. |
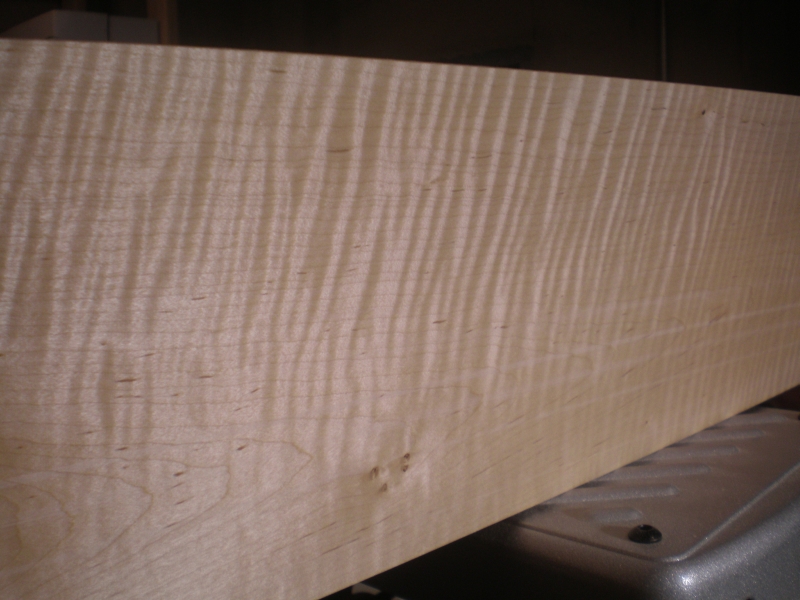 2/19/09 - The veneer press above didn't work. The center didn't have enough pressure, and the veneer didn't glue flat. I bought some birdseye maple veneer and another maple substrate board from Menards to try again. But tonight when I went to plane the maple down to 1/4" I was pleasantly surprised to see that this board is really curly maple. It just kept looking better each pass through the planer. This board is figured way better than the curly maple stock I bought from a lumber place! So this will be my guitar face - no veneer. |
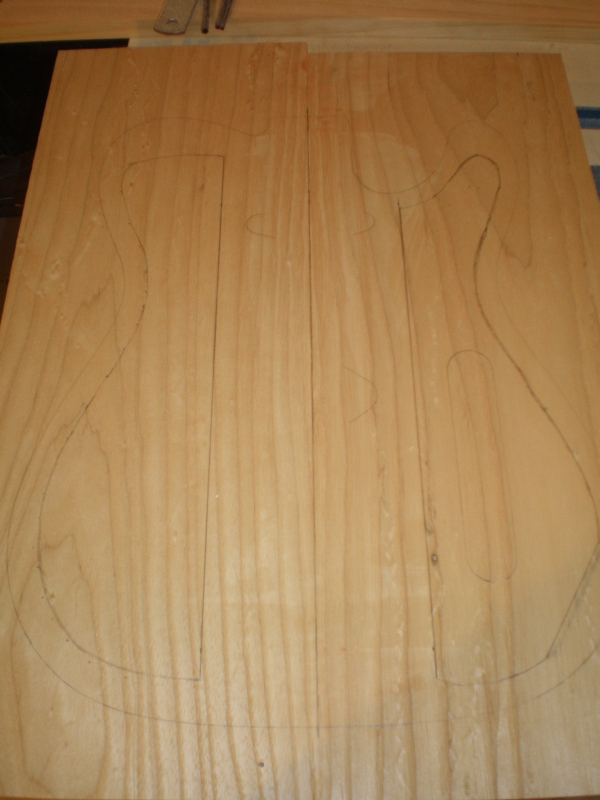 2/20/09 - I've layed out the ash body and drawn my lines for the chambers. I then realized that I wouldn't be able to cut the rough outline with the jigsaw after I chambered it, so I cut it first. After cutting, it weighed in at 7 lbs. And it's only 1-1/2" thick. This might be a heavy guitar. That's why swamp (black) ash is normally used instead of white ash like this - it's lighter. |
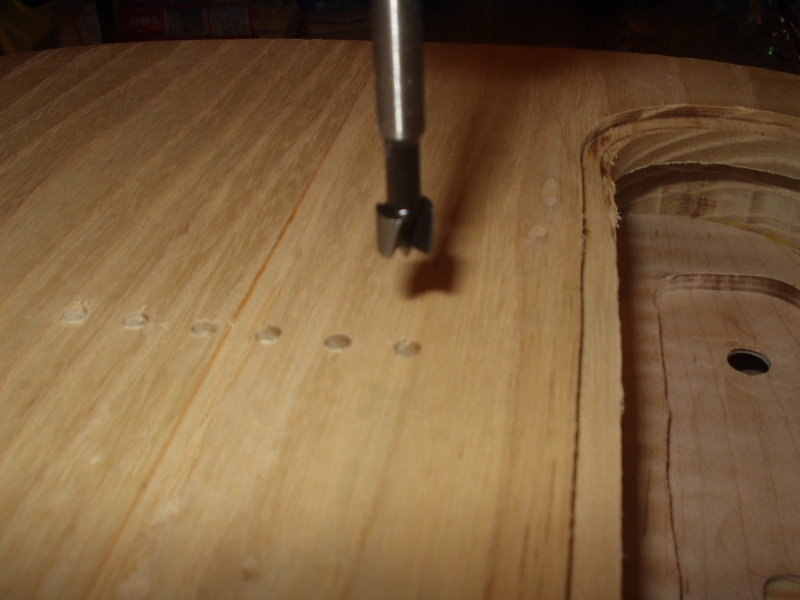
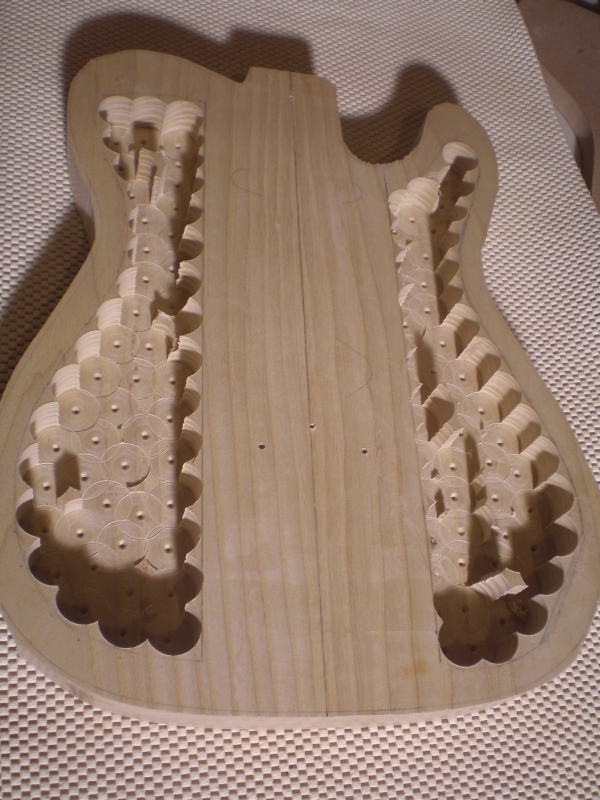 2/20/09 - After I rough cut the outline, I used the drill press with a 1" Forstner bit to remove most of the chamber pockets. It was time consuming, but cleaner than using the router right away, and saves wear & tear on the router. I'm leaving slightly more than 3/8" thickness on the back. |
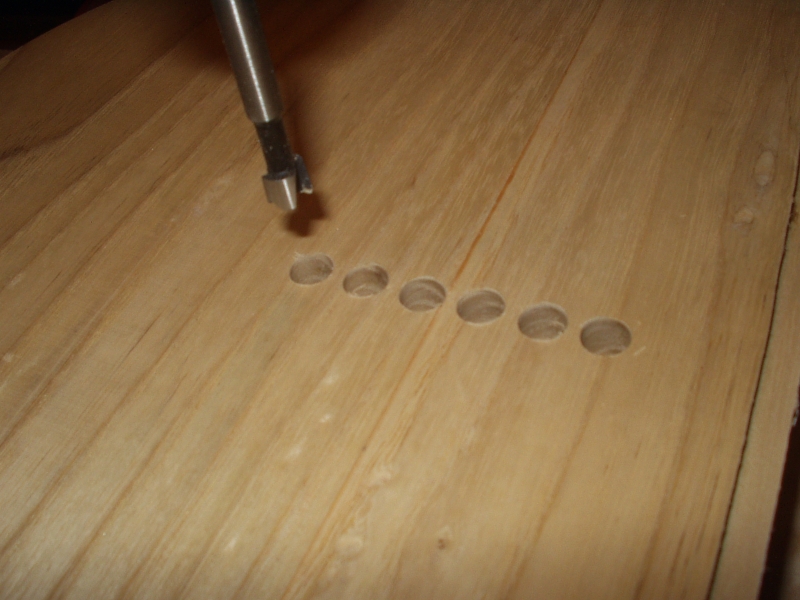
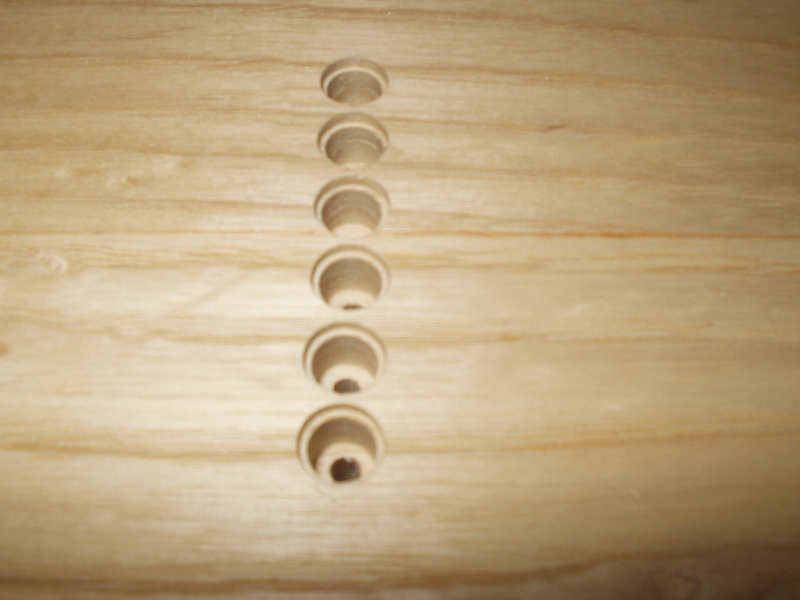
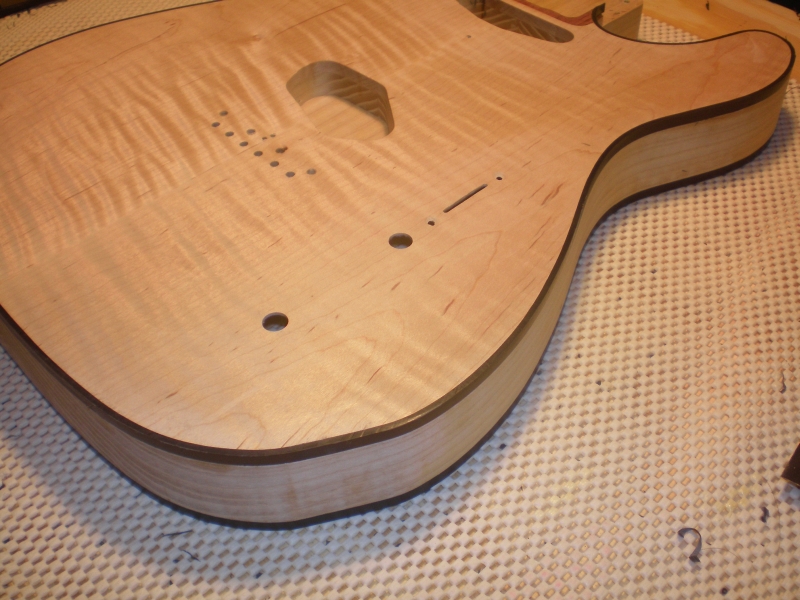
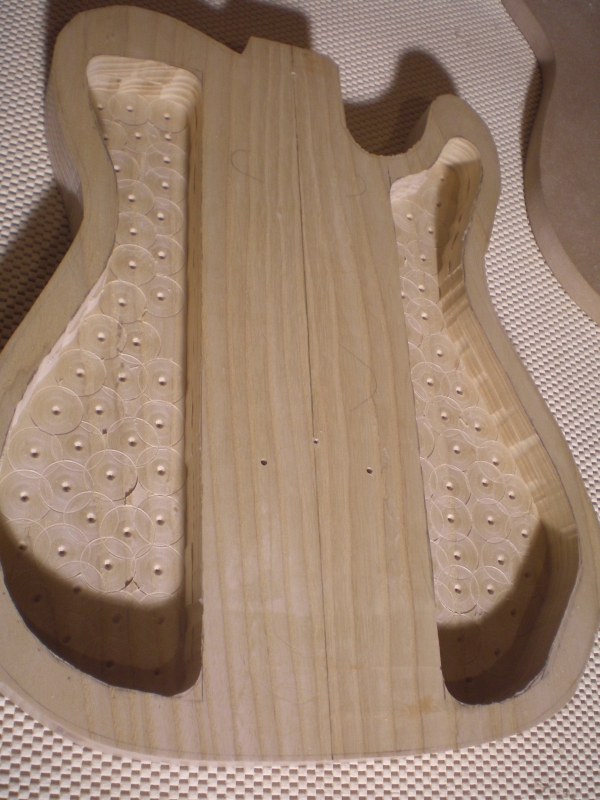 2/20/09 - After drilling, I cleaned it up with the router. It now weighs 5.25 lbs. Also note here the holes on the center line. Those are for the template so I can mount it in the same location again later. The two lower holes are the outside string holes. I only drilled these part way for now..... |
 2/20/09 - Here is the curly maple top rough cut and layed out. Note the two holes in this piece. Using two 1/8" drill bits, they're used for lining the top up with the body. Once the top is glued on, these will be drilled all the way through and the other 4 holes added. |
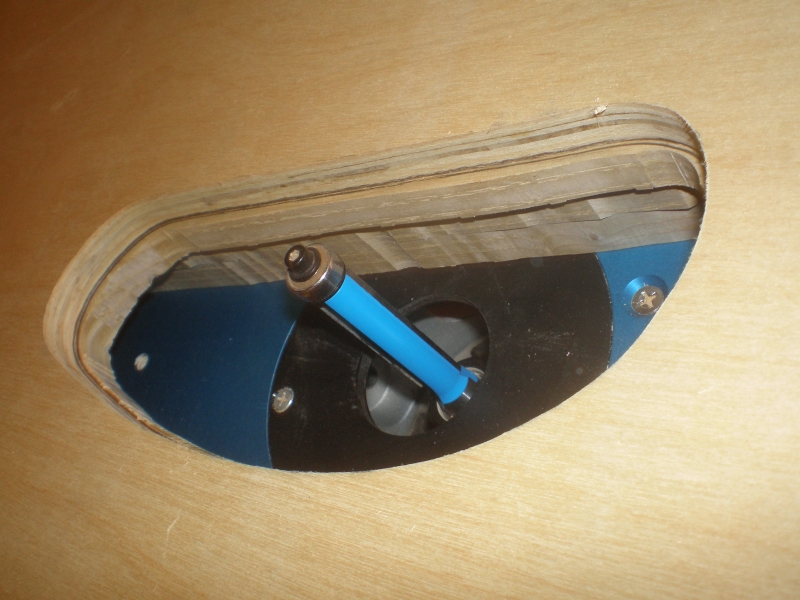
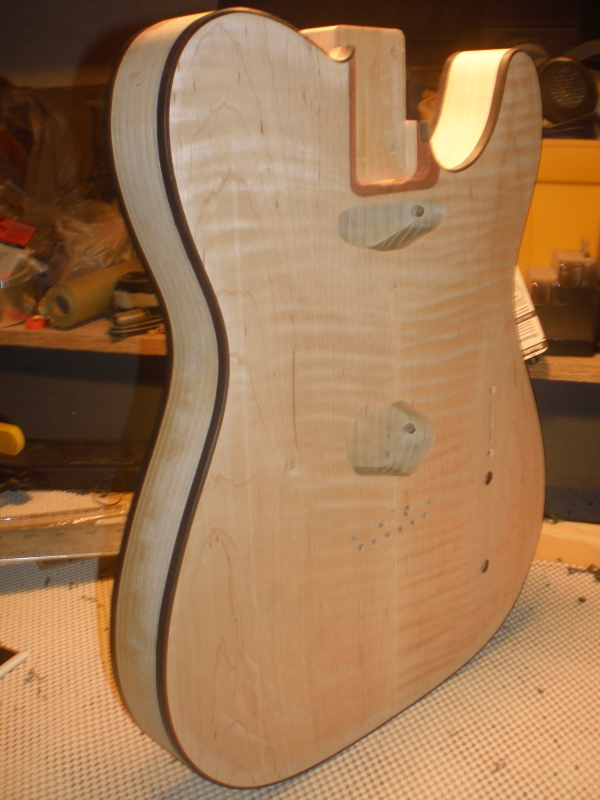
 2/21/09 - Routed out the area for the switch and pots on the underside of the top. |
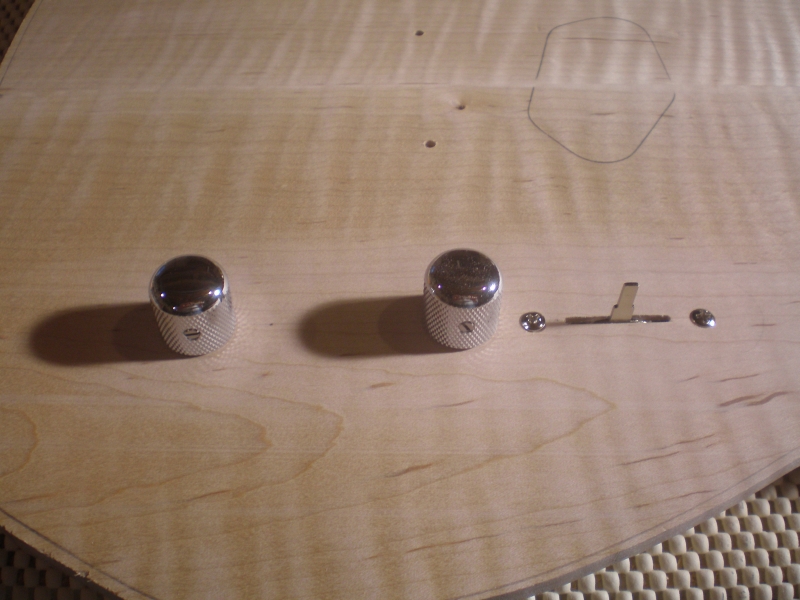 2/21/09 - Here's what it will look like. Normally on a Telecaster there is a chrome plate that these mount to. I wanted to highlight the wood, so opted for a rear rout. |
 2/21/09 - Because the wood is so thin here, I decided to use the control plate underneath for strength. It also acts as the ground tie for the pots. |
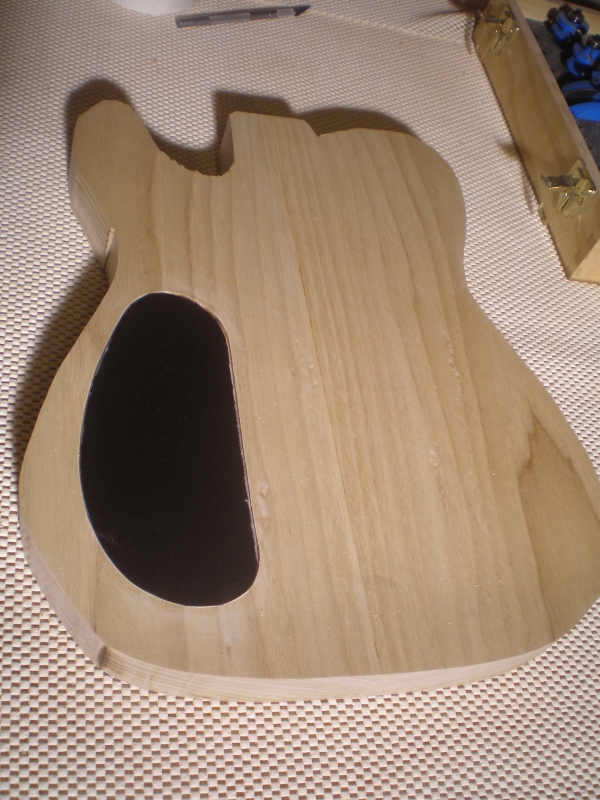
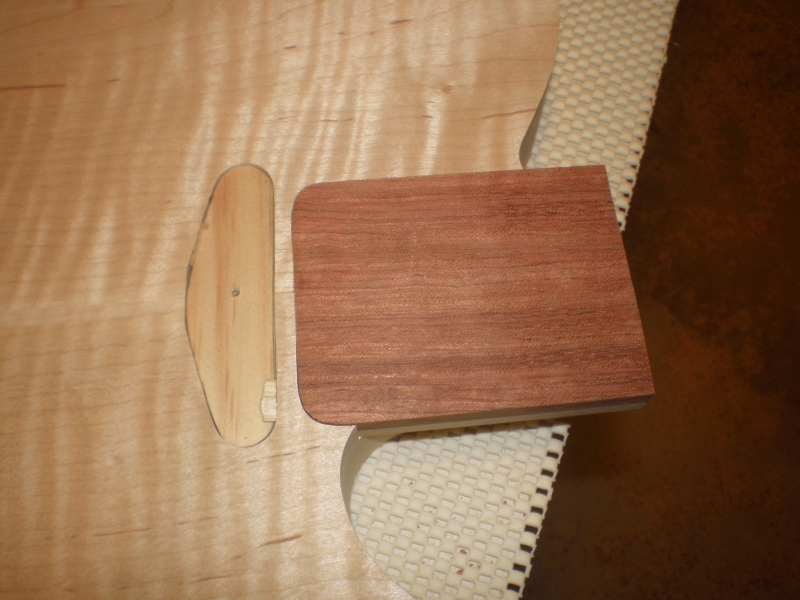
 2/21/09 - I first made a control cavity cover out of pickguard material. Then I made the template on the right, 1/4" smaller all the way around. I used the spindle sander to make it smooth and sand right up to the line. Next I traced the template on the back of the ash body and rough cut it with the jig saw. |
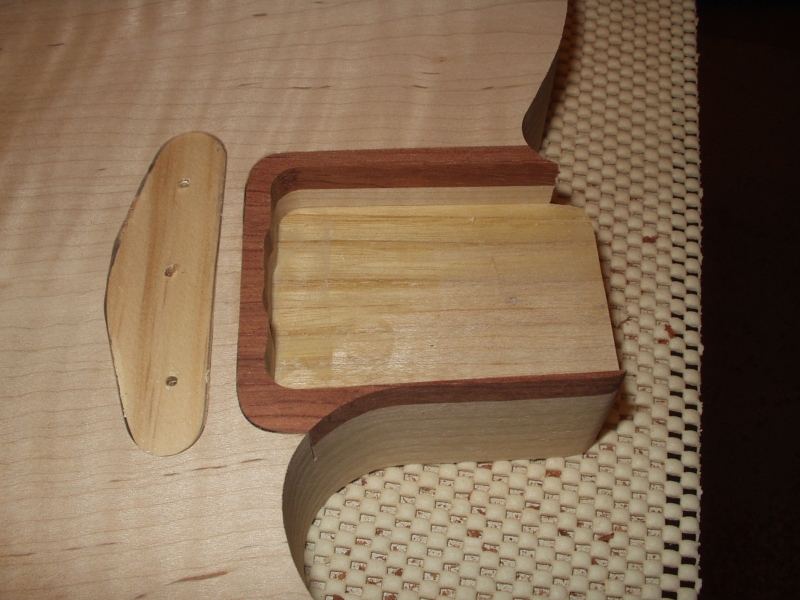
 2/21/09 - Here's the body about to be routed to match the template. The extra long pattern trimming bit is coming in handy. |
 2/21/09 - After trimming the opening, I then routed a 1/4" rabbet so that the cover plate will sit just a little less than flush. I still have to drill and countersink the holes, but I will wait until final assembly to do that. |
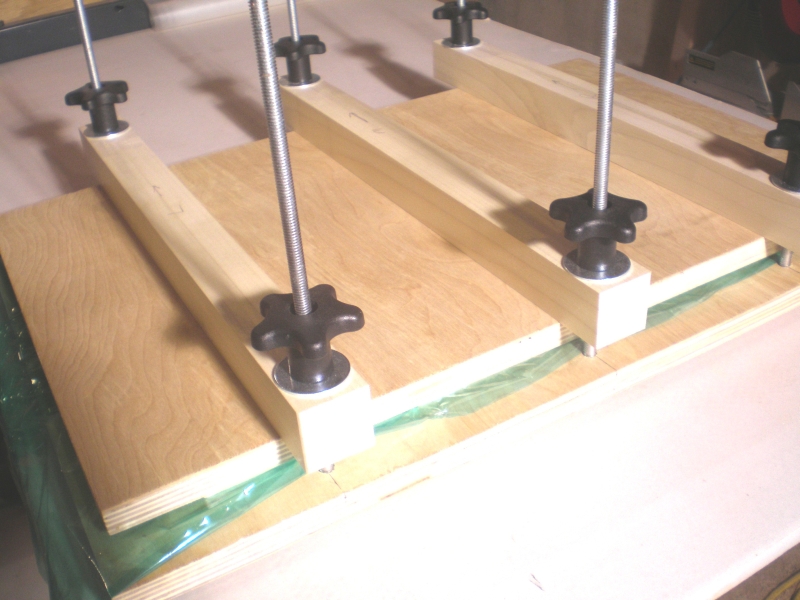
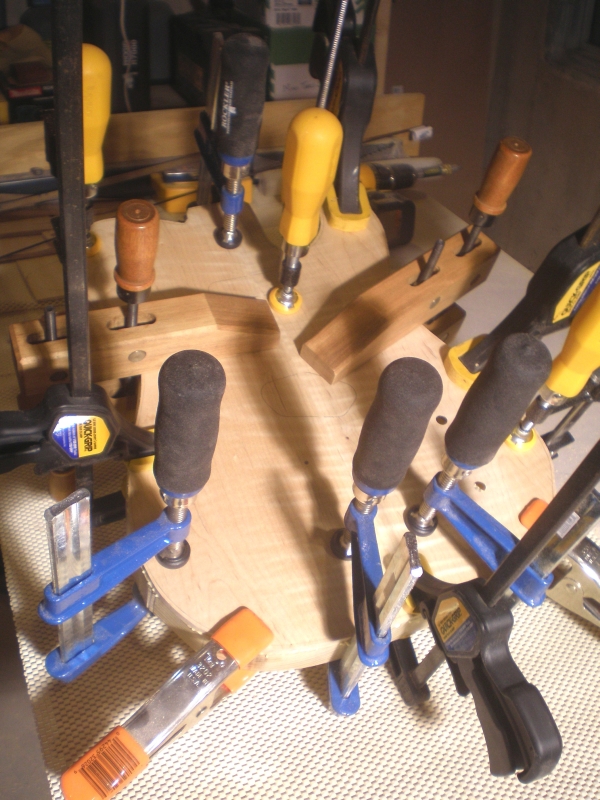 2/21/09 - Here's the curly maple top being glued onto the ash body. I used the 1/8" drill bits to line it up, and removed them right before taking this picture. This is just about every clamp I own. |
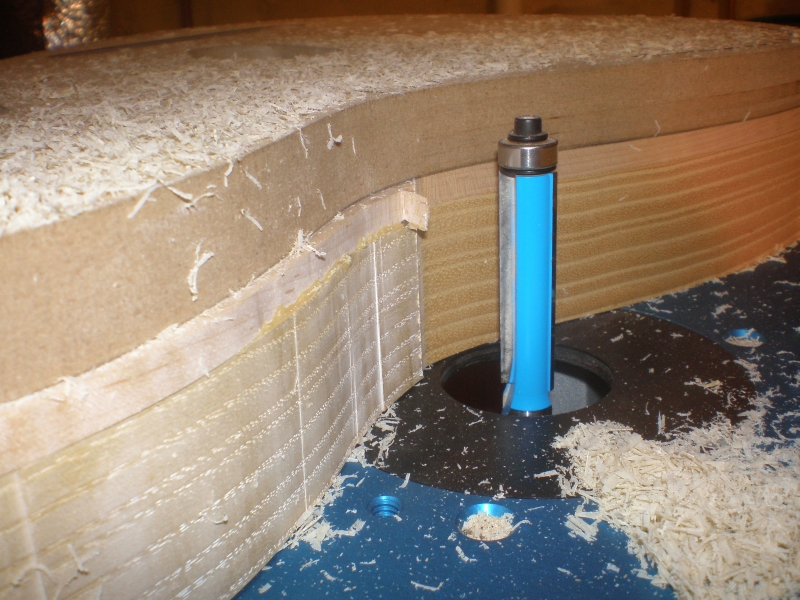 2/26/09 - It's finally time to rout the body. This long bit cuts the whole depth at once, but I have to take small bites to avoid chipping. I'm also trying to cut in two directions to avoid this...... |
 2/26/09 - ...but backcutting isn't easy, and here the piece jumped a bit. I figure I can use the sander to blend it in. |
 2/26/09 - Here I'm using a top bearing bit to rout the pickup cavities. I had to extend this bit a little in the router collet to get to the depth I needed. |
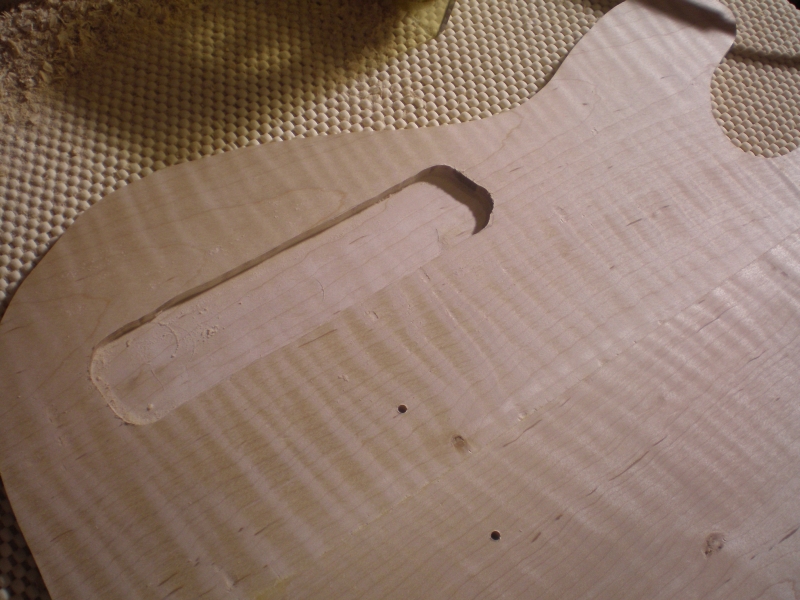
 2/26/09 - Now it's time to rout the neck pocket. Here's where I ran into a problem that might mean this body is now firewood. :( The template is located using the outside string holes, and screwed down with one screw. Similar to the template picture to the left. The problem is that the neck end moved in each direction when I routed..... |
 2/26/09 - ...leaving the neck pocket too wide. Here I'm holding the neck to the top edge, you can see how much bigger it is than it should be. 2/26/09 - Also, I decided to use a Fender neck on this build to save time. |
 2/26/09 - And here I'm holding it against the bottom edge. I don't know if I can make this work. My initial thought is that I can't. Especially because I wanted to clear coat this body and maybe not use a pickguard. If I was painting it I could maybe fill it and re-rout. The thought of having to start all over will keep me awake at night. |
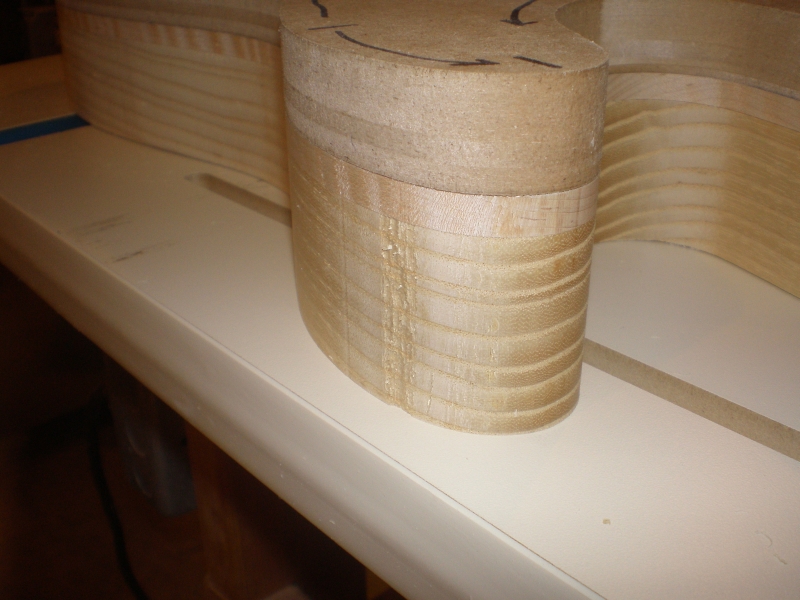
 6/6/09 - Finally back at it. I made a template roughly 1/4" bigger than the neck pocket, and routed the body. I then cut & shaped this plug, which is two thin pieces laminated together. The bottom is maple, and I forget what the top wood is. Most of what should remain after recutting the neck pocket will be covered by the pickguard anyway, unless I use a clear pickguard. |
 6/7/09 - After rerouting the neck pocket. The side on the bottom of this picture needed to be trimmed by hand. |
 6/7/09 - The neck fits nicely now. |
 6/7/09 - Next up was to drill the holes for the pickup wires. This is easier because the side is chambered - I only have to drill the hole into the chamber. For a normal solid body, I would have to drill into the control cavity. |
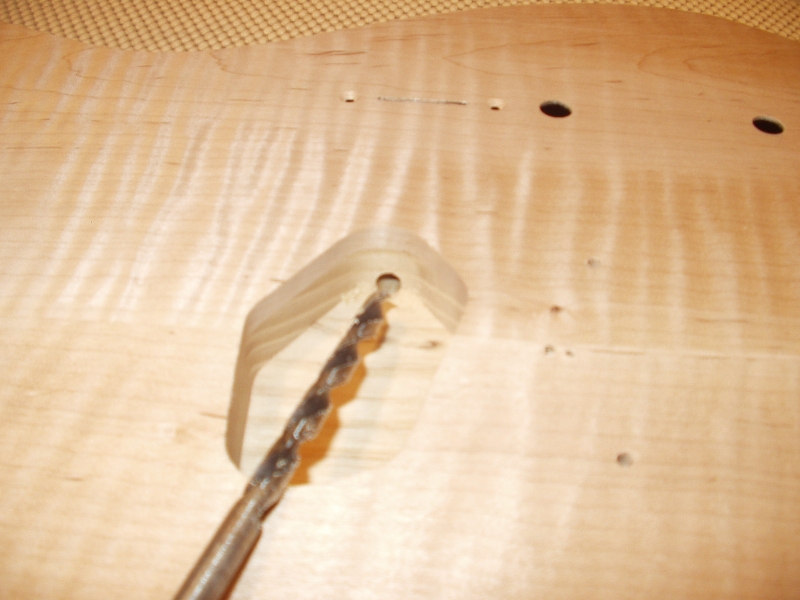
 6/7/09 - Setup to drill the string-through holes. After using the template to drill part way through from the top, I needed to finish the holes from the back. First I drilled a 5/32" hole in the pine board, then inserted a cutoff piece of drill bit. I used this as a locating pin - put the body on with the pin in one of the front holes, and drill the rest from the back. |
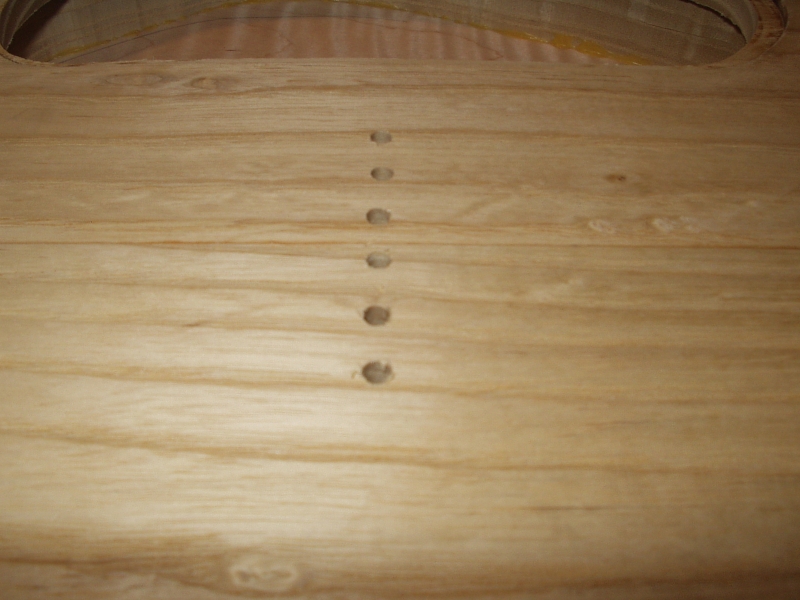 6/7/09 - This is the result. It looks like a couple of the holes are slightly off. |
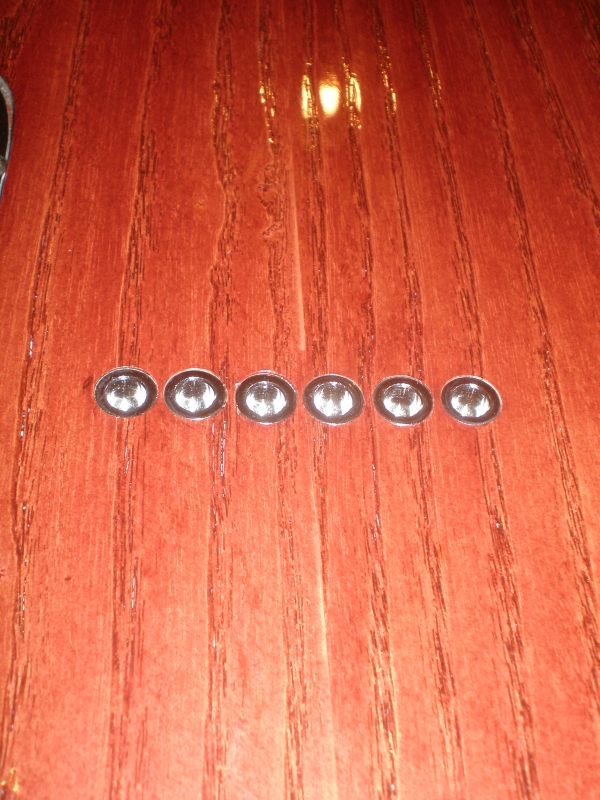
 6/7/09 - Next step is to drill bigger holes for the string ferrules (metal pieces that hold the string from pulling through). |
 6/7/09 - The results. |
 6/7/09 - And finally, another slightly larger step for the rim of the ferrules so they sit flush with the back. Fender doesn't set them flush, this is a custom touch. |
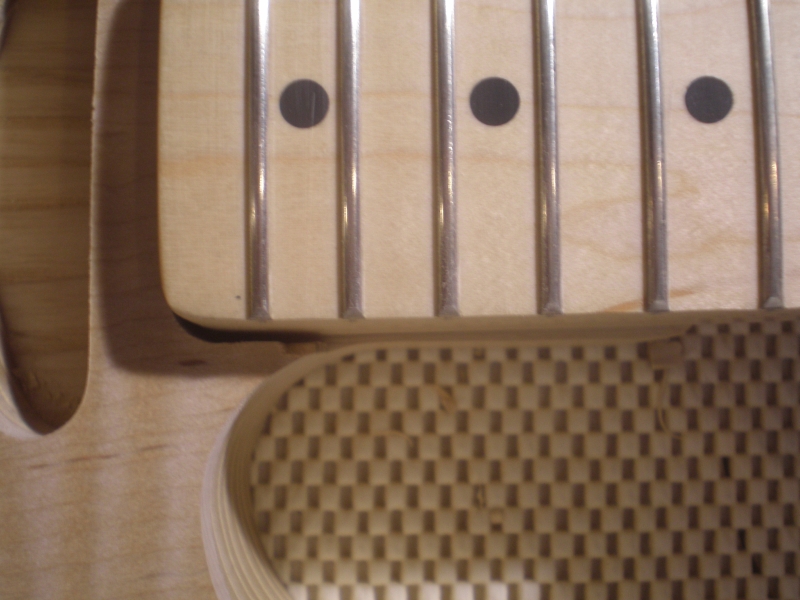
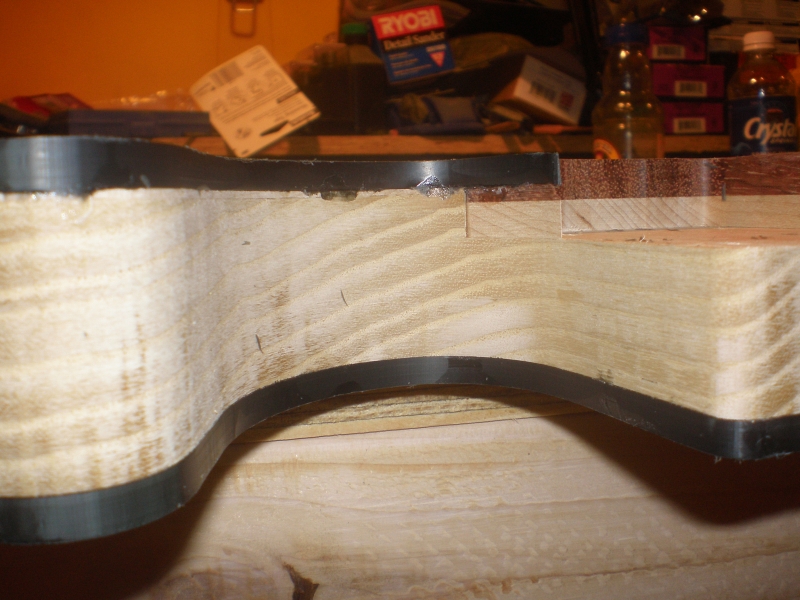
 6/7/09 - Next up, binding channels. I used the small laminate trim router to rout the top and bottom edges. |
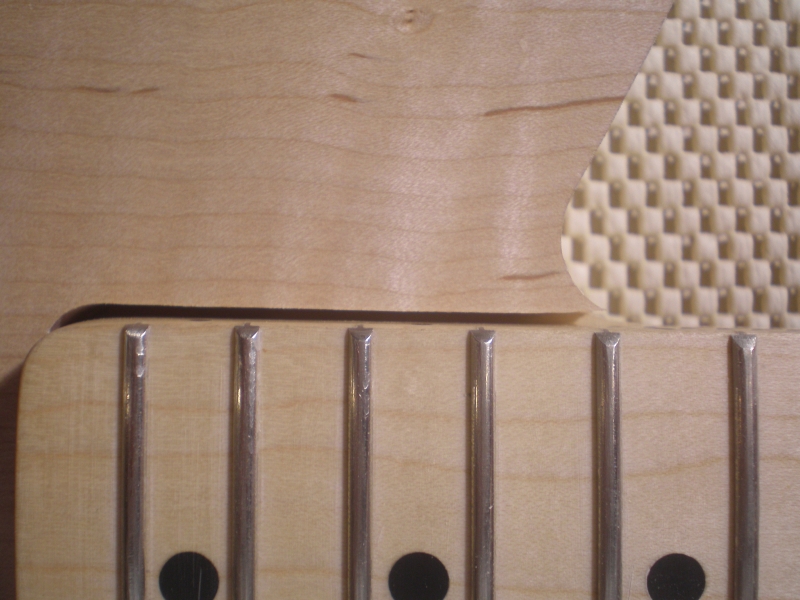
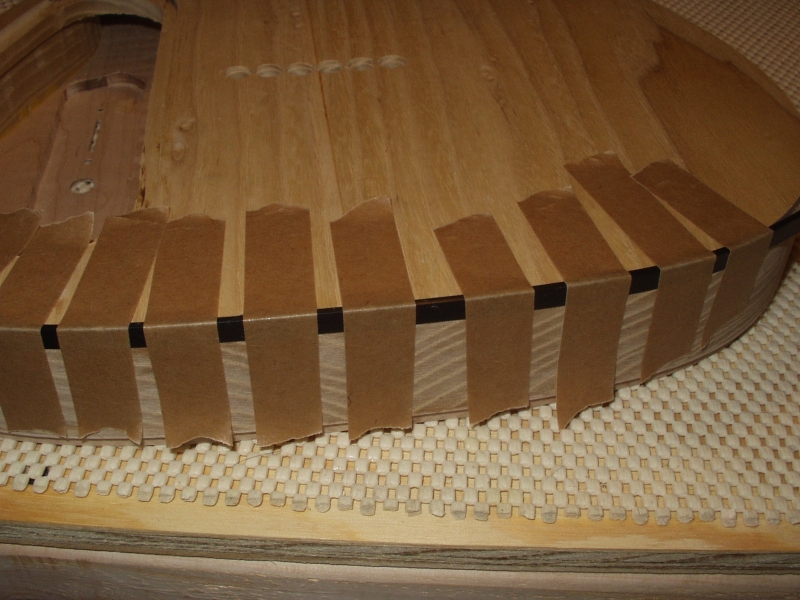 6/7/09 - I've decided to use a black binding since the finish will be light. The binding is plastic (acrylic) and glues in with model glue. The binding is just a hair taller than the channel, I will scrape/sand it flush later. |
 6/7/09 - This is where I left off. I have to take it in stages since the glue takes awhile to dry. The tight curves will present a challenge, the binding is not that flexible. |
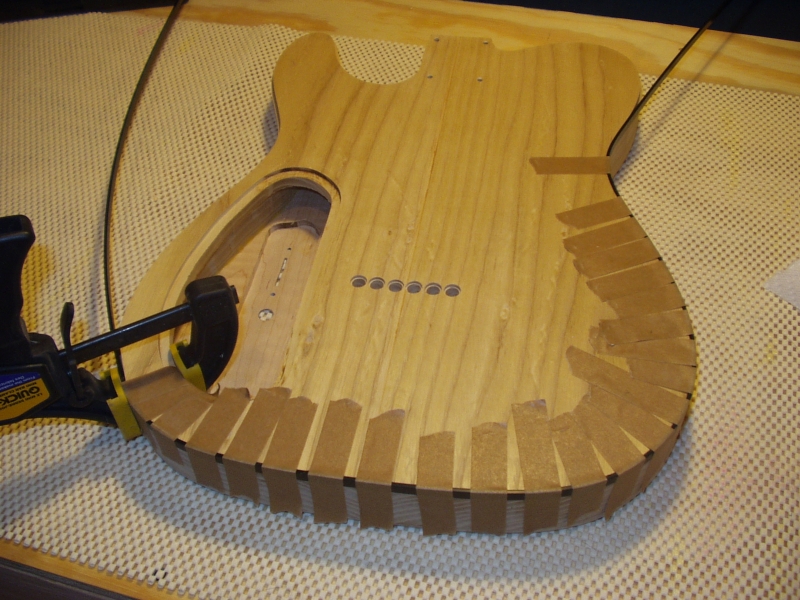
 6/11/09 - The back binding is done, and I started on the front. |
 6/11/09 - I scraped the back flush. I haven't touched the sides yet. There is a little more glue squeezed out on the sides, I haven't decided how I'll do those - either trim with a router or sand with the spindle sander. |
 6/14/09 - The binding is all glued in now, and scraped flush on the front & back. |
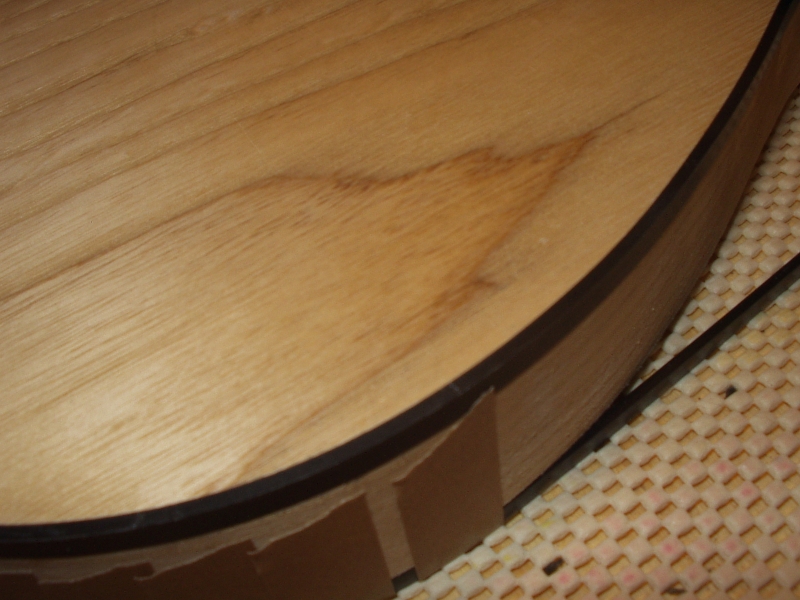
 6/14/09 - That left some light scrape marks on the front, those will sand out. |
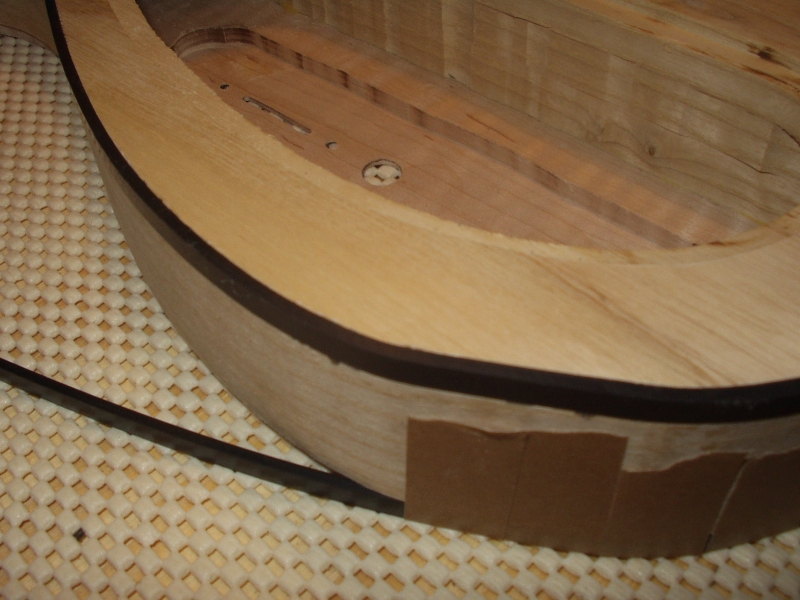
 6/14/09 - The sides had more goopy spots like this. I first tried cleaning them up with the router, but that still left a couple spots. I then used the spindle sander... |
 6/14/09 - All cleaned up, but now rough from the sanding. I went back to the scraper and smoothed them up. I will make them shiny again with some acetone. |
 6/14/09 - Almost ready for sanding and finish. |
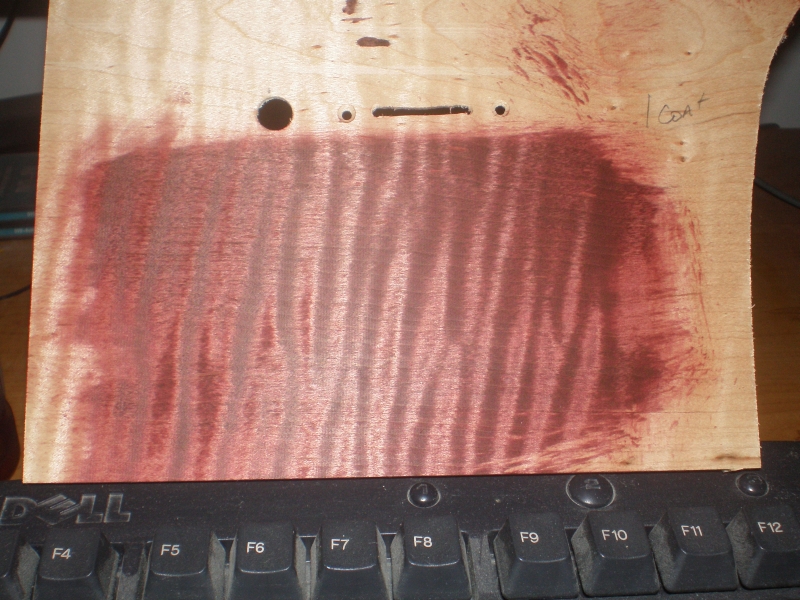 6/21/09 - No real progress. I did get the hole drilled for the jack cup. And I did test a sample stain that I think I am going to use. The color is called Cabernet. This is a cutoff piece of the maple top, I wanted to see how it would look with the curly maple. |
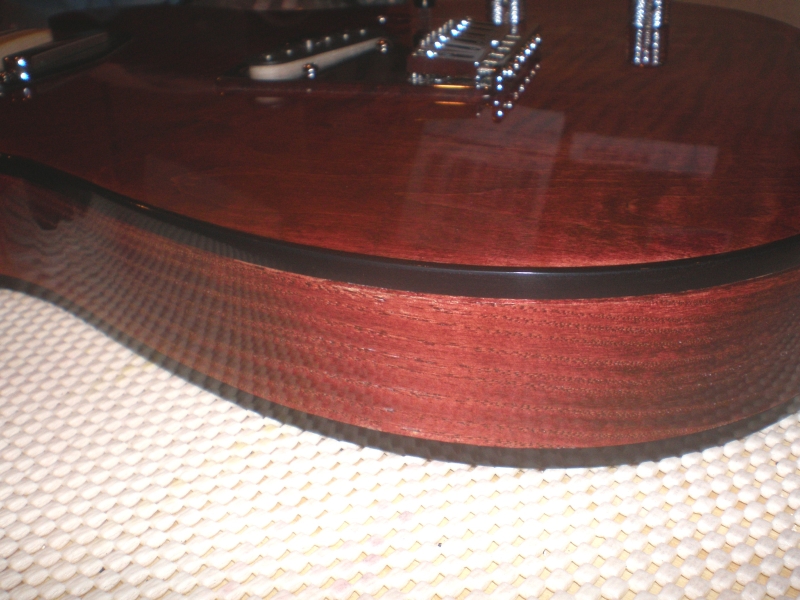
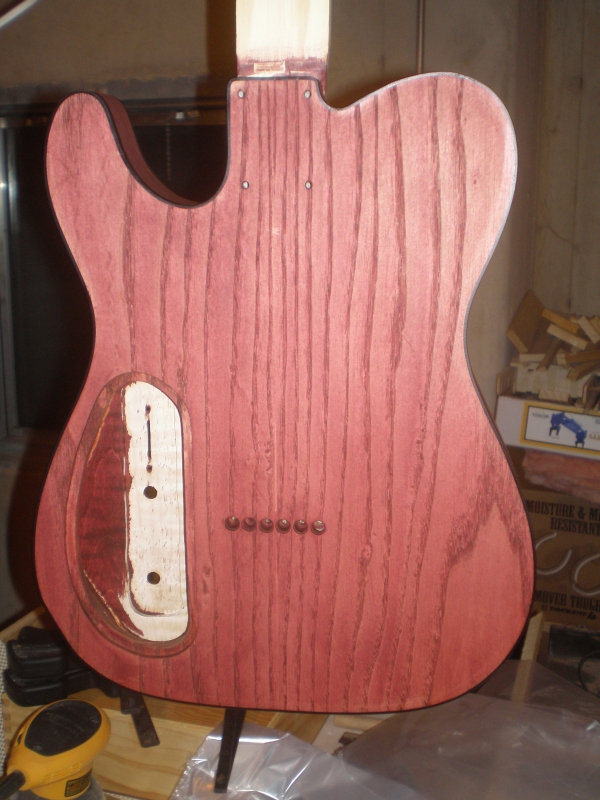 6/27/09 - Sanded and smoothed everything, then hit the binding with acetone to shine it back up. Then applied 1 coat of stain. These pictures look more red than in person, which is a little disappointing because I was trying for red. In person it looks darker. The back turned out better than the front. |
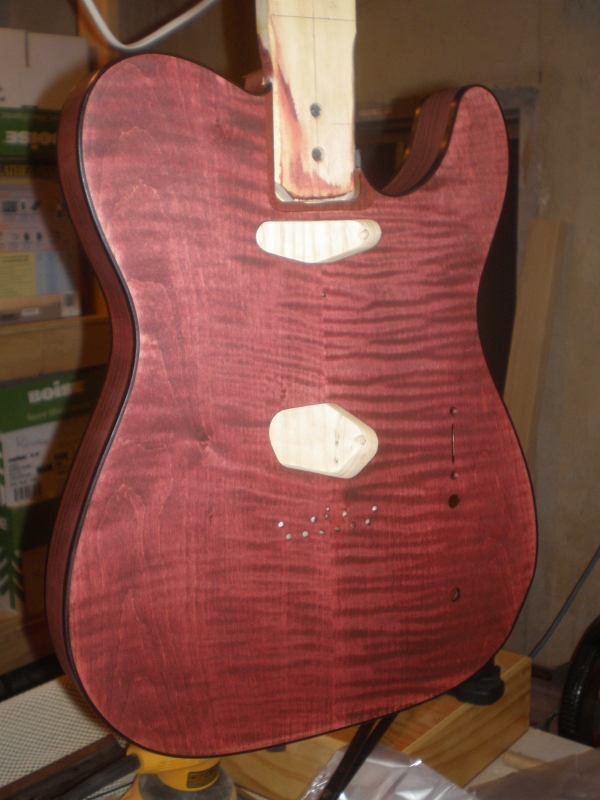 6/27/09 - The picture shows more of the curly than in person. I'm hoping that's a good sign for when I put a gloss polyurethane finish on it. Right now it looks a little dull. |
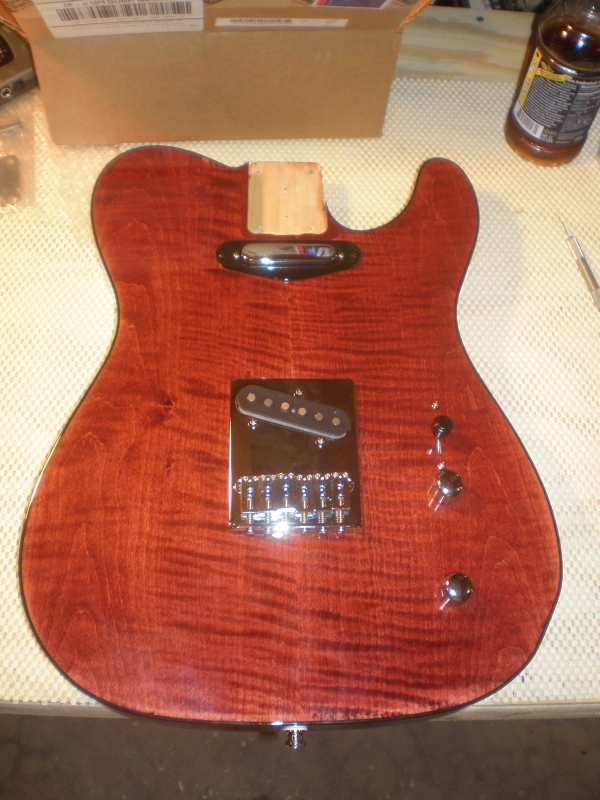 8/18/09 - Finally got back to it over the weekend. Wet sanded and then polished the body, it turned out nice and shiny. I then added all the hardware and wired up the electronics. Tonight I soldered all the connections and finished assembly. |
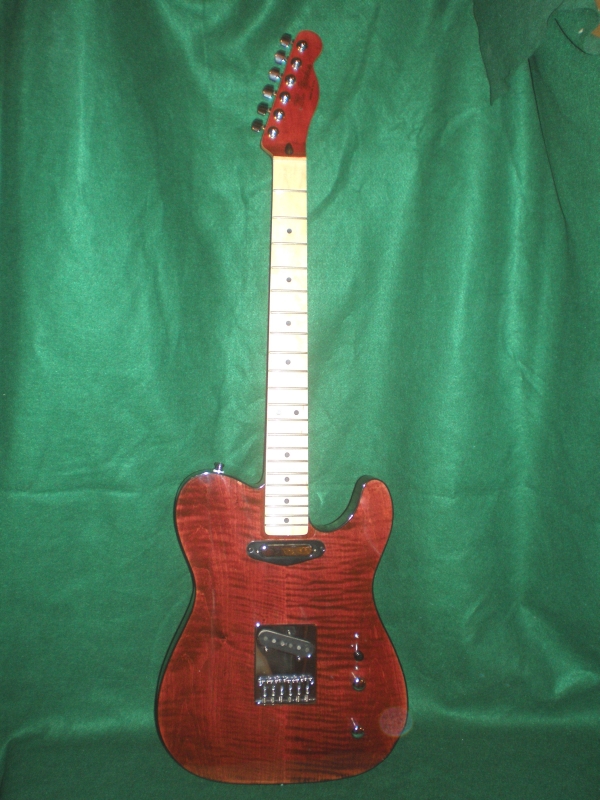 8/18/09 - Still no strings, as I realized I don't have a string retainer for this one yet. |
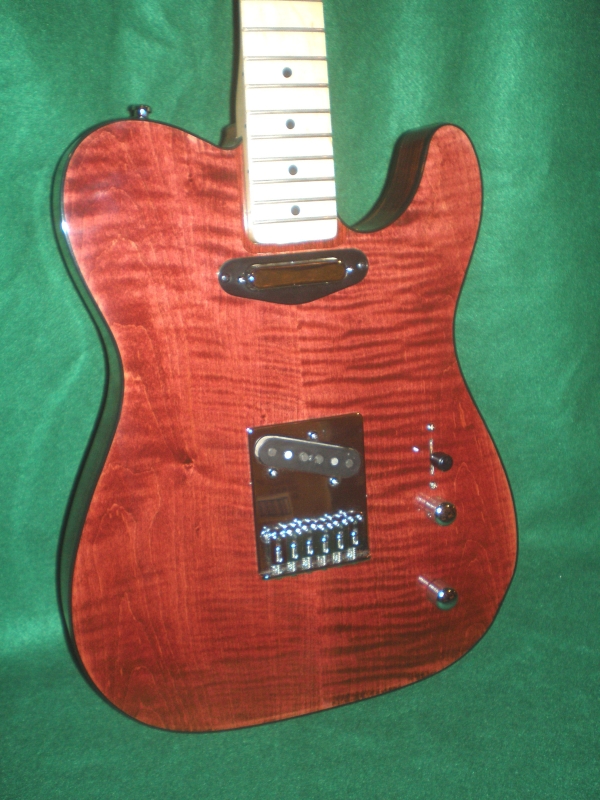 8/18/09 - I didn't use a pickguard since I wanted to show off the wood grain. That required mounting the neck pickup in a pickup ring. I went with black, so as not to have too big of a shiny object there. |
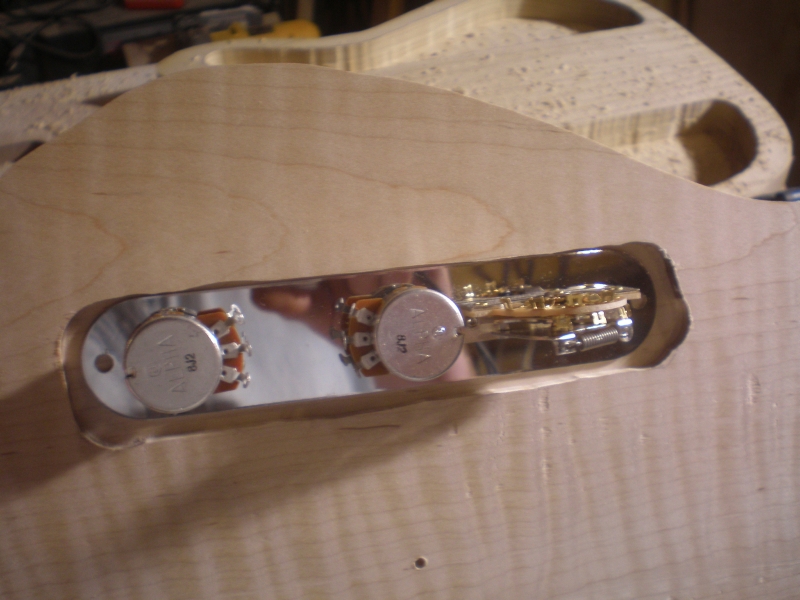
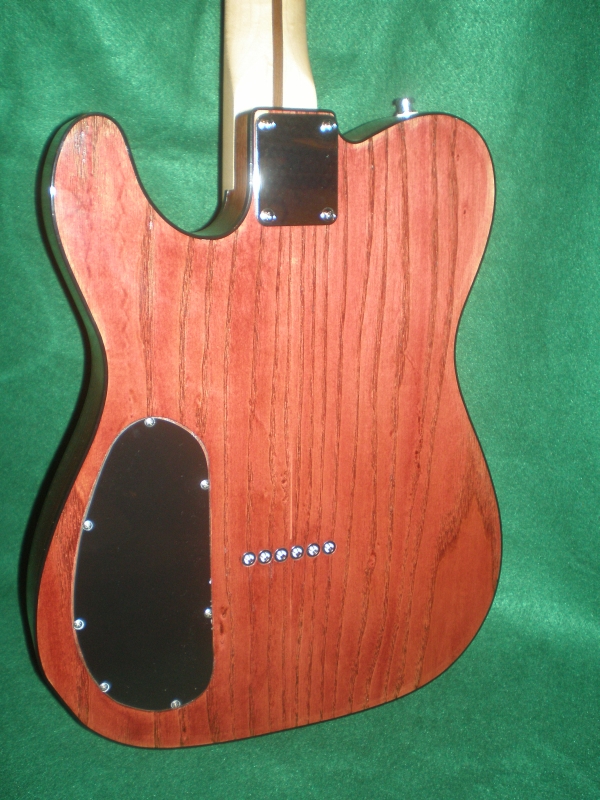 8/18/09 - Here is the back with the electronics cover mounted. |
 8/18/09 - Here you see the string ferrules flushed to the body. I had to pound these in with a small socket, but they went in pretty easily. You can also see a bit of where the glue line didn't take the stain. |
 8/18/09 - A closeup of the double binding. |
 8/18/09 - The jack socket. I chose black on this as well so it would blend. |