Click on any picture to open a slideshow. Once there, you can click the link in the caption for the full-size picture.
One of my hobbies is woodworking. I got the bug a long time ago, after watching Norm Abrams on The New Yankee Workshop and seeing him turn out beautiful projects.
| Circa 1988. This was one of my very first projects. The Herman's World of Sporting Goods store I was working at was getting rid of all the brown shelving. I took as much of it as I could and built this entertainment system out of them. Working with this veneered pressed wood was difficult because it chipped easily when cut. I got the glass custom made at a glass shop. I eventually added another 4 feet to the left of this unit which functioned as a desk. | ||
 It was rudimentary, but worked well. But it weighed a ton. |
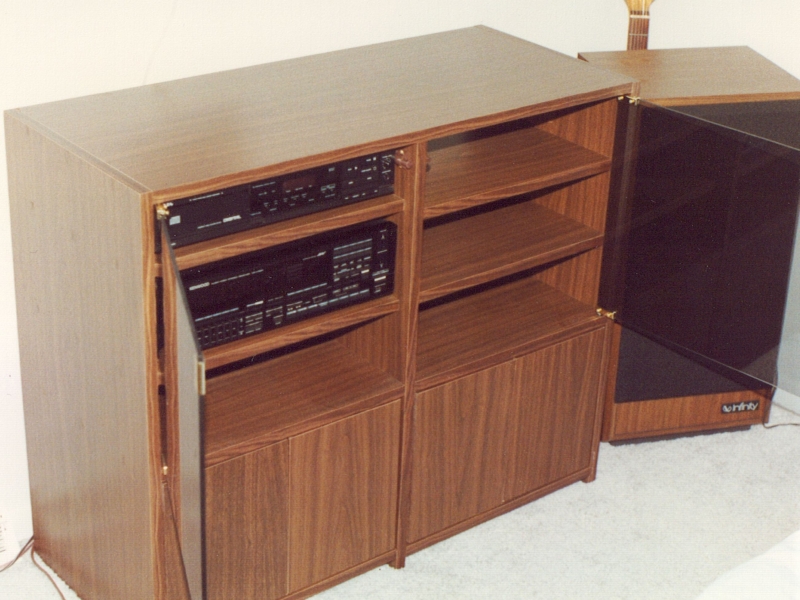 The smoked glass doors weren't very expensive, and enhanced the look. Here you can see how closely matched these shelves were to the speakers I already owned. I eventually made speaker stands out of the leftover pieces. |
|
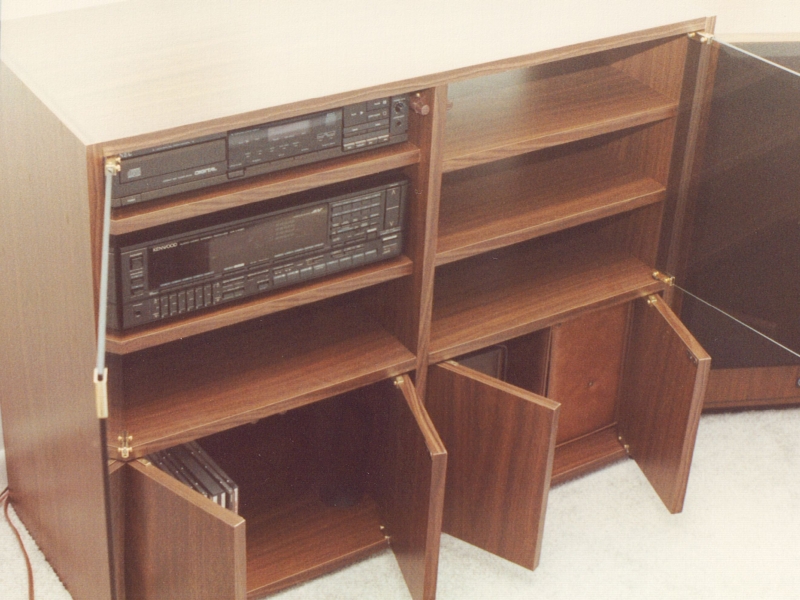 Storage underneath for my cassettes (remember those?!) and the few CDs I had at the time. |
||
| Circa 1990. I started small, learning how to use a router. One thing that helped me a lot was the book Router Basics by the late Patrick Spielman, a master woodworker from Wisconsin and author of many woodworking books. Eventually I made my own router table and increased it's versatility. The only other power tool I had at the time was a jigsaw, so I would rip boards to rough size with it and then trim them with the router and a flush trimming bit. | ||
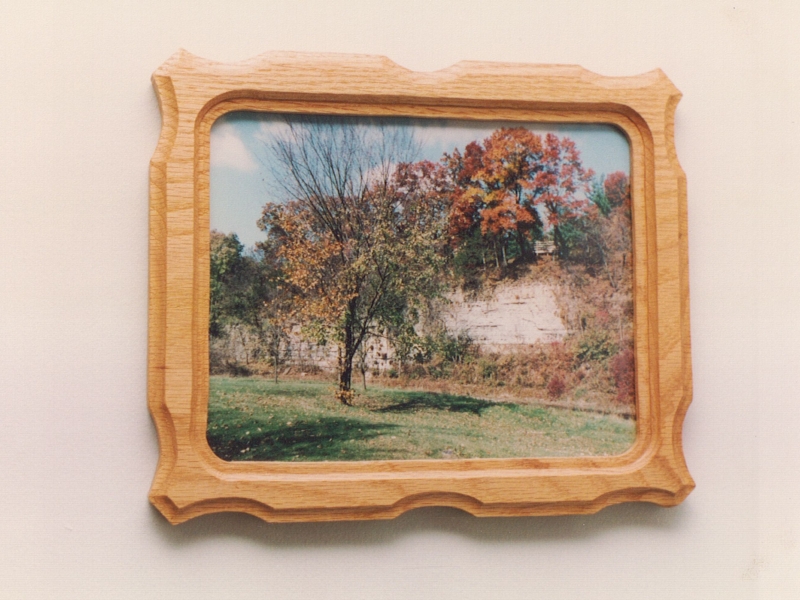 One of the things I experimented with was making picture frames. But since I didn't have a table or miter saw yet, I was making them out of one board which wasted a lot of wood. Yes, the photo here was one of mine - another hobby of mine. |
 This is one of my early router projects. I used a store-bought inexpensive pine shelf as a template and a flush trimming bit to replicate it in red oak. Red oak is my favorite wood to work because of it's finished beauty. I ended up making more of these in longer lengths for an Aunt and Uncle. |
|
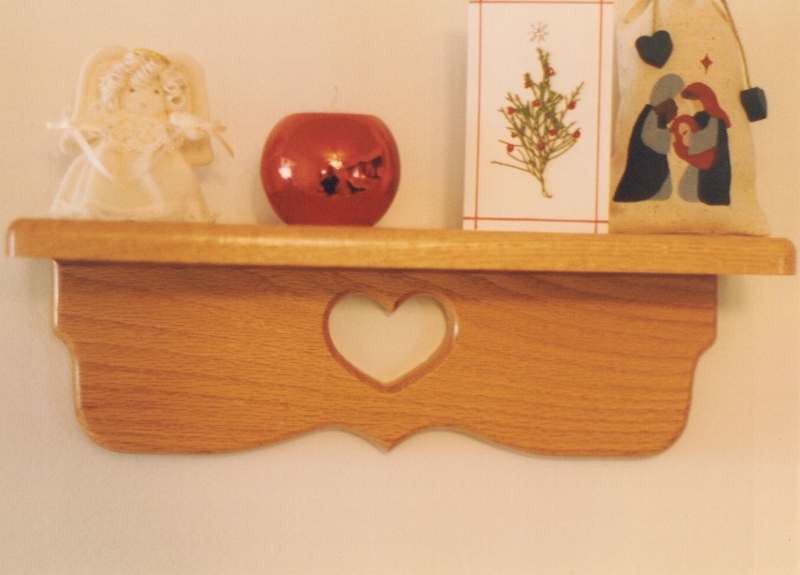
 I was experimenting with a dowel jig, and this little knick-knack house was the result. I was still learning how to control the router to avoid the black burn marks you see here. |
||
| Circa 1992. Once I had graduated to larger projects, I made this bookcase to order. It was designed to match built-in bookcases which flank a fireplace on the other side of this room. The top and face frame are solid oak, the rest is oak plywood. I was still cutting the pieces with a circular or jigsaw, sizing them with the router. | ||
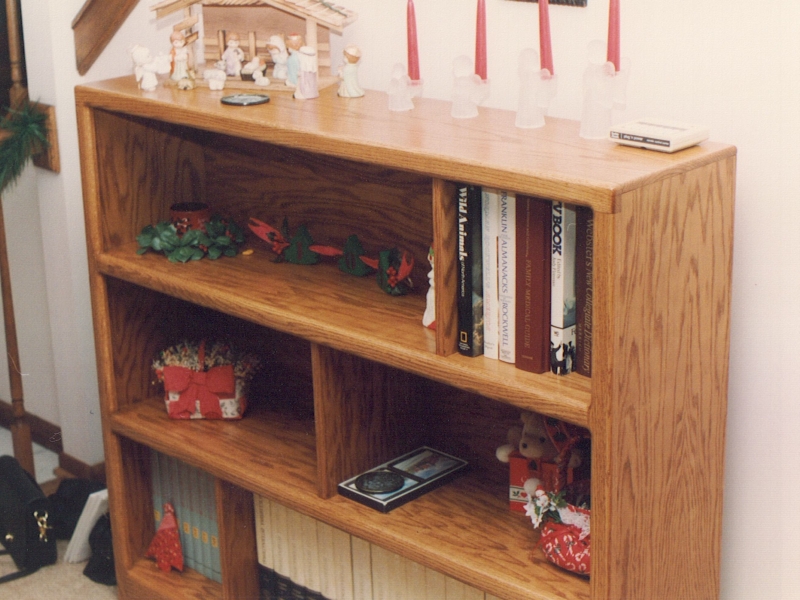 The stain was mixed by my Uncle to match the existing pieces, and it has two coats of polyurethane over it. |
 The vertical dividers were necessary because the 3' span is too long for 3/4" plywood. It would sag if unsupported. Here they are fixed, but now I would probably make them removable to be able to be positioned where desired. |
|
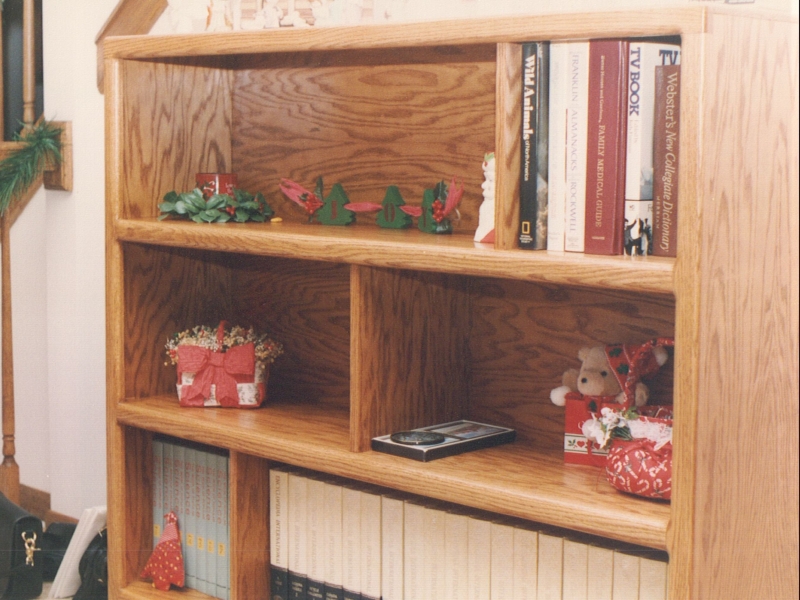 The face frame adds some dimension to the look. |
 |
|
| 1993. This jewelry box is a project I am quite proud of. It took over 150 hours to complete. It is made almost entirely of red oak, including the drawer dividers. The glass doors were chemically etched, and the left one activated a music box mounted in the upper left rear corner. I also learned a valuable lesson while building it -- I broke a finger when a piece I was routing on the table kicked back. | ||
 You can see I was still getting burn marks on the corners. I later learned to use sharper bits which reduces it a lot. |
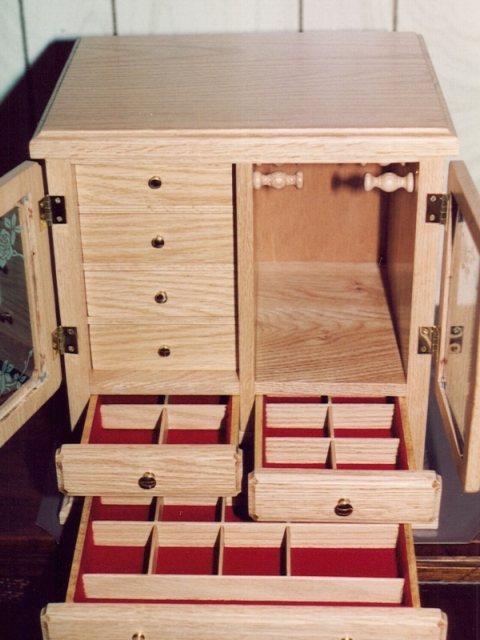 I used 3/4", 1/2", and 1/4" oak. It is lined with red felt. |
|
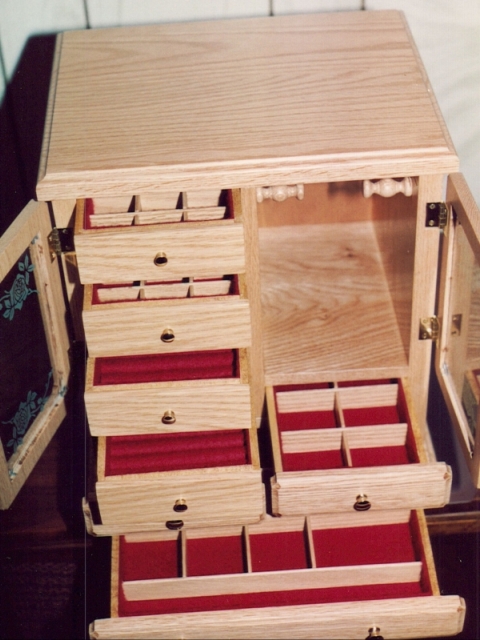 The rolls on the two smaller drawers on the right are for rings. The pegs on the left are for hanging necklaces. |
 I bought the etching cream and stencils at a craft store. |
|
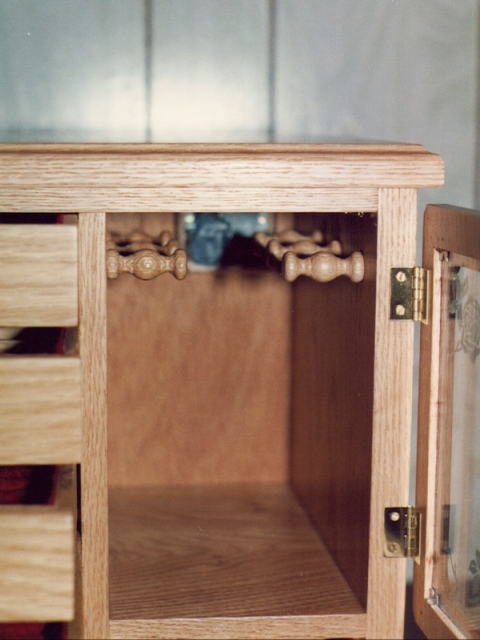 You can see the music box in the back corner. It was activated by a brass rod. |
||
| 1995. My parents had talked of getting a glider, and when I saw this one on the cover of WOOD Magazine I decided to build them one. The plans are still available here. My dad had an apple tree in his yard at the time, so the theme was perfect. Made entirely of western red cedar, I realized the only way to feasibly build this is if I had an easier way to rip the boards to the various widths. So I bought my first table saw, a portable model. It struggled with some of the boards as they weren't dry enough, but it did the job. I still ended up using the router to plane the sawn edges. | ||
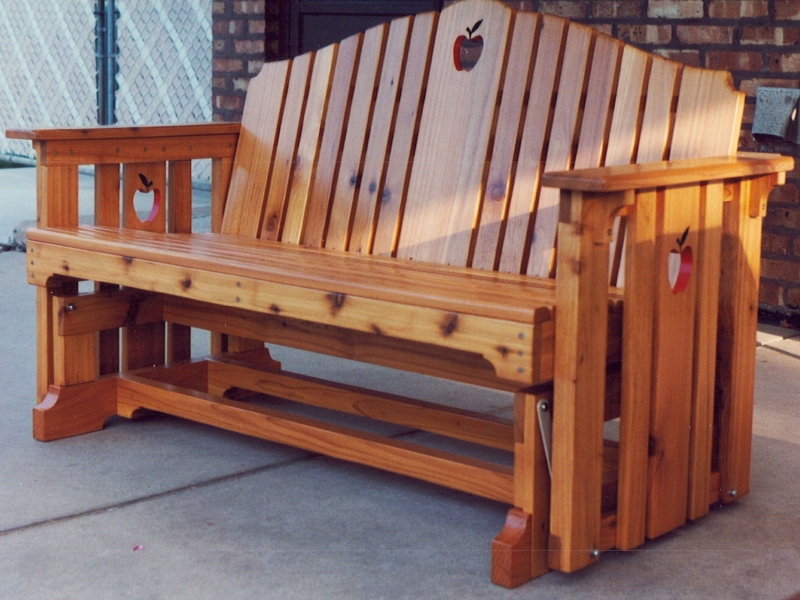 The steel hinges were cut and shaped by hand, then painted. All the screws are stainless steel to prevent rust stains. The apples were cut with a jigsaw and the inside edges painted red and green. |
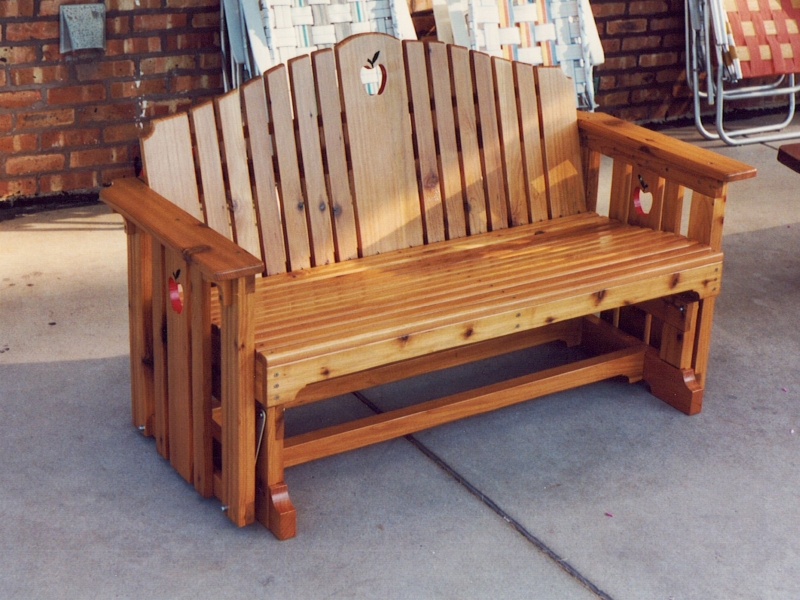 The whole thing was sealed with Thompson's marine varnish. It has held up well, but it is under a patio roof so it doesn't get full sun or rain. |
|
 I'm proud to say this is still in use today almost 18 years later. |
||
| 2009. I was asked by my cousin to create a sign as a gift for my Aunt & Uncle's 40th wedding anniversary. Since it would be displayed outside their house I knew I needed to make it out of cedar and protect it with an outdoor sealer. I learned a lesson while doing this project - I am allergic to cedar dust. I got a serious sinus infection from breathing all the dust I generated with the sanding. | ||
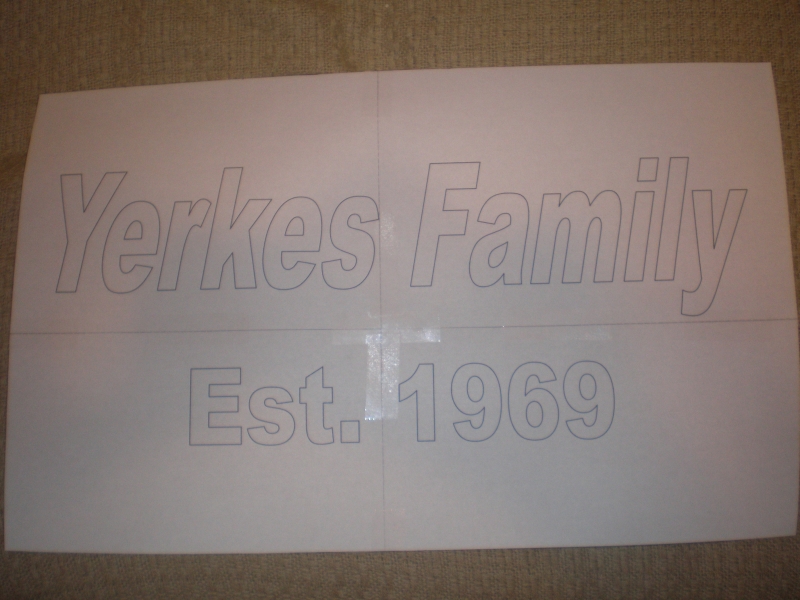 The template I printed and then glued to the surface with spray adhesive. |
 I then drilled out the bulk of the material on a drill press, followed by routing. Here you can see the centers of the nines and sixes broke out while routing around them. |
|
 I used dowels to replace them. You can see the points from the drill bit in the larger letters above. |
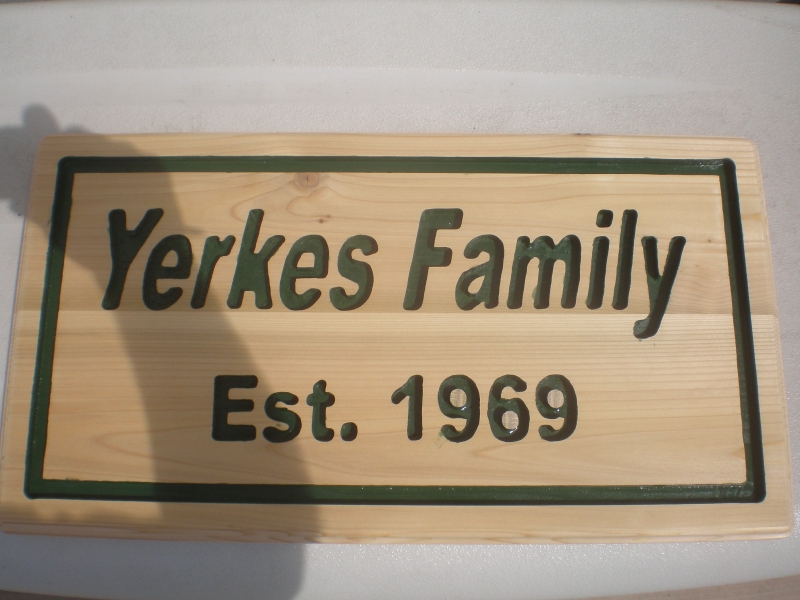 I then painted the insides of the letters with enamel. |
|
 The paint smears would be sanded off before applying the finish. |
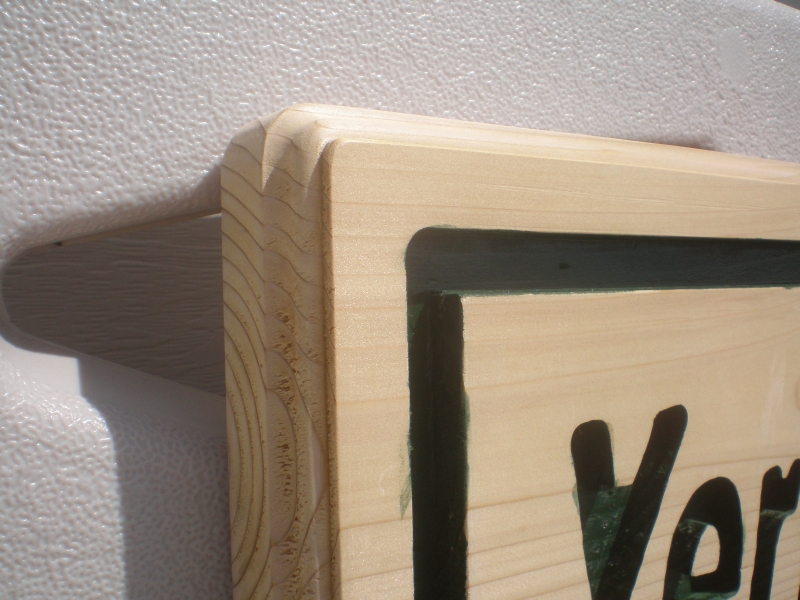 The edge profile. |
|
| In 2012, after using a TV tray for the past 7 years for my work laptop, I decided I needed a better solution. So I mounted my office TV on the wall and built an extension of my existing desk. | ||
 I knew I wouldn't be able to match the existing desk, so I just used birch plywood. I was able to replicate the front curve of the main part, and built the shelf to match the height. |
 The edges are all banded with veneer. |
|
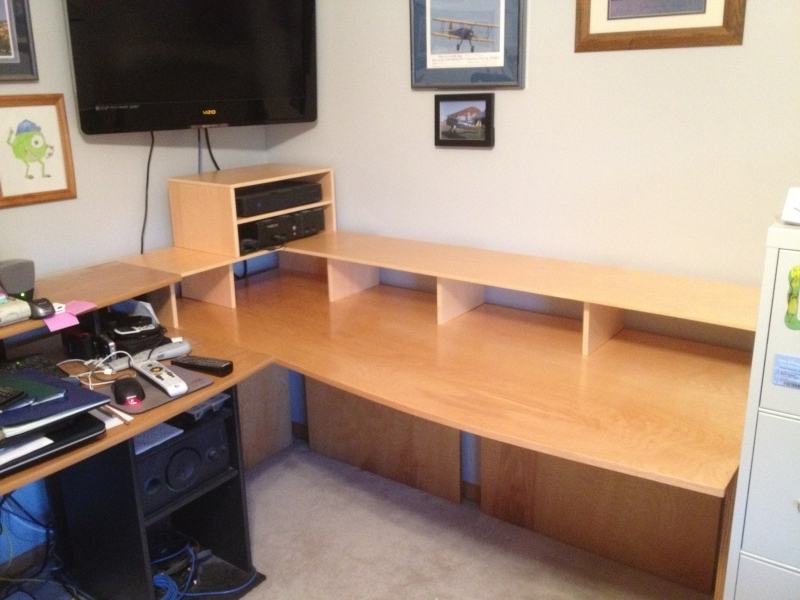 I have since added a desk lamp and a lot of stuff, but it is nice to finally have some desk space. |
||