Click on any picture to open a slideshow. Once there, you can click the link in the caption for the full-size picture.
History:
Back
in 2013 I started building an acoustic guitar. As part of that, I
wanted to do a mother of pearl inlay on the headstock. Eventually
I would like to also do decorative inlays in the fretboard. For
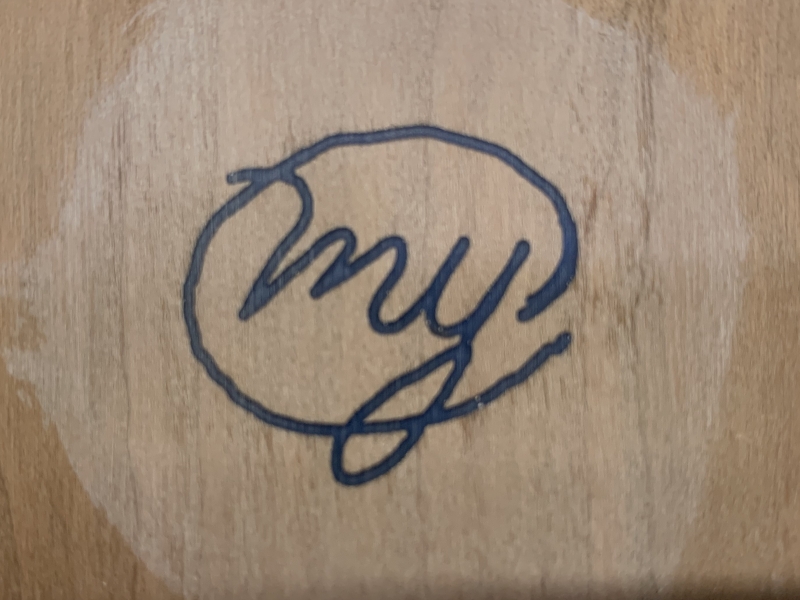
my "logo" I went back in time to when I worked in retail. Anytime
I had to initial a form or anything, I would use lower case my and
circle it. So for this I wrote that on paper, scanned it into the
computer as a bitmap, and cleaned it up as much as possible in
Microsoft Paint. I then printed off multiple copies, and
used spray adhesive to stick it to the wood and the pearl sheet.
The inlay process is very manual - I had to carve out the pocket for
the inlay with an air-powered mini die grinder with a base. Even
with tiny bits it was difficult to control and route precisely to my
lines. Cutting the pearl was done by hand with a small saw and
was also difficult to master. Due to some other disappointing
circumstances (the body was water-damaged when my humidifier leaked) I
didn't finish the guitar...yet.
Fast
forward to Winter '21/'22 and I purchased a ukulele kit. I
convinced myself that being smaller it would be easier to complete
start to finish,
and it would light the fire to get back to the guitar. But I
didn't want to just build the kit without customizing it. I
wanted to do my logo on the headstock, but this time I thought I would
try epoxy-filled inlay and save the difficulty of cutting the pearl to
fit. It was easy enough to learn how to do the epoxy. But I
still couldn't get acceptable results doing the carving.
 The headstock overlay for the acoustic guitar. It looks good at arms' length, but up close you can see where I had to fill the gaps with wood dust and glue. And I couldn't cut the mother of pearl all in one piece and you can see the seams. |
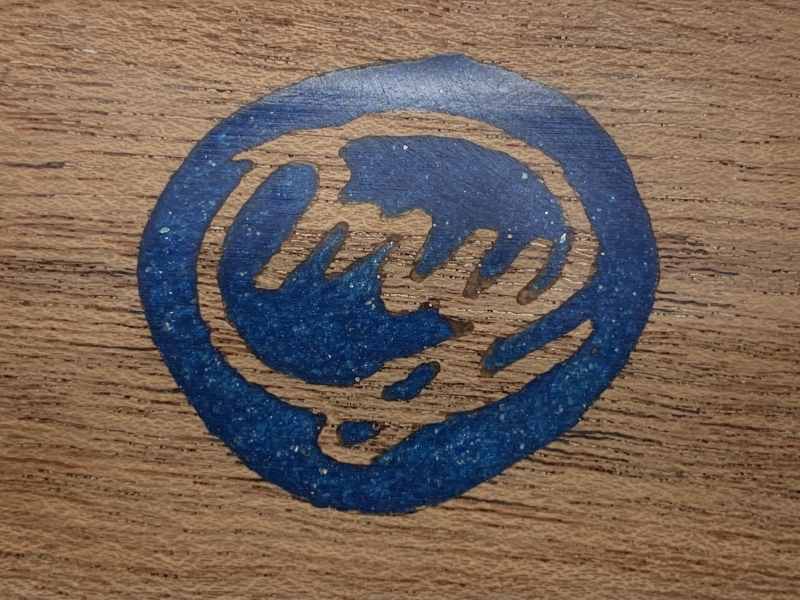
 One of the first tests for doing epoxy. This was routed with the die grinder, then filled with epoxy with blue pigment. This one wasn't too bad (some of the others were just awful) but when I sanded the epoxy overfill I sanded too much and lost the tail of the y. It also seemed too minimal. |
 I then tried routing a pocket surrounding the writing. Again, this wasn't good and the more I sanded the worse it got. Most of the first few attempts I would move just a little too far and break off parts of the script. |
 I switched to hand-holding the die grinder instead of using the base. I got better results, and the top surface wasn't bad. But when I sanded it, the fact I hadn't carved the recess with straight walls became apparent. I was also starting to experiment with adding gold flakes into the epoxy. |
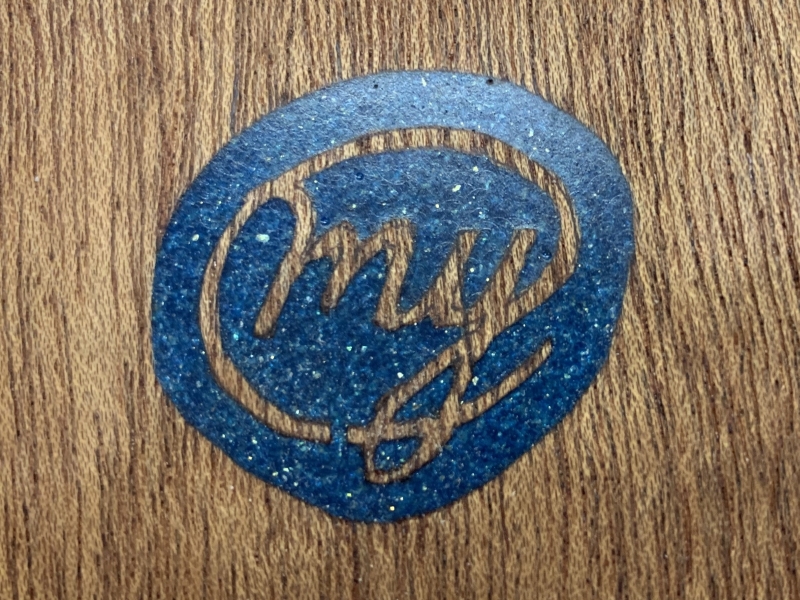 I switched course and decided to try hand-carving. This turned out better, but I still had issues with the thin lettering breaking. This would probably work with more practice, but this carve took me almost 90 minutes and I was practically cross-eyed by the end. My back was killing me from being hunched over the work bench. But the good news is that I had good results with the gold flake in the epoxy. |
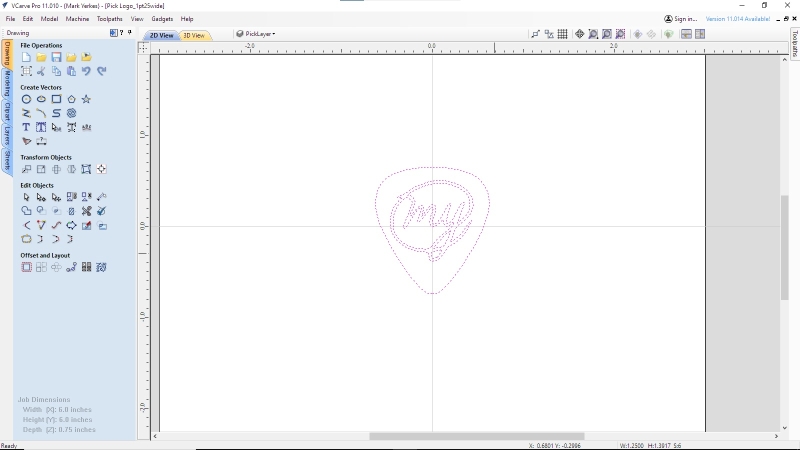 Enter the CNC. This was one of the reasons I wanted a CNC router - to do inlays. It took me several hours on the computer refining the design. This is the CAD side of the software where you Design the project. I started by importing the bitmap I used in the past. I had to smooth all of the lines of the script. A friend suggested one of the previous attempts was starting to look like a guitar pick, and because the script isn't a circle I decided to use a pick shape for the outside. |
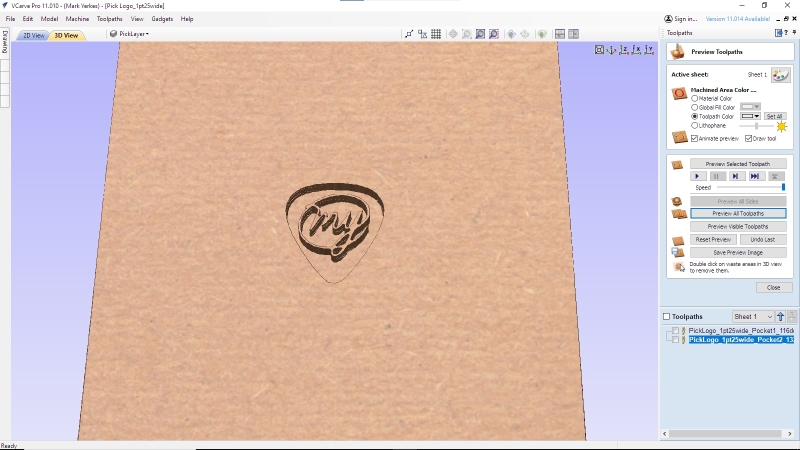 This is the CAM side of the software where you set up the Manufacturing of the project. Here is where I choose which bit(s) to use, what rpm to spin it at, how fast to move it, and also set the depth here. The software allows you to preview the toolpaths to get a visual of whether it will look right. |
Test Logo Inlay - YouTube |
 The bulk of this was routed with a 1/16" diameter bit. For a router bit, that is tiny. One problem I ran into is that to make this small enough for a ukulele (much smaller than a guitar) a 1/16" bit couldn't fit in the tight corners and the design didn't look right. I found 1/32" diameter bits on Amazon and decided to try it. I had to have the CNC go very slowly, but it worked out perfectly. |
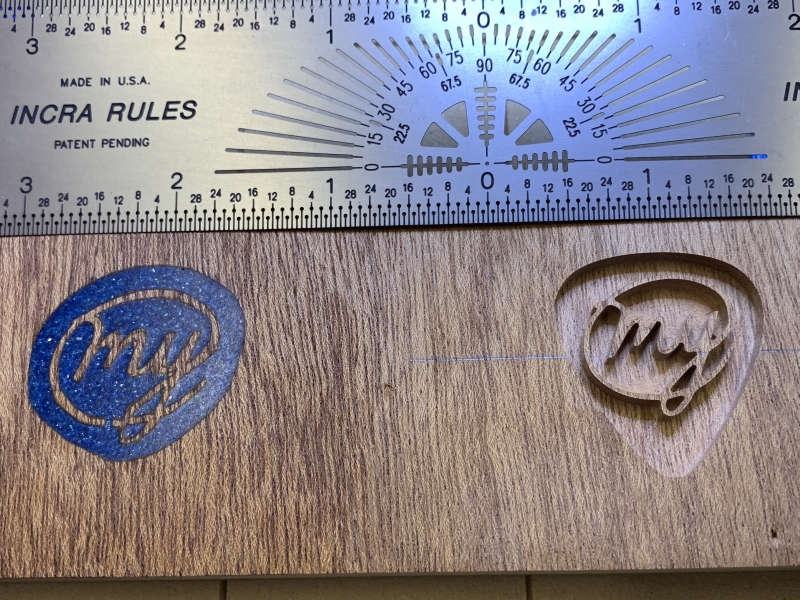 Here they are side by side for comparison. Another advantage of having the CNC is that I will be able to use it to shave down the epoxy over fill instead of sanding. I should be able to precisely mill it down to just the top surface of the wood. That will be important for the ukulele since that headstock is one piece instead of a glued on overlay. |
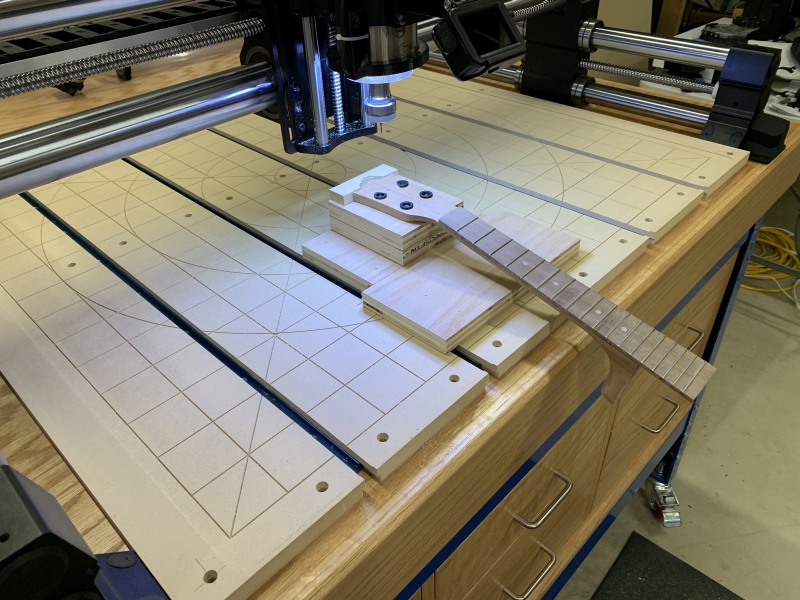 Here is the ukulele neck mounted on the CNC. I needed a way to mount the headstock flat to the surface, as low as possible, and have the rest of the neck hang over the front. I also needed it to be square to the bit in the x-axis. The longer, single-layer piece of plywood was cut by the CNC after it was mounted so it would be a straight, square edge. |
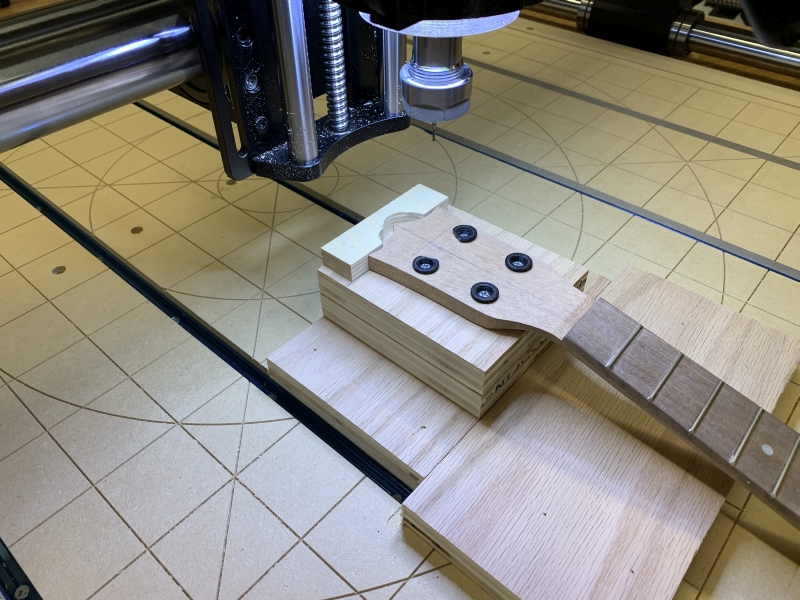 I built up 3 layers of plywood to mount the headstock to. I then used the small piece of lighter plywood as a straightedge to position the headstock perpendicular. The black inserts were created on the 3D printer so that the screws would hold down the headstock without protruding above the surface in case the bit traveled over them. Plastic wouldn't damage the bit but the metal screws would ruin it. I wasn't concerned about cutting the inlay, but when surfacing the epoxy later. The pencil lines are for me to be able to locate the bit in the center point of the inlay. The inlay comes close to the peg holes and I wanted to make sure it didn't get too close. |
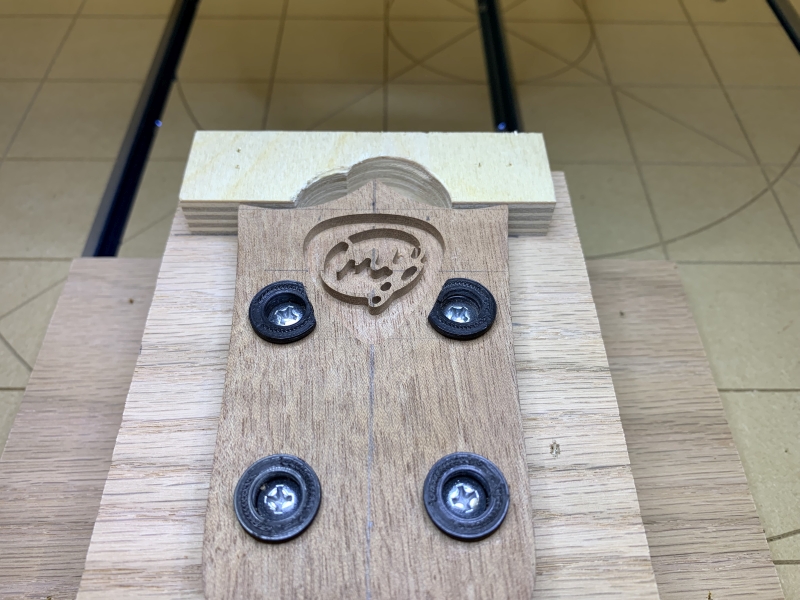 Here is the inlay after the first 1/16" bit "roughing" cut. The mount worked great. |
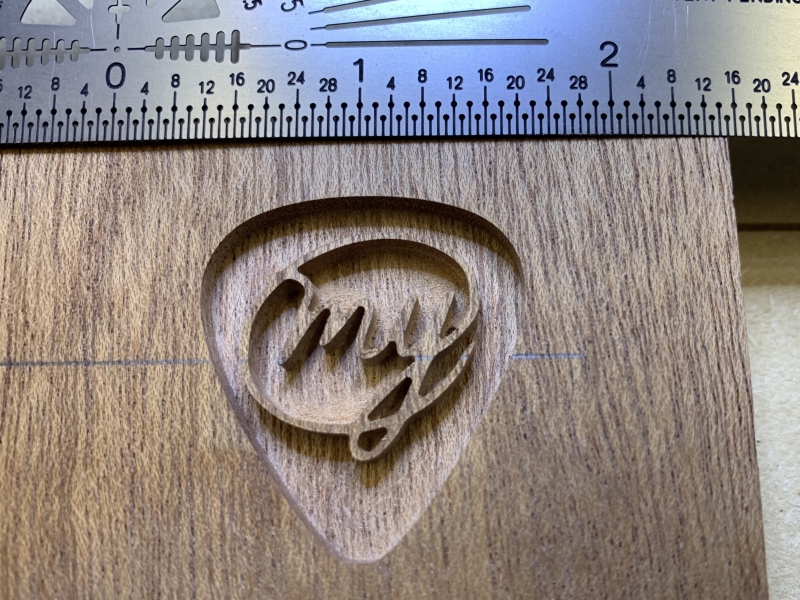
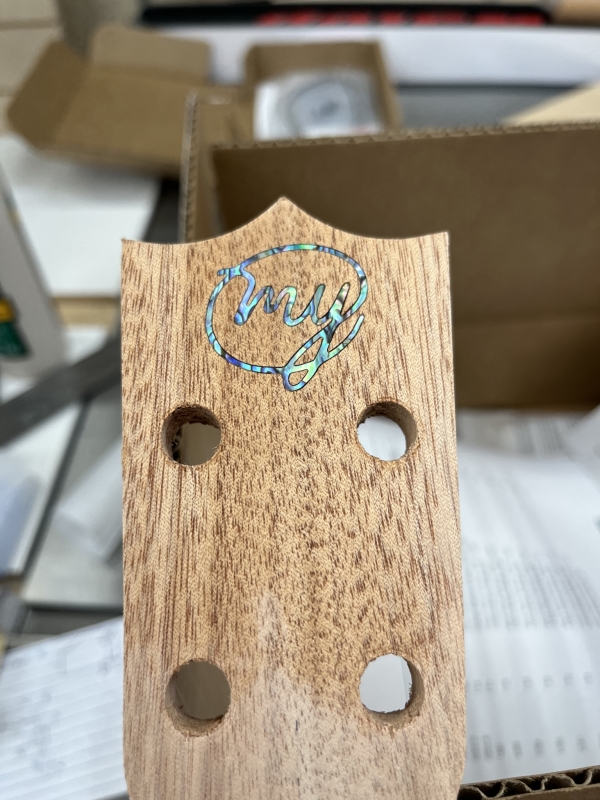
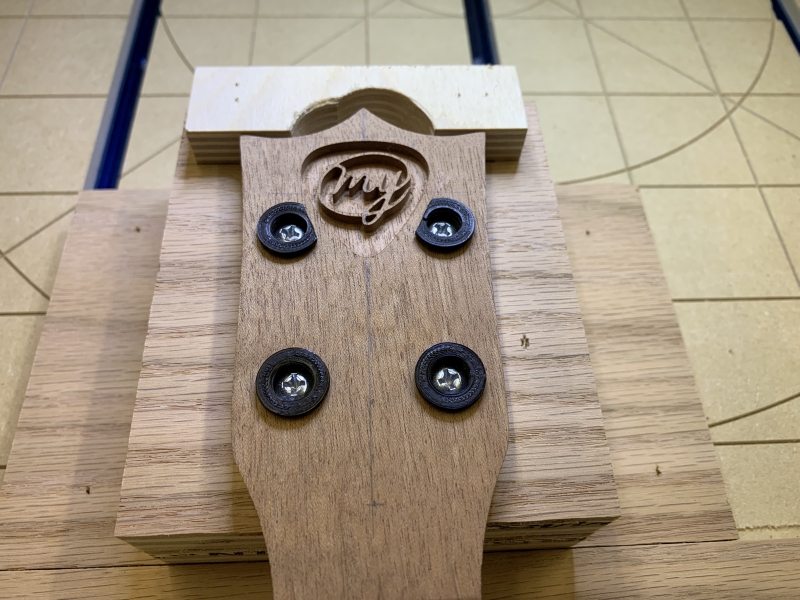 Here it is after the 1/32" bit "finishing" passes. I was very happy with it at this point. I then removed the whole mount from the CNC so that I could clamp it to my workbench to hold the heastock level for the epoxy fill. |
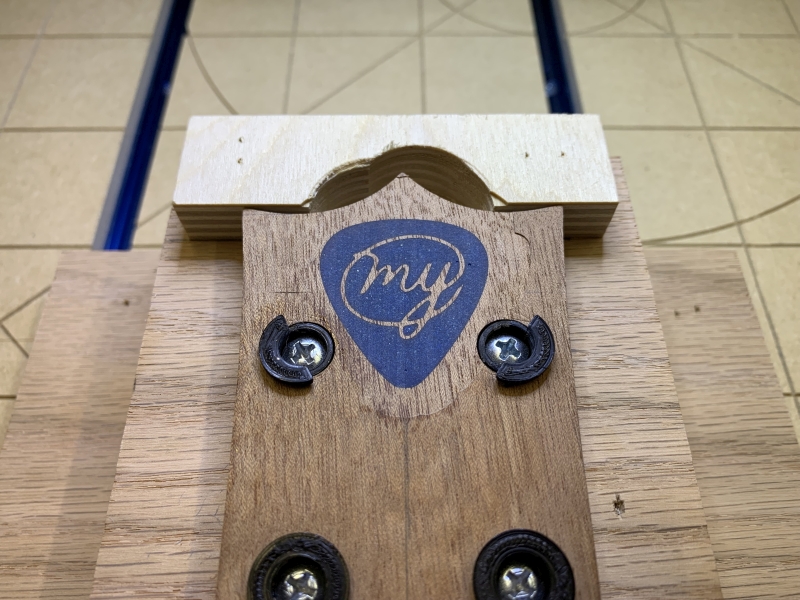 After the epoxy cured, I remounted it in the CNC and used a 1/4" bit to mill the excess epoxy flat to the surface. I did that in multiple steps as I only wanted to mill to the headstock surface and not much deeper. You can see the slight edges where the bit cut on the right. It turned out the headstock is slightly thicker on that side. Those lines will sand out. The epoxy is dull looking because it was just milled. It will be polished with multiple finer grits and when finish is applied will be glossy. There are gold metallic particles in it. |
 Taking it a step further. I had to redesign the logo in the software to accommodate the 1/32" bit both outside the lettering and inside of it. Then I carved the logo out of Abalam, which is abalone shell laminated into a .050" thick sheet. That worked without shattering, so here I am experimenting with cutting the recess for it to fit into. The CNC is so precise that using the same design is too snug for it to fit into. Cutting it with a .005" offset was perfect. That's 5/1000th of an inch! |
 The final outcome in my second ukulele headstock. That build is documented here: UkuleleBuild2 |