Click on any picture to open a slideshow. Once there, you can click the link in the caption for the full-size picture.
My second ukulele build. I decided to do this before going back to the Acoustic Build to practice more of my newly acquired skills. I also wanted to try a baritone ukulele. Baritone is the largest of four sizes of ukulele and it tunes similar to the bottom 4 strings of a guitar, just in a higher octave.
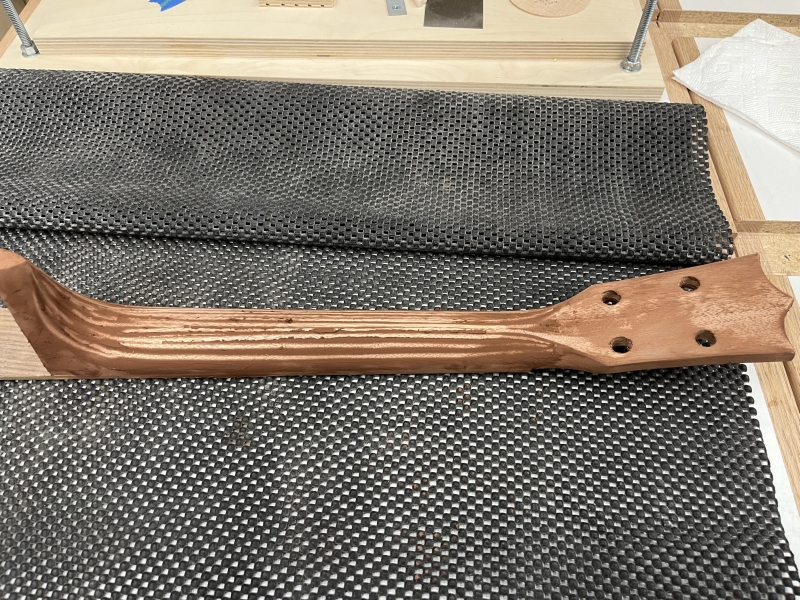
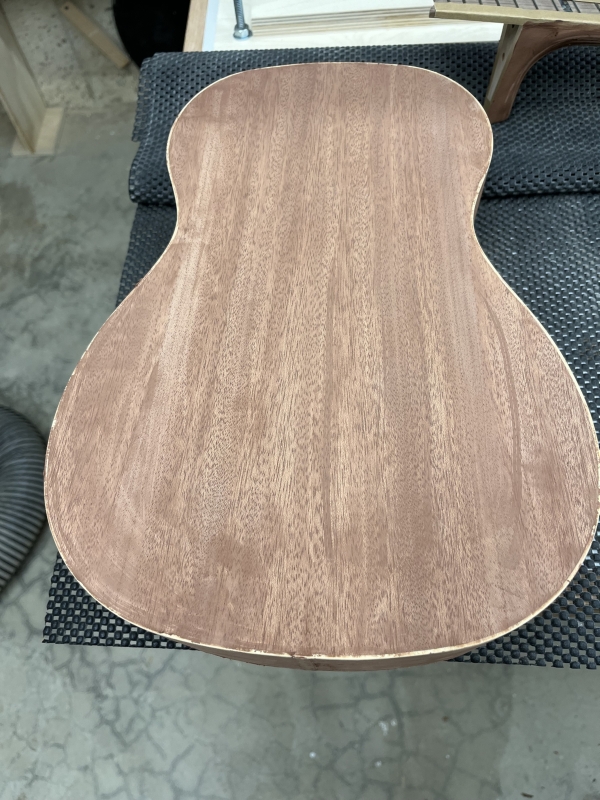
This is also from a Stewart-MacDonald kit but with many custom modifications. The back and sides are laminated mahogany (plywood). The kit comes with a mahogany top, but for this build I wanted something different. I purchased an unjoined spruce top, which meant I needed to do all of the work. I had to join the pieces, mill it down to thickness on the CNC, rout the rosette channels, and cut the soundhole. The neck is pre-shaped mahogony, with a walnut fretboard. The sides were pre-bent as I hadn't progressed to doing that myself yet.
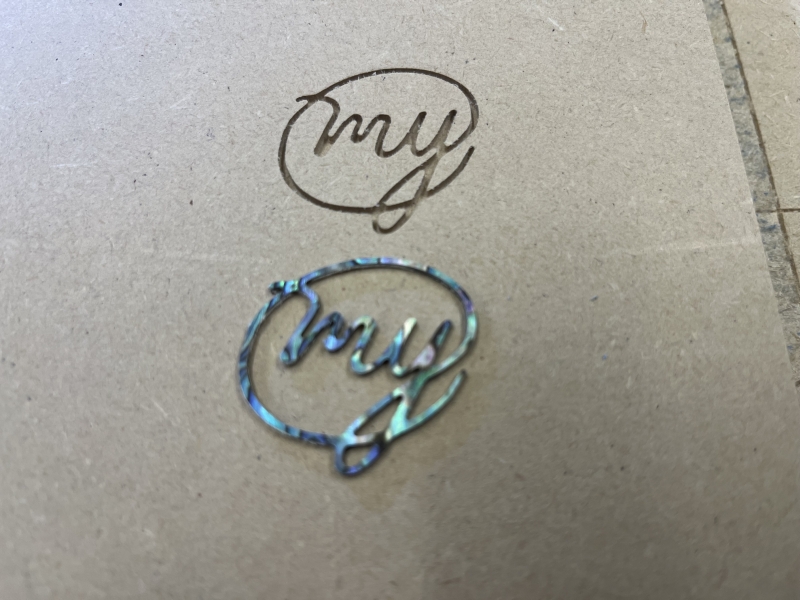 I started with trying to do an inlay using the CNC. This is a product called Abalam, which is abalone shell pieces laminated into a .050" thick sheet. I had to redesign my logo so that a 1/32" (.031") bit would fit both inside the logo and all around it. This had an added benefit of smoothing out the lines. I was pleasantly surprised the the abalone didn't shatter when cutting it. |
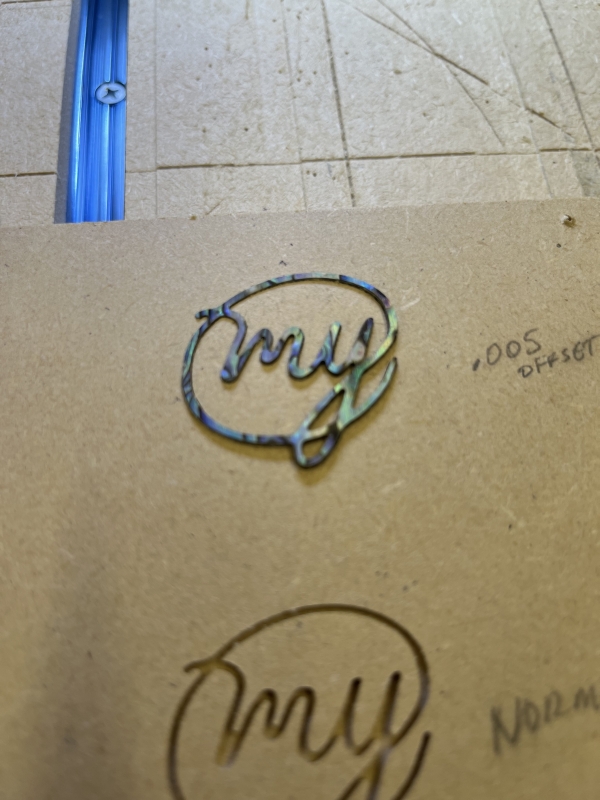 Trial fitting the shell in the inlay pocket. I had to make the pocket .005" larger all around and then the shell dropped right in. |
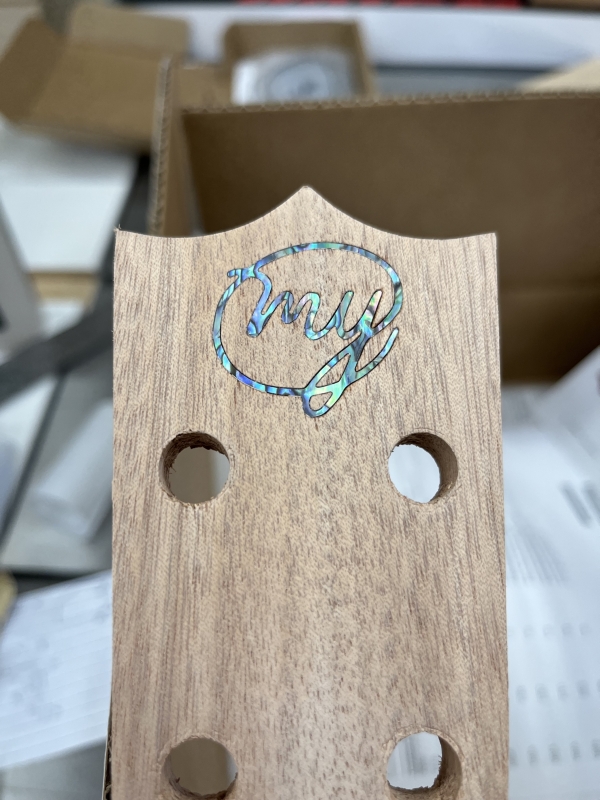 I used the same mounting method to hold the ukulele neck in the CNC that I did for the first ukulele that got an epoxy inlay. Here is the shell glued in. It only required a light sanding to get it flush. |
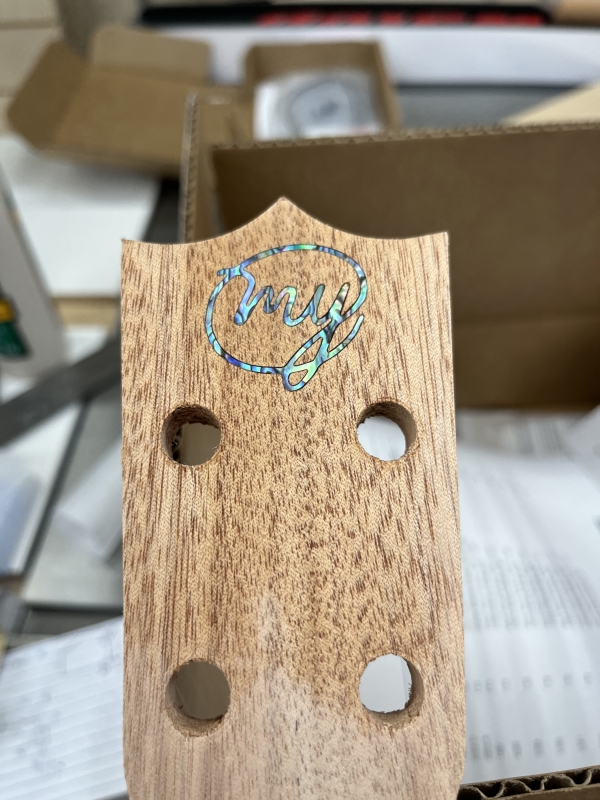 Wiped with mineral spirits to see how it would look with finsih applied. |
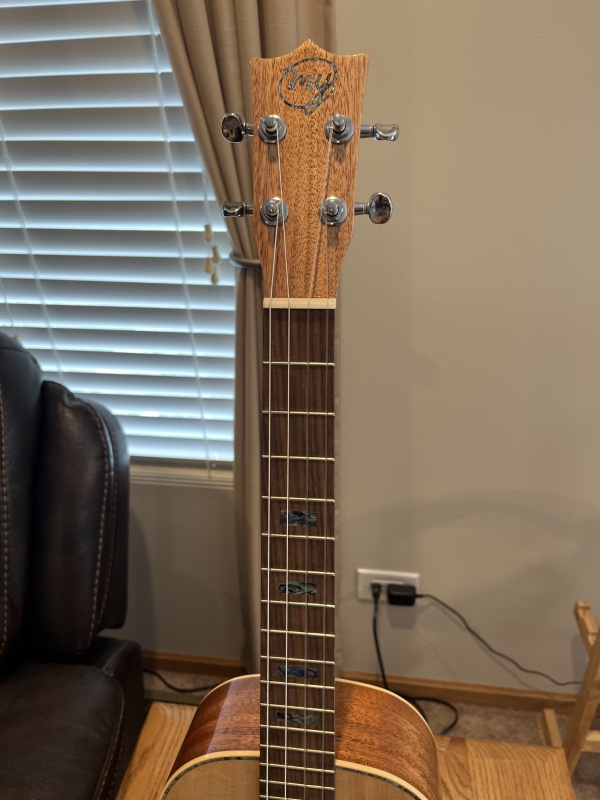
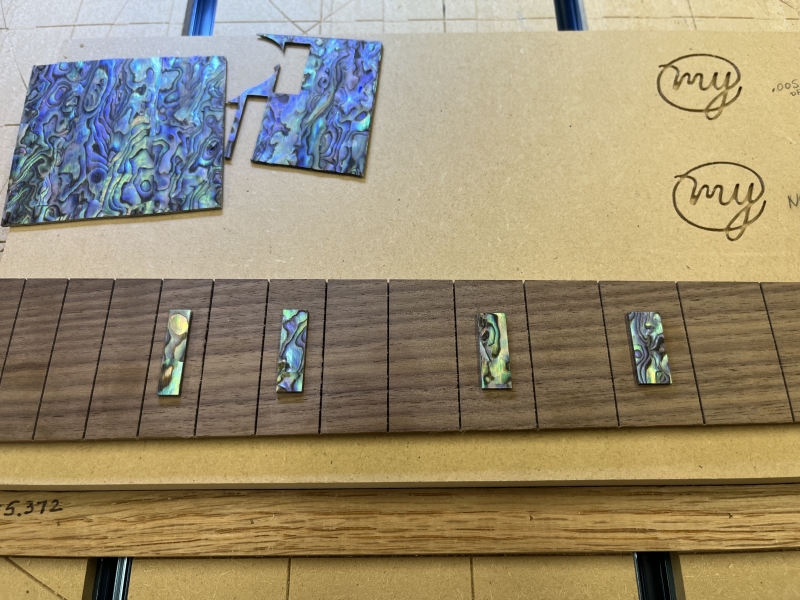 Still playing with inlays, I decided to also do abalone fret markers. |
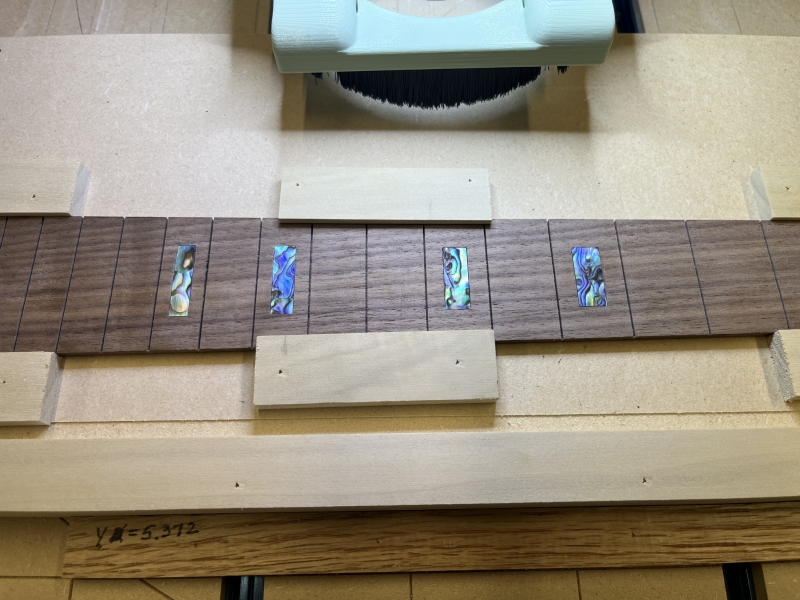 Since it was a much simpler shape, the most difficult part here was making sure the fretboard was mounted in the CNC square to the x/y-axis and couldn't move. |
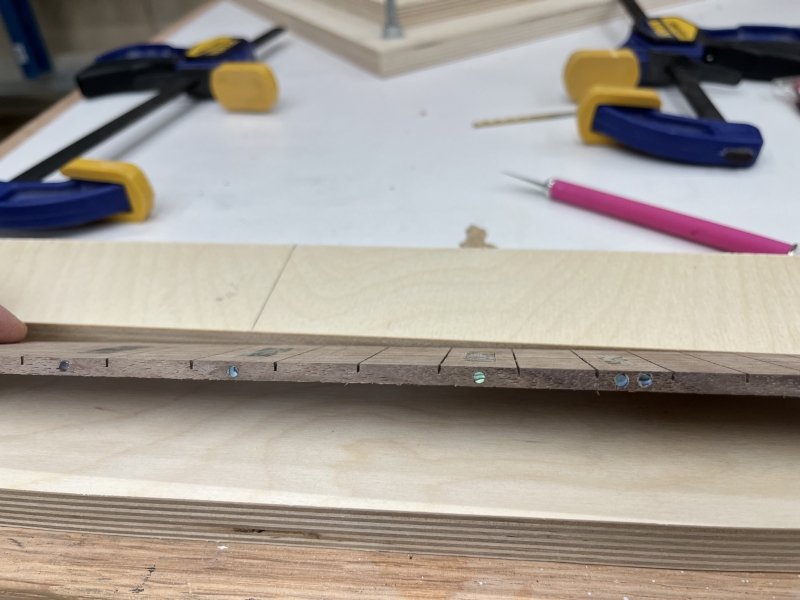 That lead to also wanting to do abalone side dots. These I didn't cut myself but purchased them and drilled the holes by hand. |
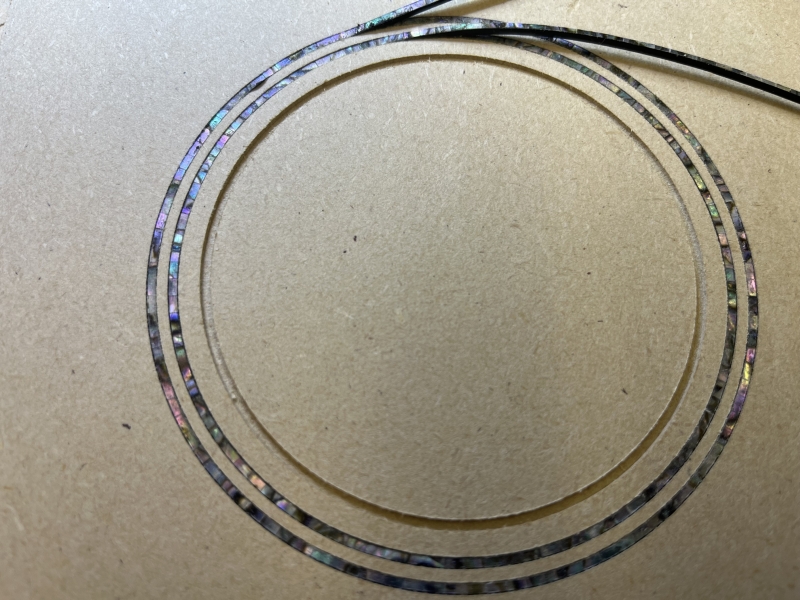 Abalone also is available in narrow stips called ZipFlex. It is many small pieces in a flexible plastic channel that easily goes around curves. Here I was testing them as rosettes. They are not inexpensive, but really look nice. I'm getting fancy! |
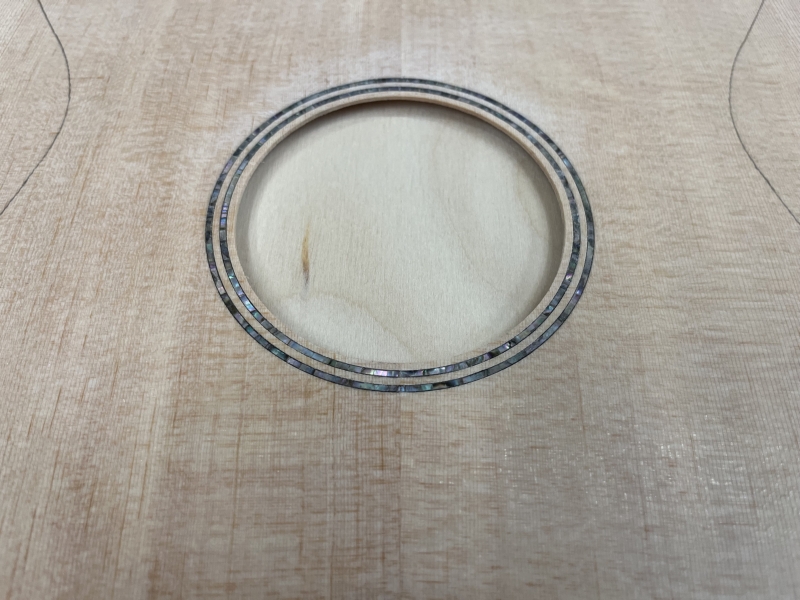 I used the CNC to rout the soundhole and the rosette channels. The top ended up a little thinner than intended above the soundhole, so I had to reinforce it later. I liked how this looked so much that I ordered more ZipFlex and you will see below how I used it even more. |
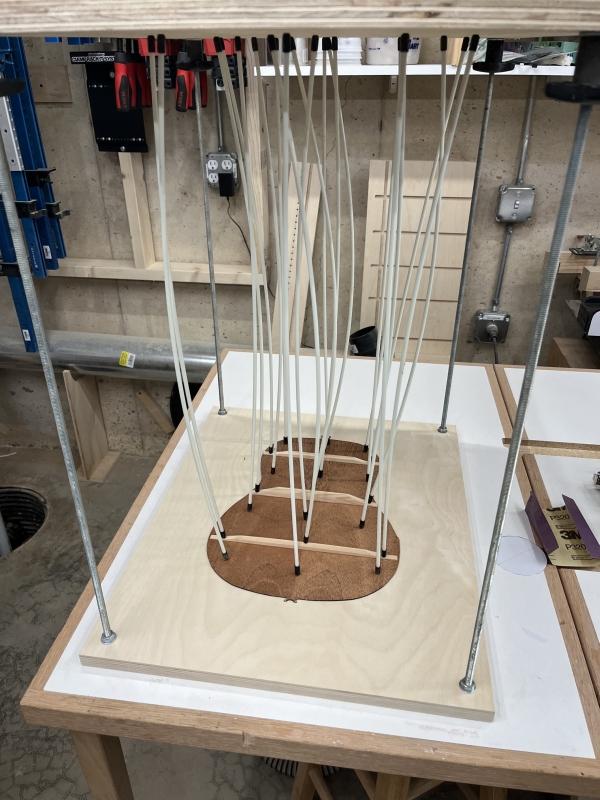 Using the GoBar deck to install the braces on the back. The back was a little warped, so I am also using it to hold it flat. One thing that makes ukuleles easier to build than guitars is that the top and back are flat and not domed. So there is a lot less work to bracing and the sides are the same height all around. |
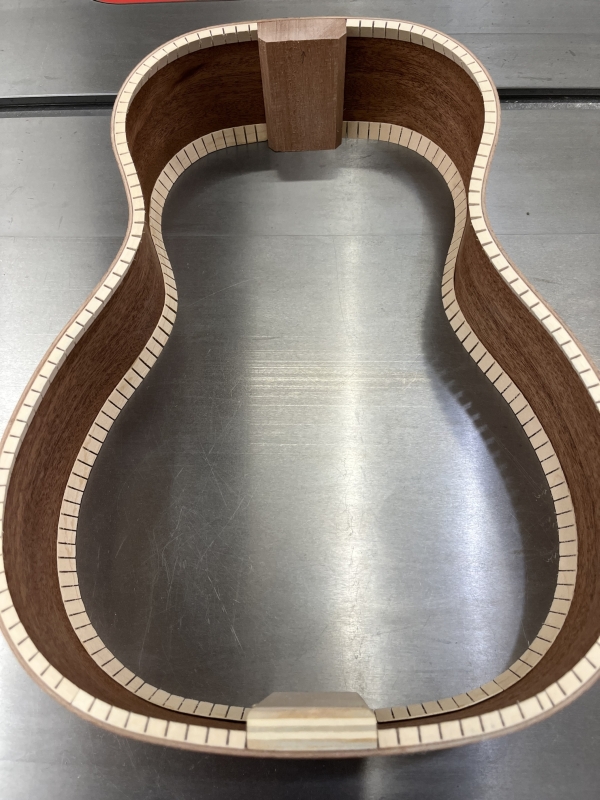 I didn't take any pictures during the process, but here the sides have been assembled with the neck and heel blocks and both the top and bottom kerfing installed. Since ukuleles have a lot less string tension than a guitar, there isn't a need for "popsicle stick" braces. |
 I kept the end wedge a simple strip of spruce. |
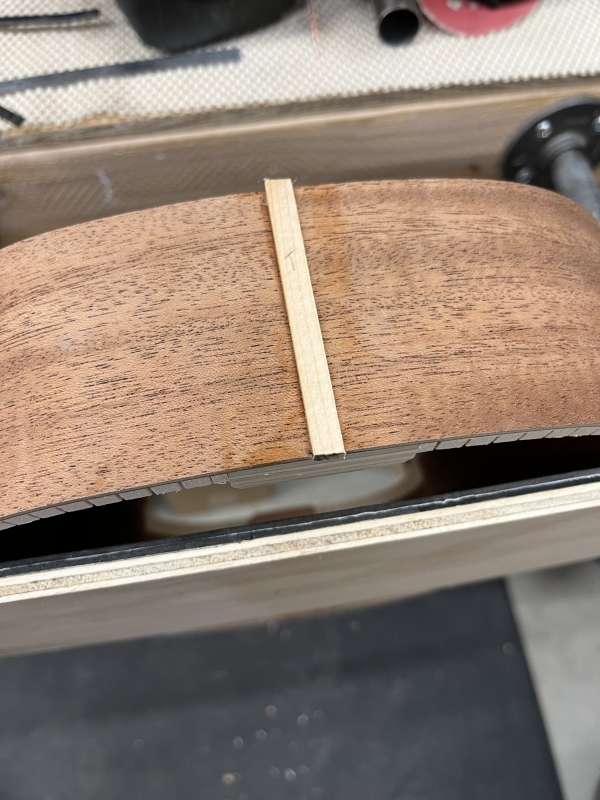 Glued in but will need to be sanded flush and trimmed. |
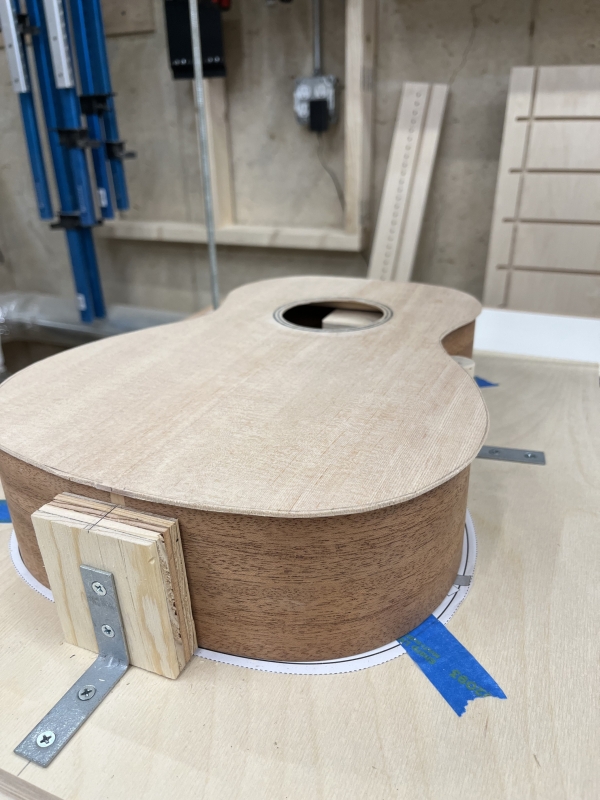 Another way ukuleles are easier is it doesn't require a full body mold. Blocks and dowels mounted to a flat piece of plywood is all that is needed. Here I am fitting the top. |
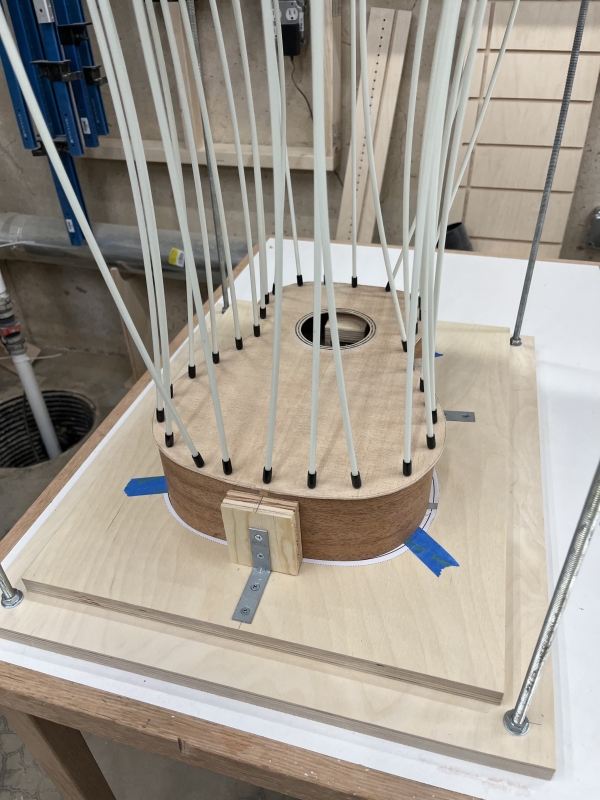 Gluing the top onto the sides. This could be done with a lot of clamps, but the GoBar deck makes it easy. |
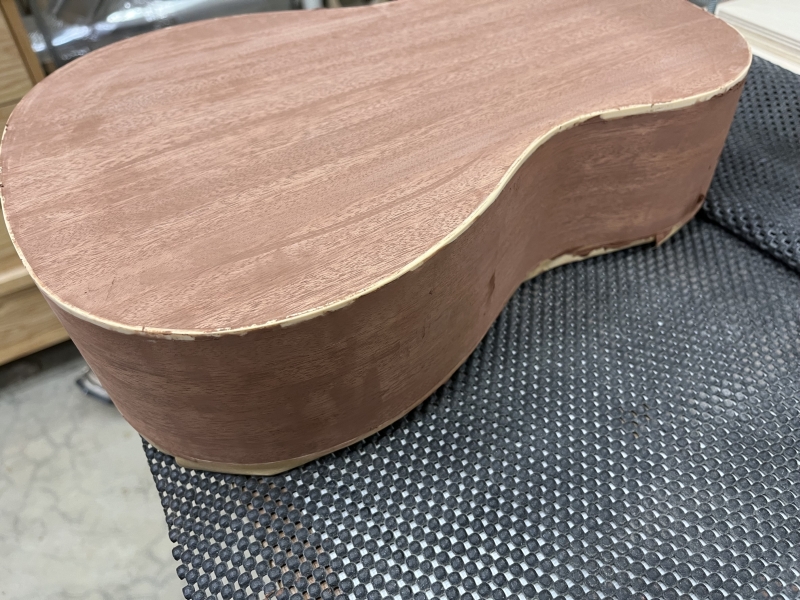
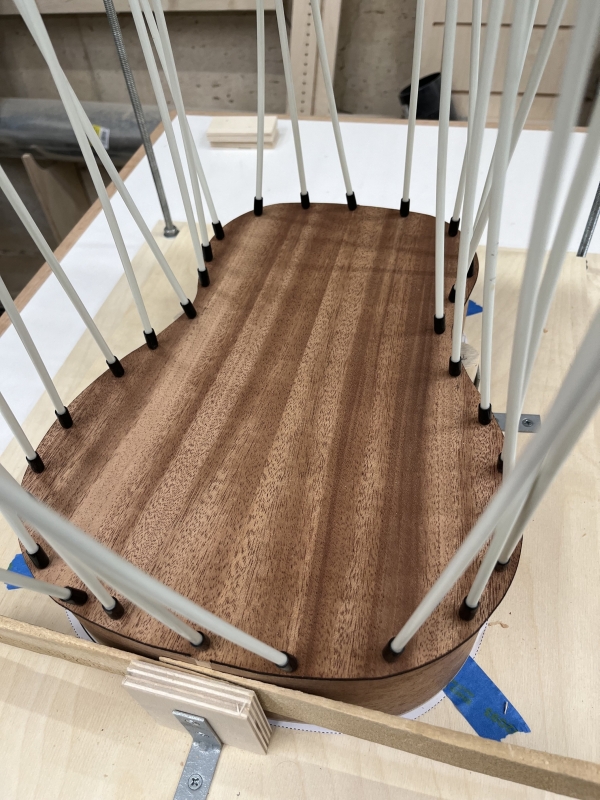 Gluing on the back. You can see the dark edge of the laminated back from where the factory used a laser to cut the shape. When I rout it flush to the sides it is lighter, but you can see the layers of the lamination. That is why I choose to install binding. |
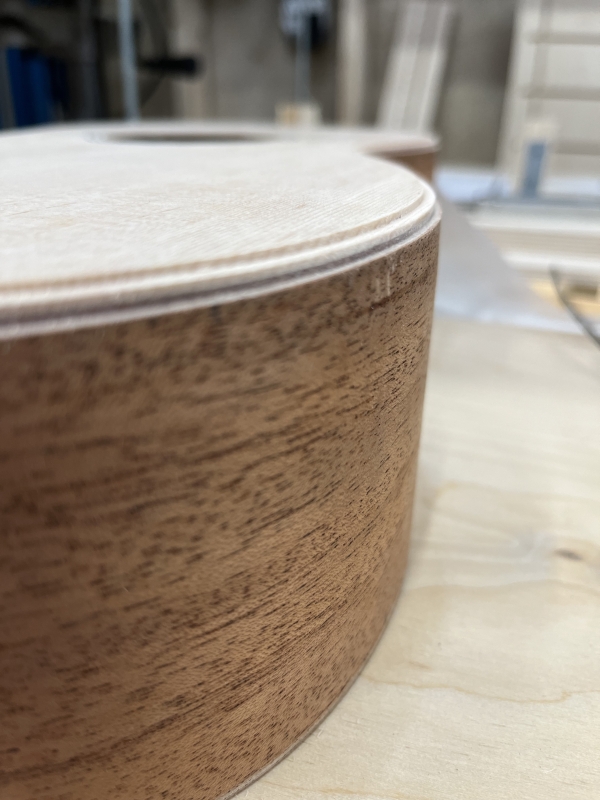 After routing the channels for the decorative purfling and binding. |
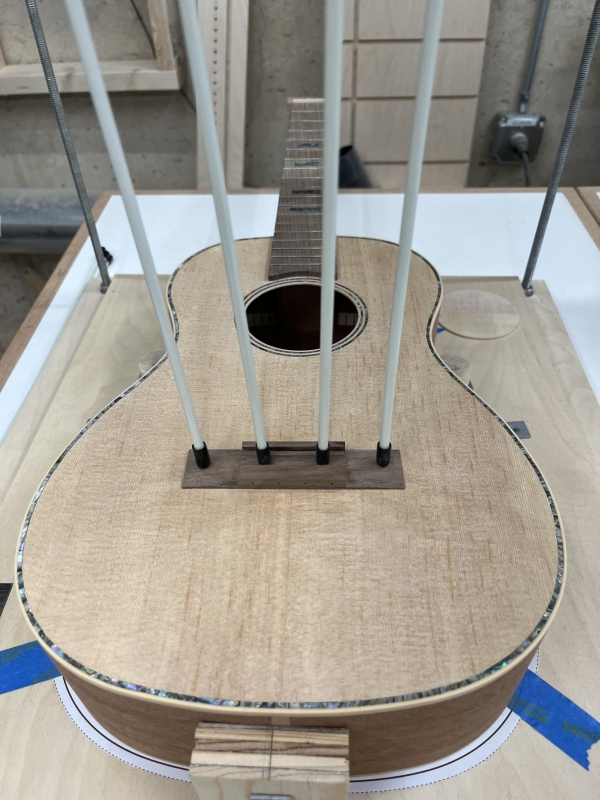
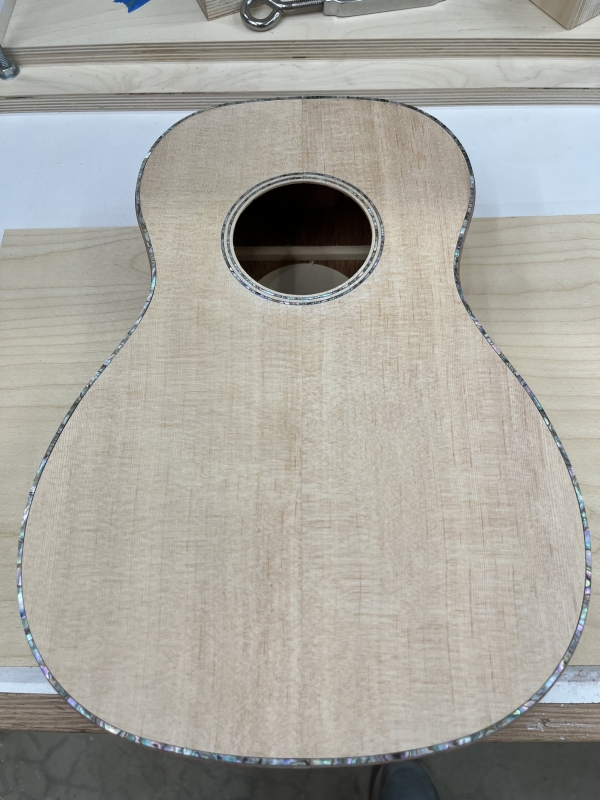 Here is where I got really fancy - using abalone ZipFlex as purfling around the top. |
 After adding the cream-colored plastic binding and getting it flat. |
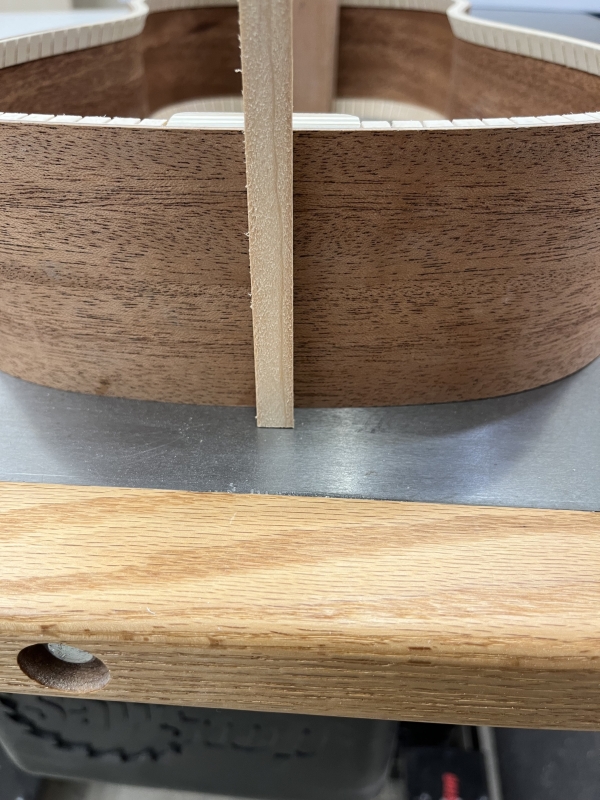
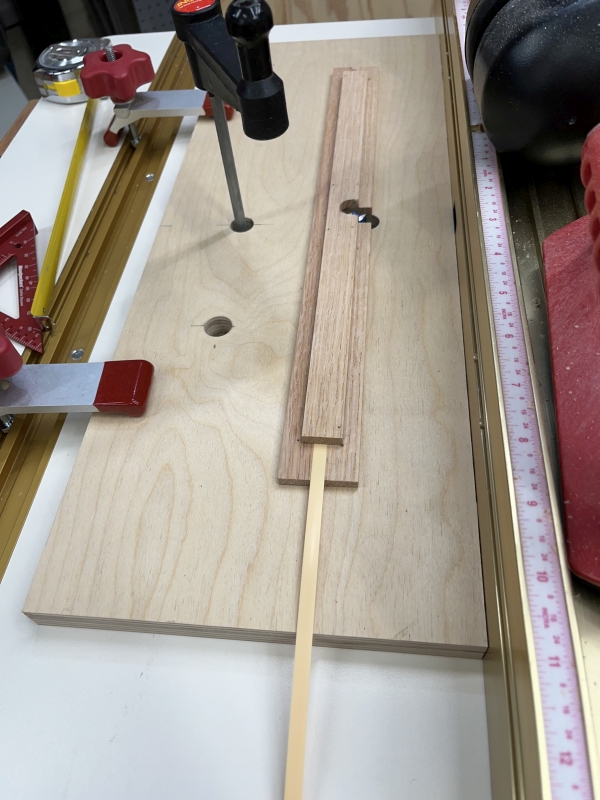 Because a ukulele is quite a bit smaller than a guitar, I wanted the bindings narrower on the sides. I slapped together this jig to let me make them smaller on the router table before installing them. It saved a lot of work scraping and sanding after gluing them in. I have since purchased an adjustable jig that will allow me to do various sizes in the future. |
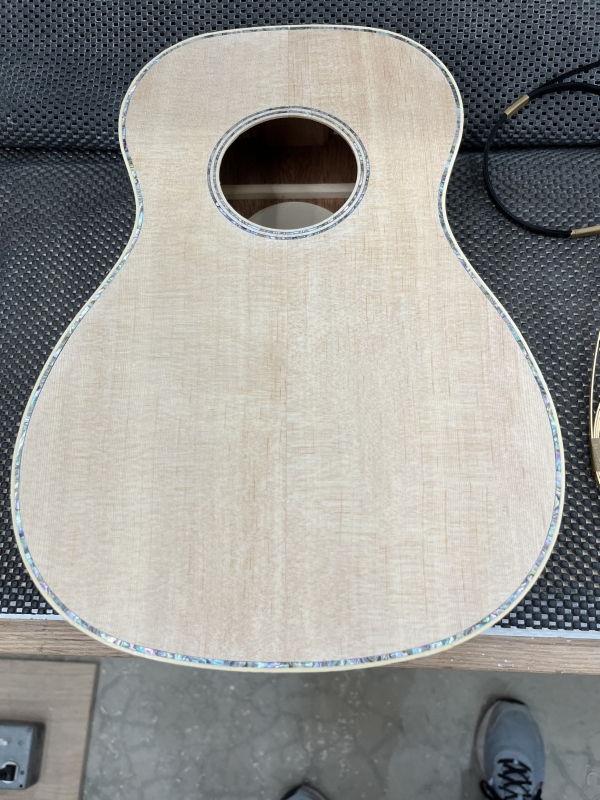
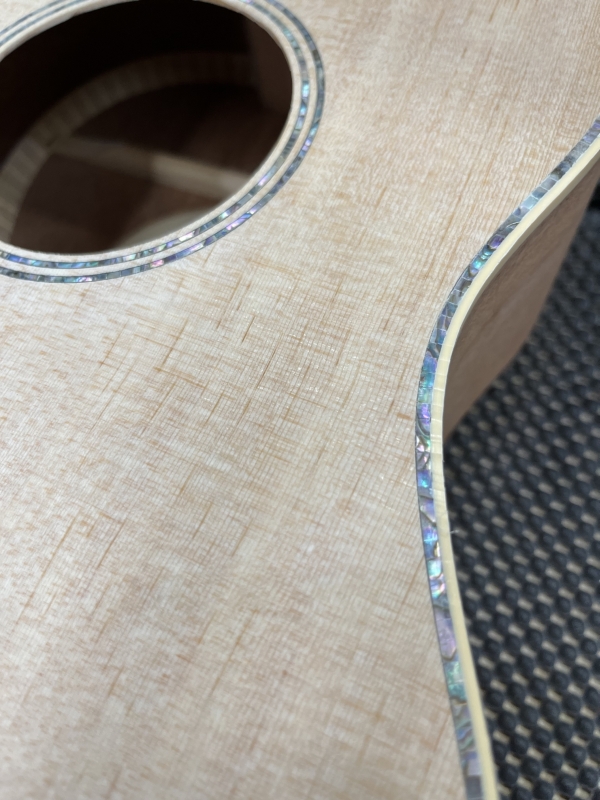 A close up of the abalone and binding. You can see the small pieces of abalone in the ZipFlex. Since they aren't all flush, when scraping the binding you can see the chatter lines in the binding. They both sanded flush and smooth later. |
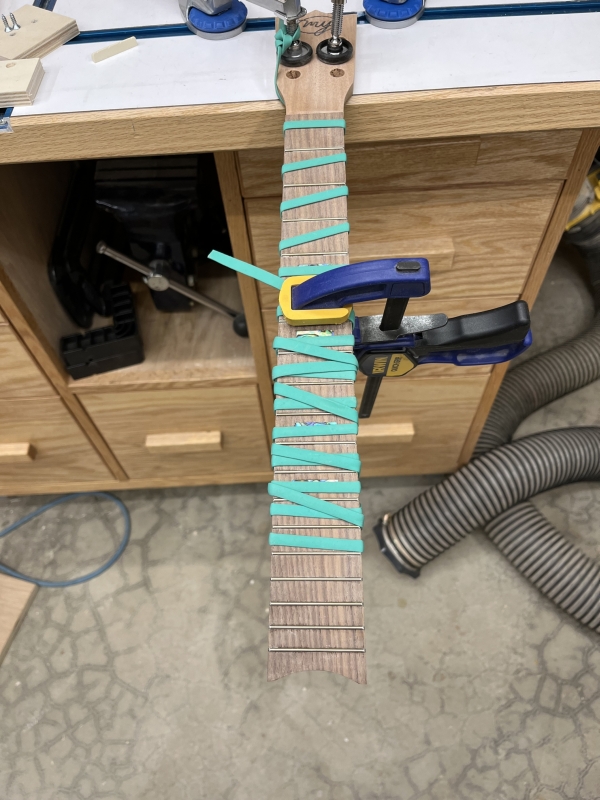 After installing all of the frets and dressing them, here I am gluing the fretboard to the neck. That is a large green rubber band that is wrapped around and used to clamp it while the glue dries. |
 Mahogany is a very porous wood species. Here I am using grain filler to fill the pores so that when finish is applied it will be smoother. The filler comes as a powder and you mix it with water. It becomes a putty the consistency of peanut butter. |
 The same grain filler is used on the back and sides. |
 I don't have to worry about the grain filler staining the plastic binding, but I did mask the top binding (at the bottom here) to prevent it from accidentally staining the ukulele top. |
 After lots of sanding, it is ready for the bridge to be glued on. Traditionally this is done after finish is applied, so the bridge can be removed later if needed to make repairs. For ukuleles I have chosen to install and finish the bridge with the rest of it. |
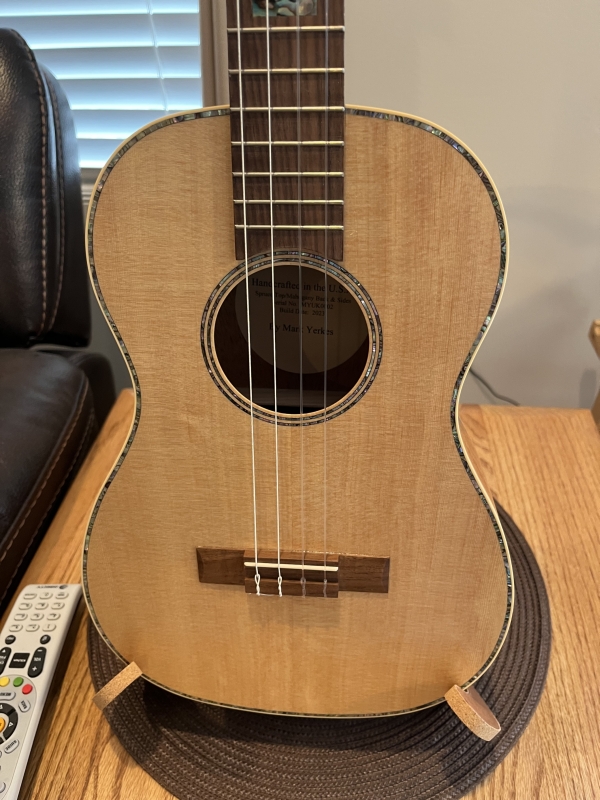
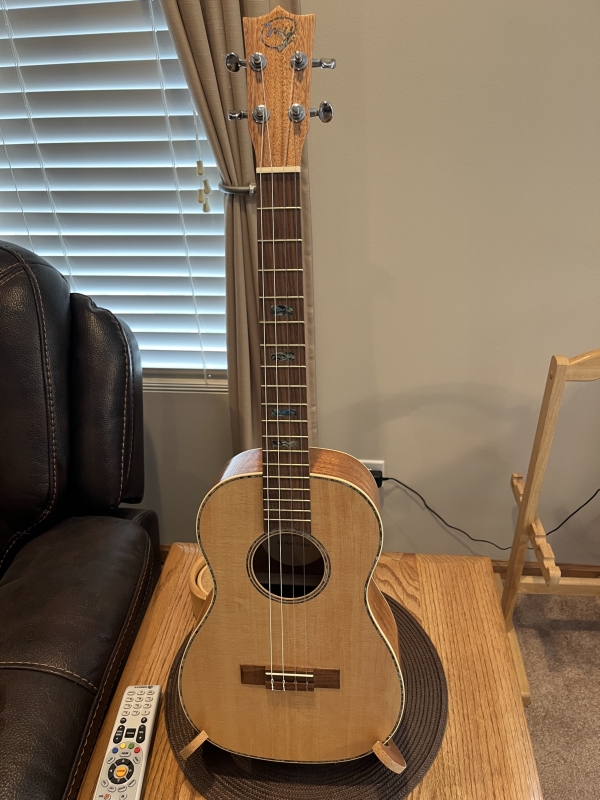 The finished instrument. It plays well and looks fantastic. |
 I do intend to use abalone on a future guitar build. |
 I am really happy with the way the logo turned out. Doing something like this is one of the main reasons I got the CNC and I am looking forward to trying more intricate inlays in the future. |