Click on any picture to open a slideshow. Once there, you can click the link in the caption for the full-size picture.
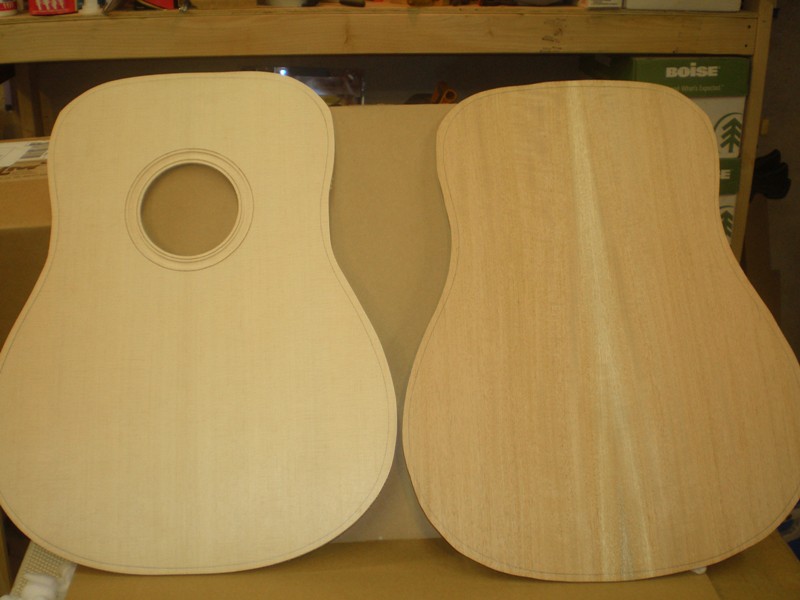
My first attempt at building an acoustic guitar. This is a Martin style kit. The back and sides are mahogony, the top is spruce. The neck is pre-shaped mahogony, with a rosewood fretboard. The neck is a bolt-on, which should be easier than the traditional dovetail. The sides were pre-bent, and the top and back joined from two pieces each. The rosette channel is cut. (I would have done that myself but when you get the top joined it is also routed for the rosette. The bracing is pre-shaped. I bought a brace blank, but I needed to see the preshaped ones so I could see how they keep the grain orientation. The fretboard is radiused and pre-slotted. All the rest of the work is up to me.
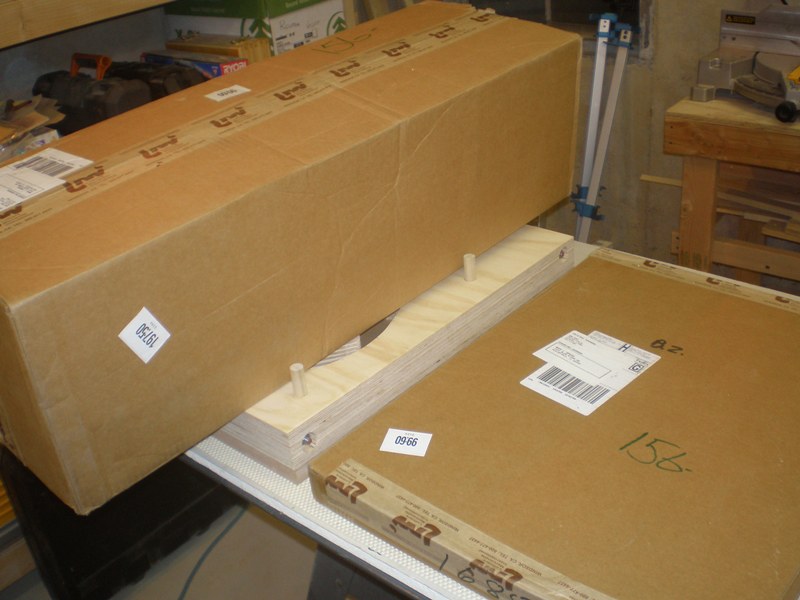 12/08/09 - The kit finally arrives. In these two boxes, weighing less than 15 lbs., is a guitar. |
 12/08/09 - The flat box was the top and back, nicely packed with cardboard and peanuts to keep them safe. Since I need to wait a couple weeks so they acclimate to my temp & humidity, I "stickered" them to keep them as flat as possible. You can see on the top that the soundhole rosette has been pre-routed. |
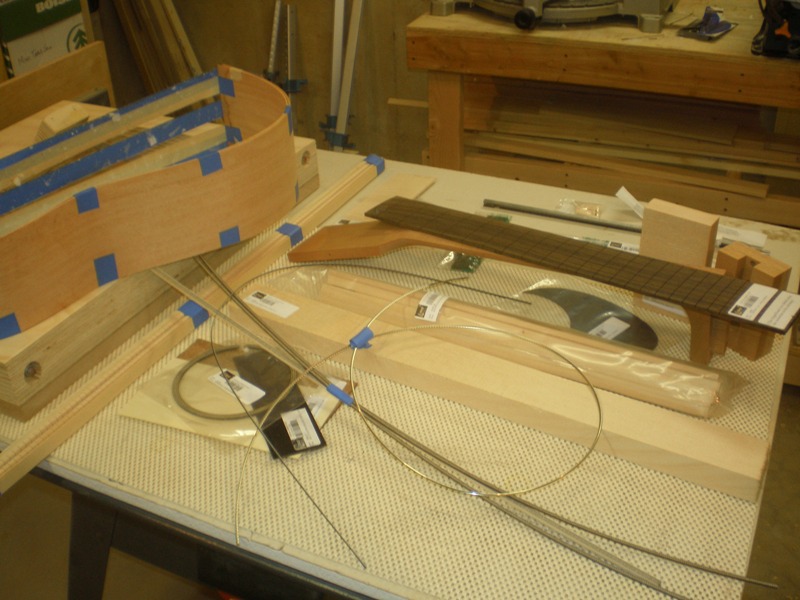 12/08/09 - The other box held the rest of the kit. The loop on top is the fretwire. The long thin pieces are the edge binding and purfling (thin decorative edge banding). The neck has the fretboard sitting on top of it, and the neck and tail block just beyond it. The long plastic bag in the middle holds the braces. The prebent sides are on the left, they were taped to help them keep their shape. |
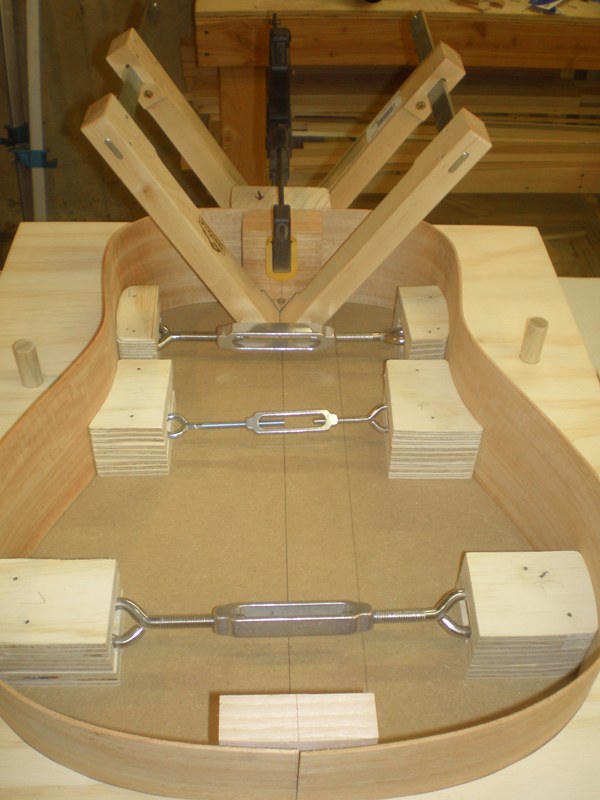
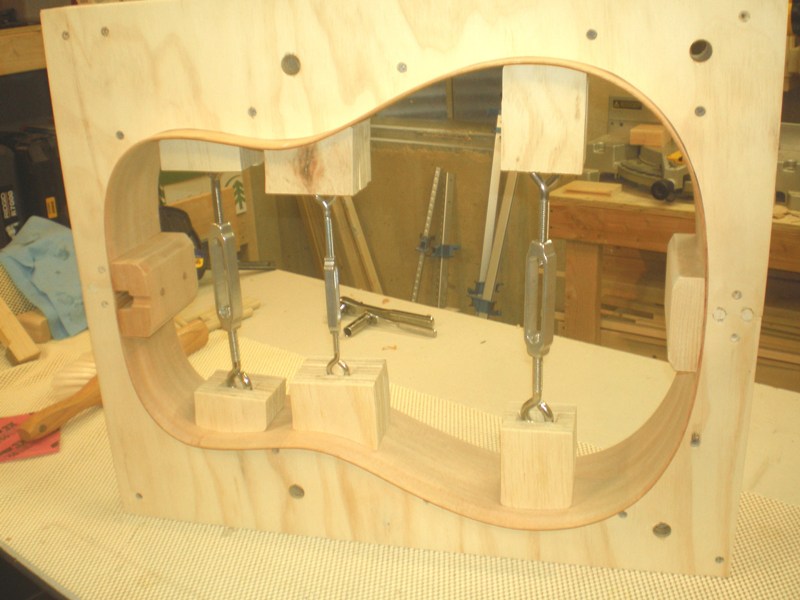
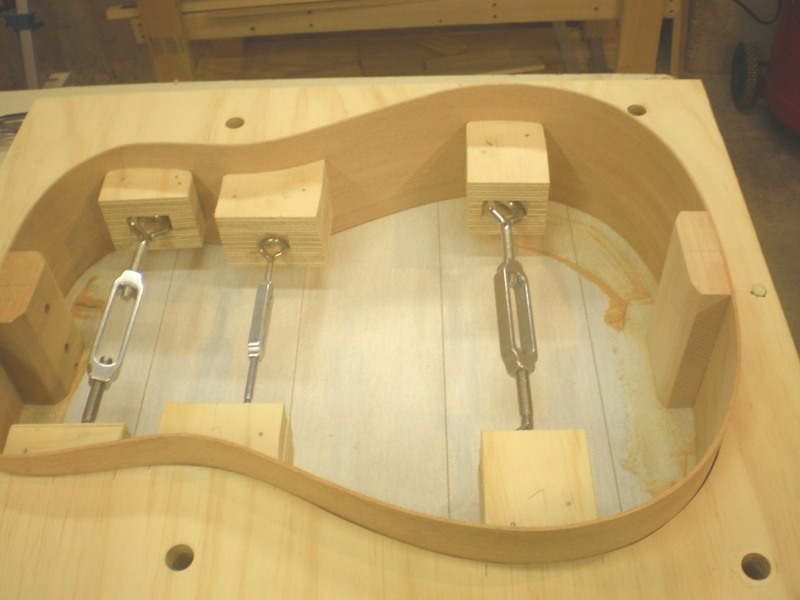
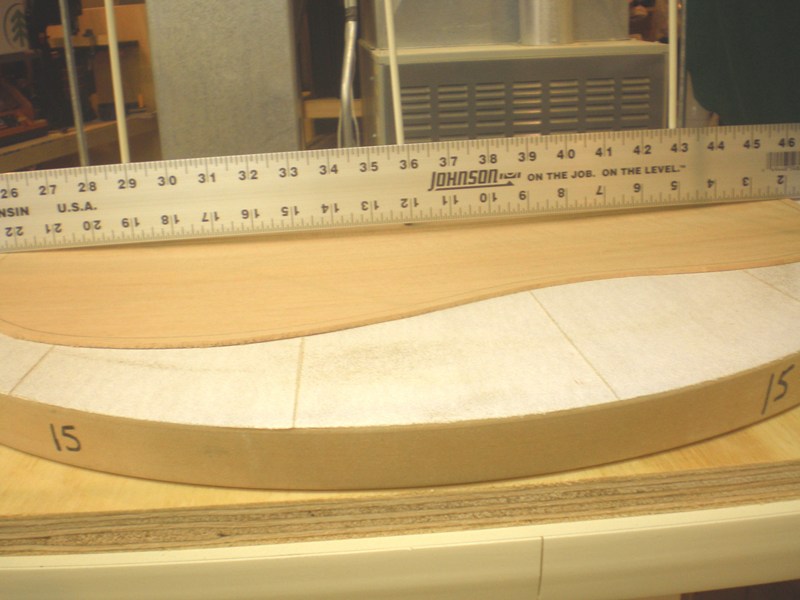
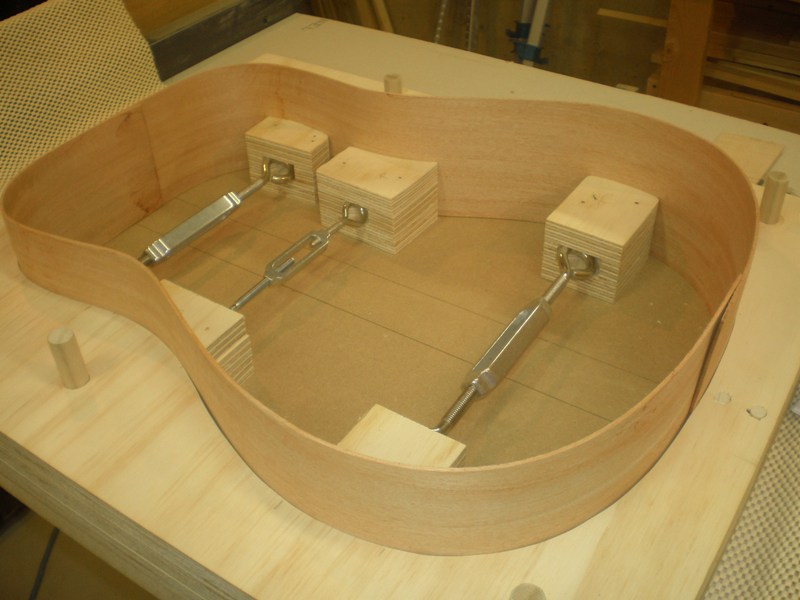 12/08/09 - Step 1! Since I need to wait a couple weeks, I needed to put the sides in the mold so they would hold their shape. I made the mold out of three layers of plywood, then added the blocks and turnbuckles to keep the sides spread. The sides are left long. The next step will be to trim them to length. |
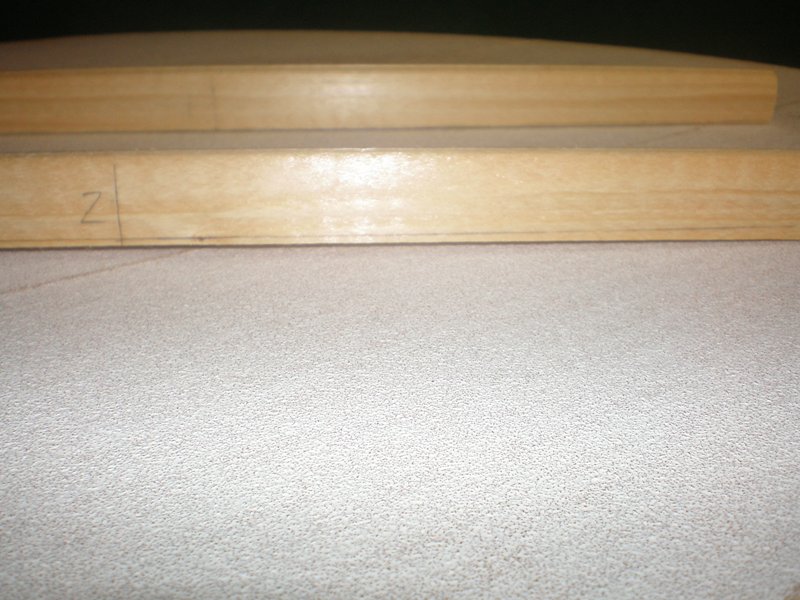
 12/08/09 - The plans. These and an acrylic template which matches will guide me through the build process. |
 12/18/09 - I have now trimmed the sides to length. Here I am dry-fitting the neck and tail blocks. |
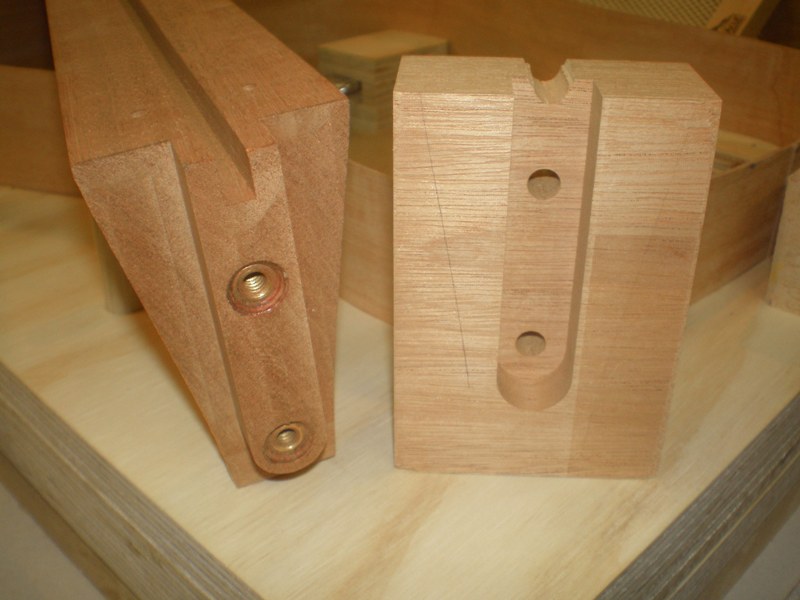
12/18/09 - Here is how the neck mounts to the neck block. |
12/18/09 - Dry-fitting. I still need to cut the neck block length down a bit prior to gluing it in. |
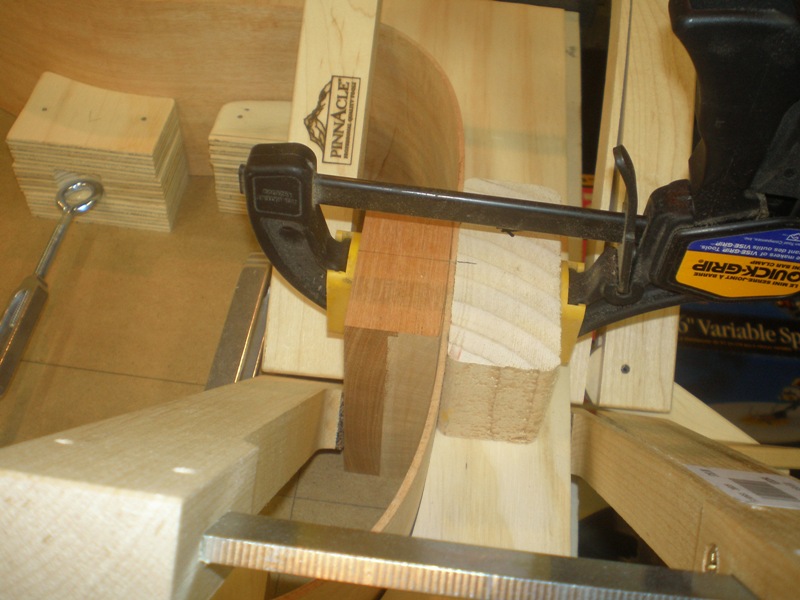
12/19/09 - Gluing in the neck and tail blocks. |
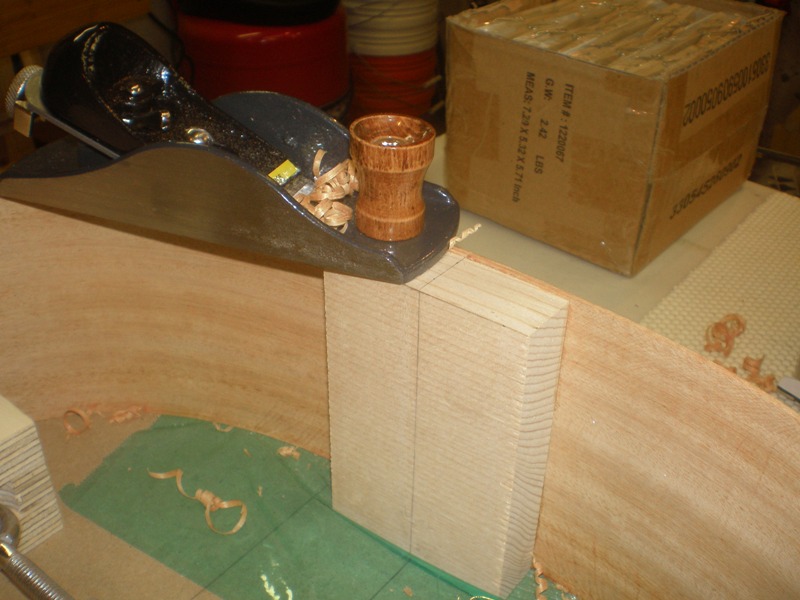
12/19/09 - Once the blocks are glued in, I planed the ends of the sides down to the height of the blocks. This is to get the sides to the width of the guitar minus the top & back. |
12/20/09 - I'm not sure why I took this picture, other than it shows the top side of the sides. All the others show the back side. On the left you can see the mortise in the neck block. |
12/20/09 - Here I am starting to radius the sides. An acoustic guitar is not flat. The top and back are actually domed, to give them strength. So here I am sanding the sides to that radius. |

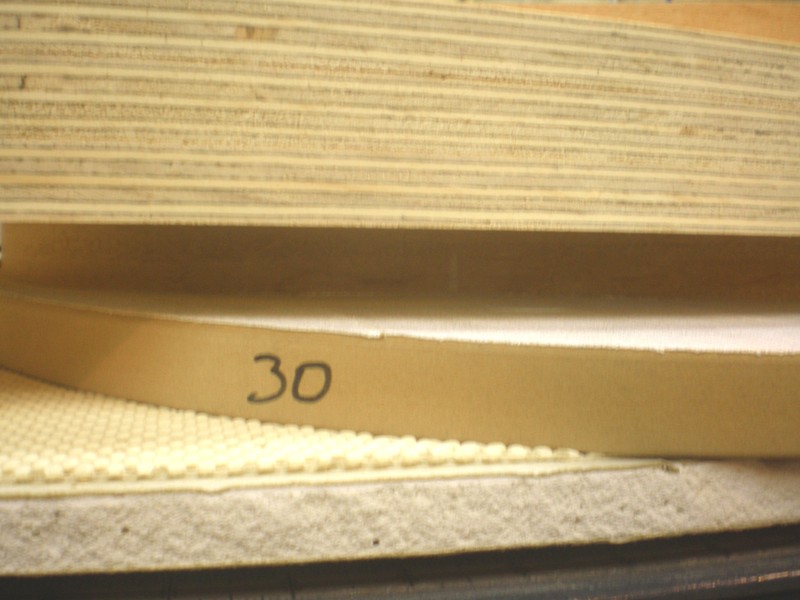
12/20/09 - This is a 30' radius dish with sandpaper stuck to it. You can see as I sand only the ends are touching so that is where the sawdust is. |

12/20/09 - Here you can see where the light is shining under the middle. I need to carefully plane and then sand the edges so that they meet this 30' radius all around. |
12/20/09 - There it is. No more light! |
12/20/09 - Another technique for seeing where the sanding is needed. I chalk the whole edge, then lightly sand, and where the chalk is left isn't touching the dish yet. |
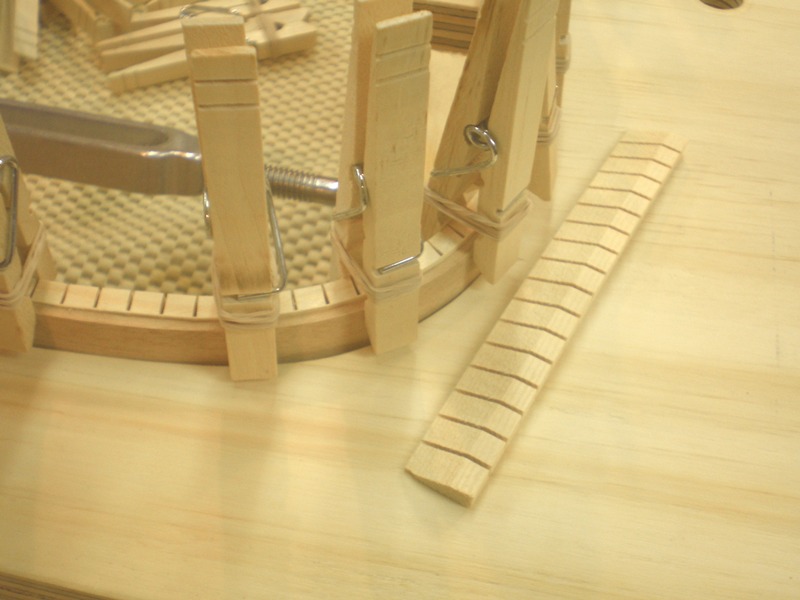
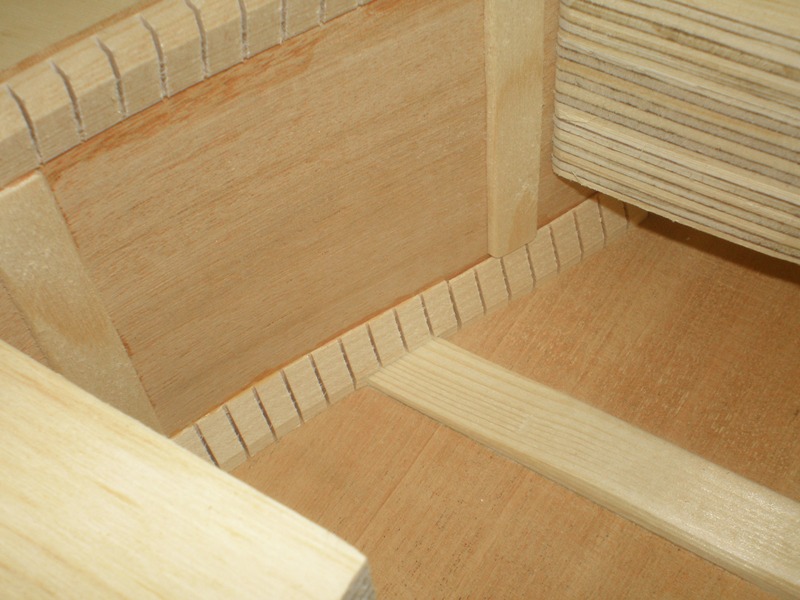
12/20/09 - Once the top and back are radiused (the top gets a 15' radius, much less pronounced than the back), the next step is to glue on kerfing. This thin strip of wood has kerfs cut in it so it will conform to the curves of the sides. The purpose is to give a wider edge for gluing the top and back on later. |
12/20/09 - About 100 clothespins with rubber bands added to them are the clamps needed. |
12/20/09 - The kerfing is left a little higher than the sides, they will then be sanded like before to put the radius edge on them. |

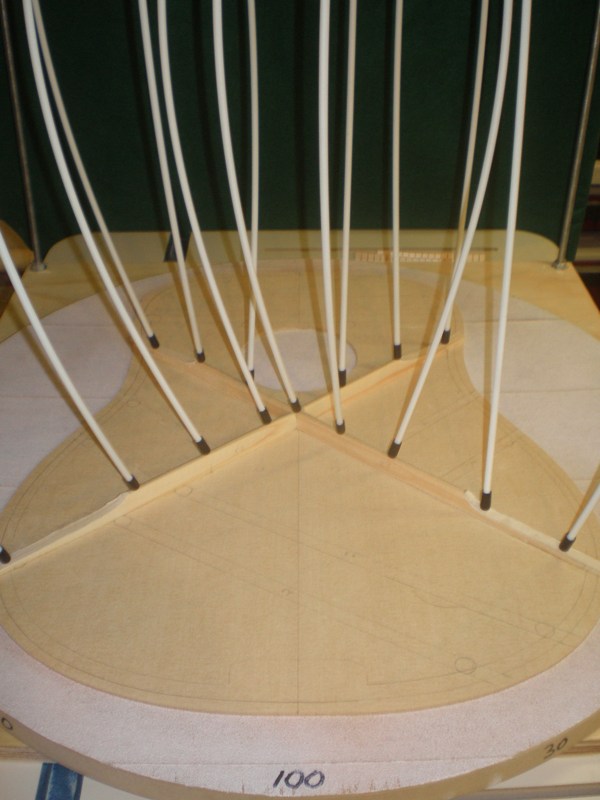
12/20/09 - Here I am setting up to start working on the guitar back. The back is laying on the 15' radius dish, which is in what is called a go-bar deck. On top of the back is a reinforcement strip that will be glued in. |
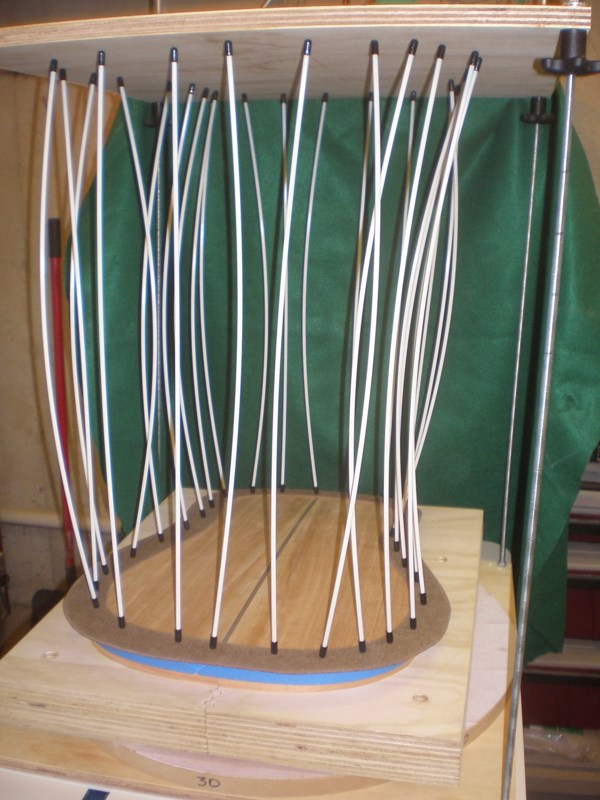
12/20/09 - Here is how the go-bar deck works. Fiberglass rods called go-bars are used to clamp the brace in place, forcing the back into that radius. The go-bar deck is two pieces of plywood, the top is adjustable to allow for different heights of the braces. |
12/20/09 - Here you can see the difference between flat and a 15' radius. I'm getting a little ahead of myself here, but needed to do something while the glue was drying on the kerfing. Before I glue the reinforcement strip and bracing on the back I need to rout and glue in a decorative strip to the outside of the back. Stay tuned..... |
12/21/09 - Setting up to rout for the decorative backstrip. If building from scratch, this strip can sometimes be glued in between the two halves. In my case, I have to do it afterwards. |
12/21/09 - The strip is about the same thickness of the back, so I want to rout about 2/3 through. After the strip is glued in, I will scrape and sand it flush. |
12/21/09 - Here is the strip glued in. The strip is wood, and the pattern goes all the way through. |
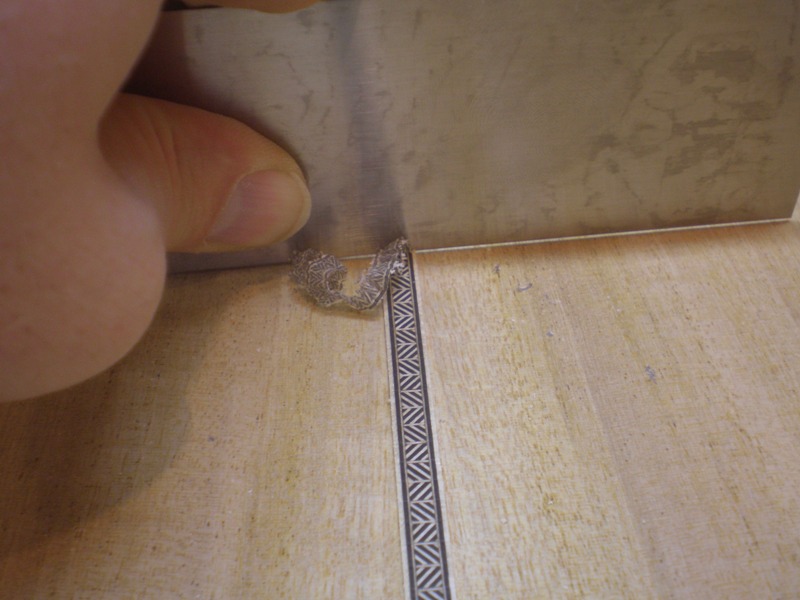
12/24/09 - Now I have to get the strip flush with the back. I chose to scrape it down with a scraper. It took quite a bit since the scraper shaves an extremely small amount with each pass. |

12/24/09 - With the kerfings all glued in it was back to the sanding dishes. Had I known how much work this would be I wouldn't have left them quite so high. It took about 20 minutes of twisting the whole form back and forth to get the kerfing sanded flush with the side. |
12/24/09 - Here is a good picture where you can kind of see the angle of the edge. |

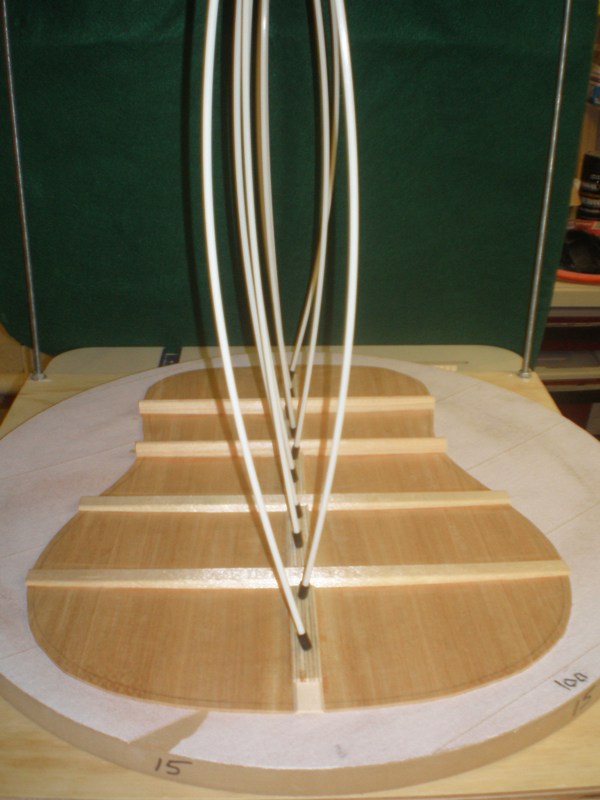
12/24/09 - Then it was time to work on the back transverse braces.Here they are layed out where they will go. I had to mark their locations 90° to the center line on the inside of the back. |
12/24/09 - The bottoms of the braces come flat, I have to radius them to the 15' curve. First I marked the curve with a pencil, then planed the ends close to the line to get them close. |
12/24/09 - Then I rubbed them back and forth on the radius dish to sand the 15' radius into the bottom. Here you can see the #2 brace prior to planing and sanding, and the #1 brace behind it is done. |
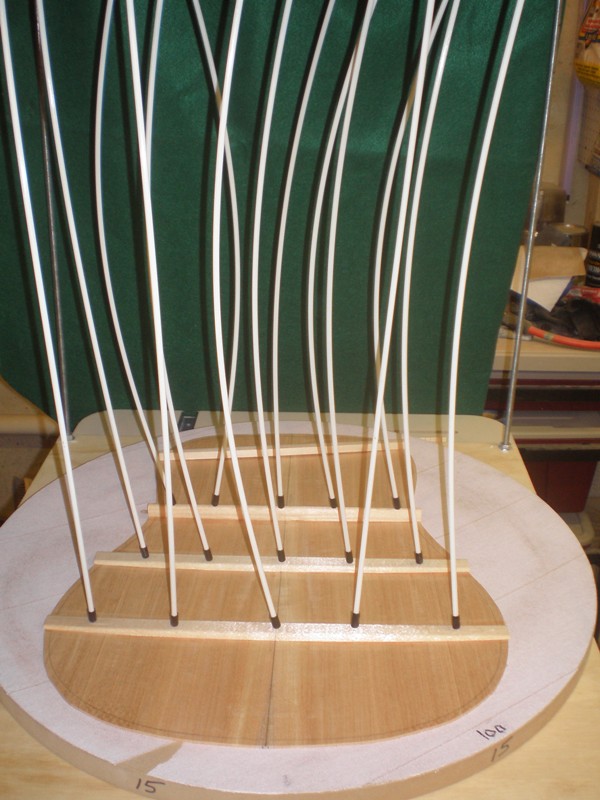
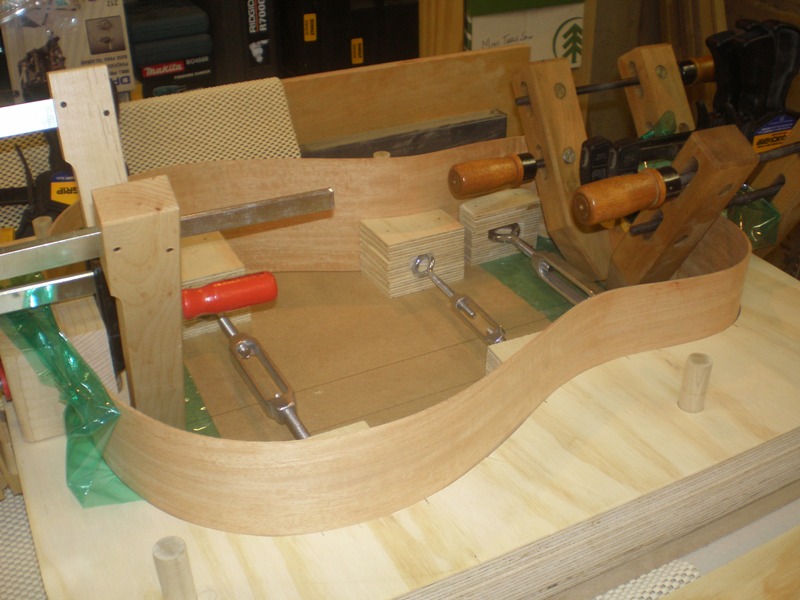
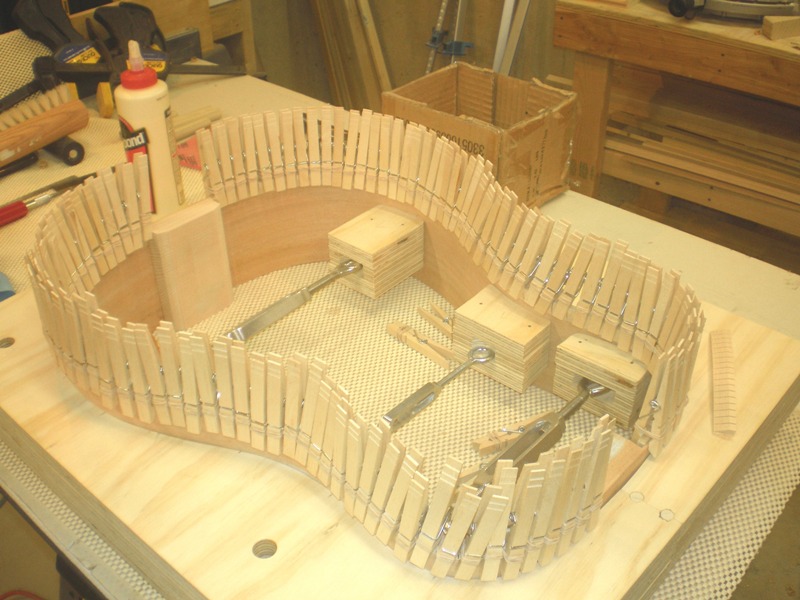
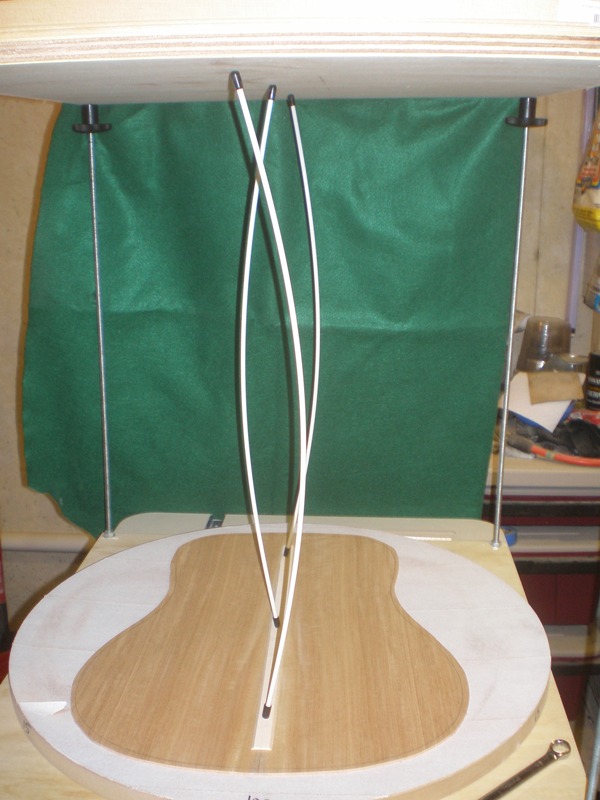
12/24/09 - Here is the go-bar deck in actual use. The #1 brace hasn't been glued at this point because I don't have enough bars. This forces the back into the 15' radius. |
12/28/09 - Here I am gluing in the center brace on the back. I am using thin strips of plywood because the brace is soft and I don't want the go-bars to leave dents. |
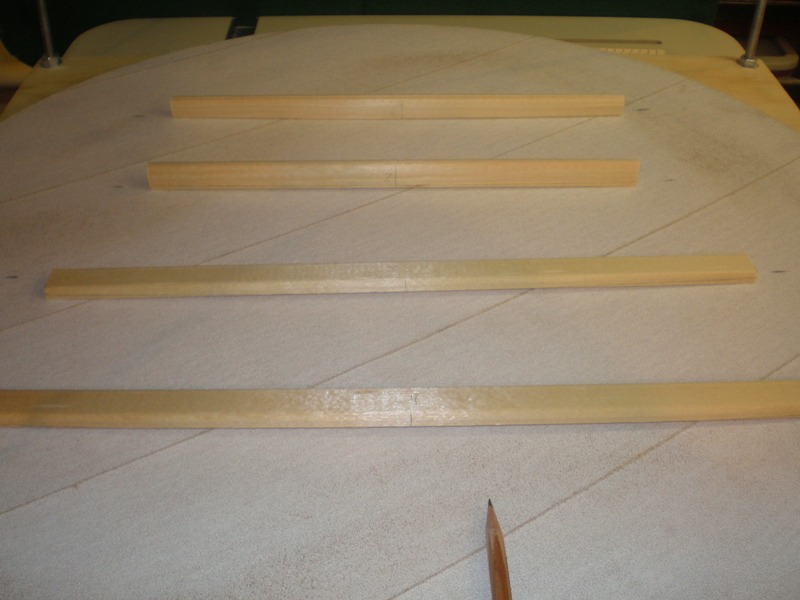
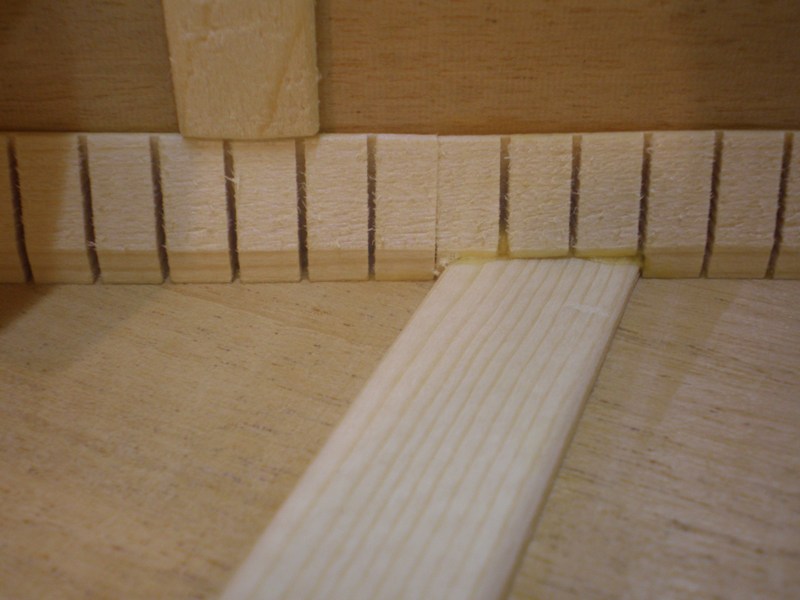
12/28/09 - Next up are these "popsicle stick" braces. Some builders actually use popsicle sticks, I chose to cut my own thin strips from extra spruce I had. These help to stiffen the body and to help prevent the sides from splitting. |
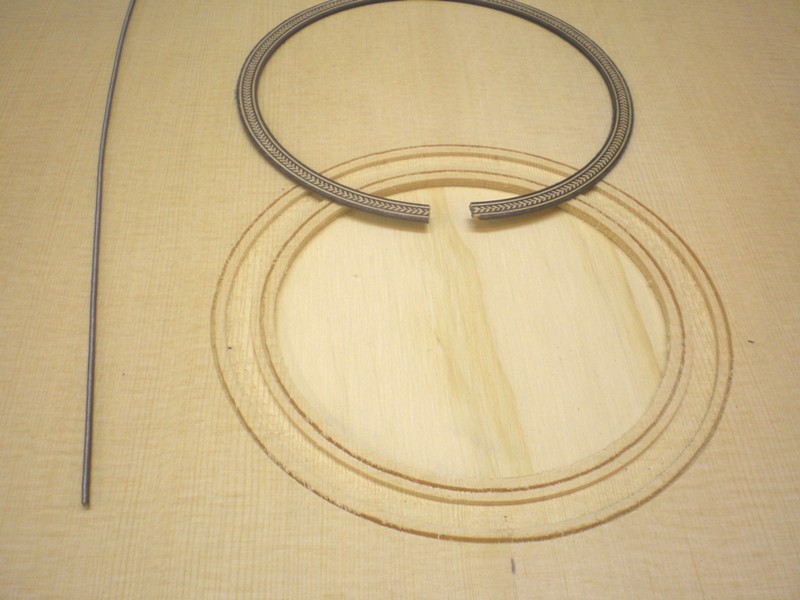
12/28/09 - Before I can work on the braces for the top, I have to fit and glue the rosette. My kit came pre-routed, but I could have easily done this. The top is sitting on a piece of plywood. |
12/28/09 - Here the rosette is cut to length and dry-fitted. The seam ended up closer than this looks, and will be covered by the fretboard anyway. |
12/28/09 - Here the rosette purfling is glued in. |

12/28/09 - After gluing in the rosette I placed it in the go-bar deck to hold it down. The rosette ended up inset a little in places, I will have to scrape and then sand everything flush. The top is still a little thick still anyway. |

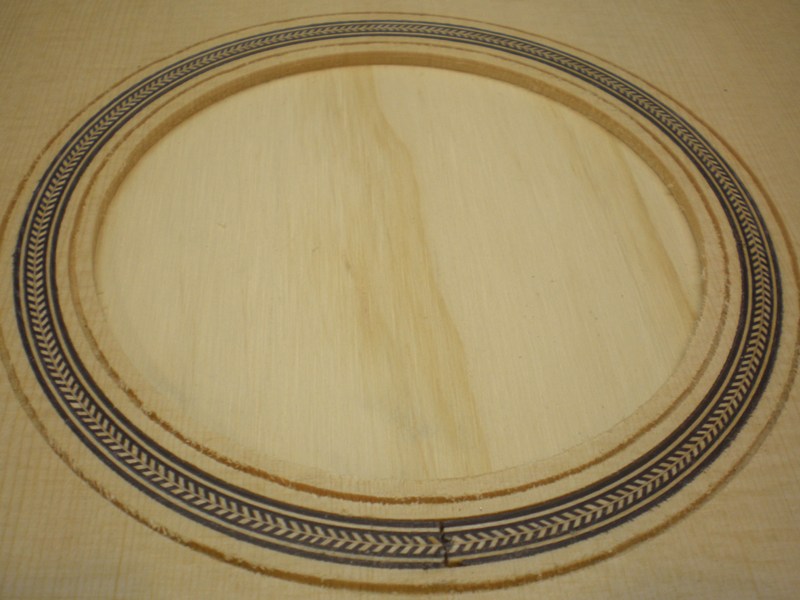
1/3/10 - After scraping and sanding, the rosette and purflings are flush with the surface of the top. |
1/3/10 - Closeup. |
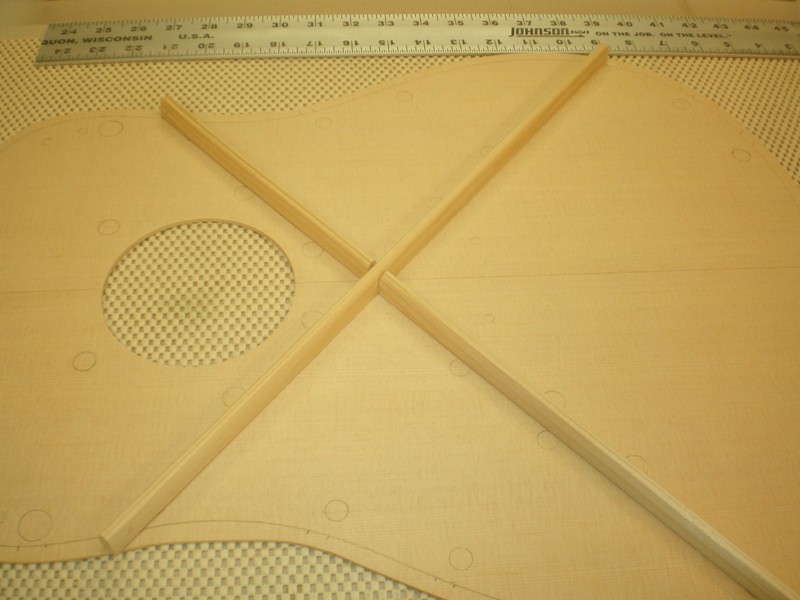
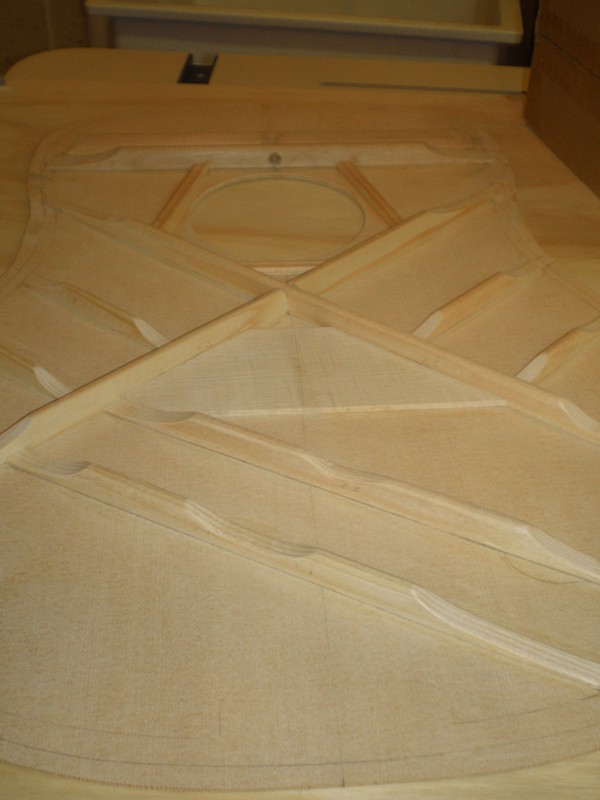
1/3/10 - Beginning to layout the inside of the top for the braces.Here the X-braces have been notched in a half-lap joint. |
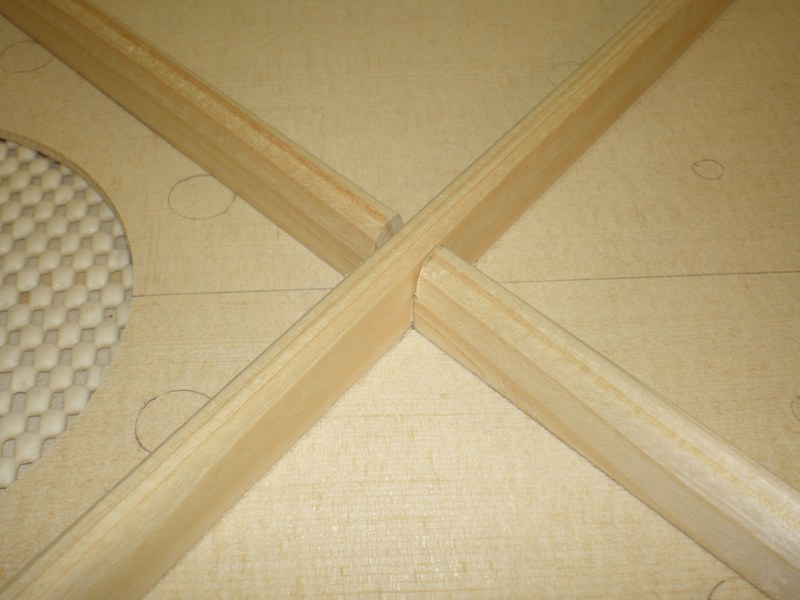
1/3/10 - Closeup of the joint. Each brace has been notched halfway. This is the key brace to keep the top from collapsing. |

1/3/10 - The rest of the braces layed out. |

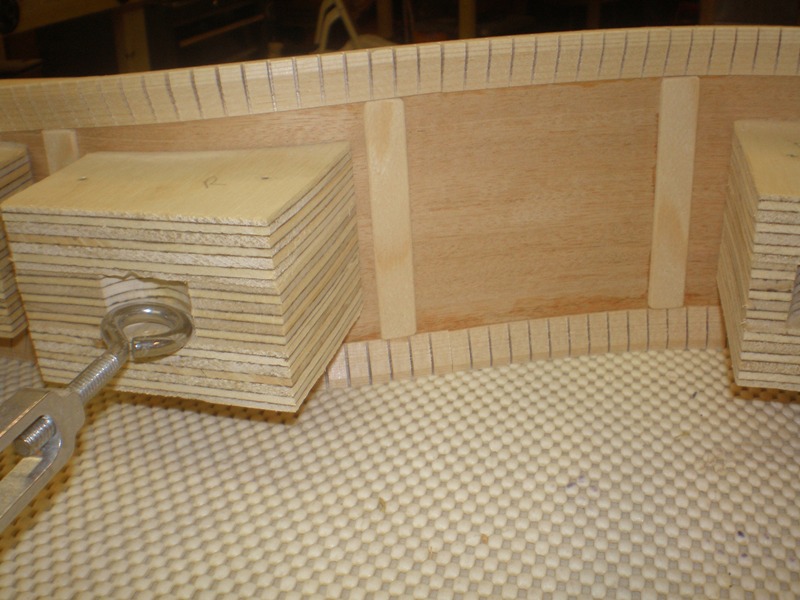
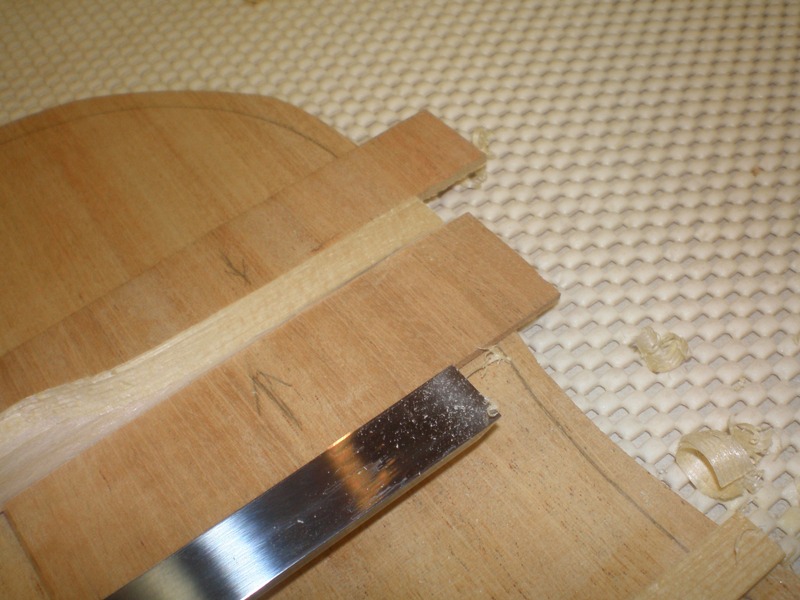
1/3/10 - Here I have trimmed the braces to length and roughed the scallops on the ends. The X-braces and the transverse shoulder brace (just above the sound hole) will be notched into the kerfing on the sides of the guitar. The others are cut shorter to fit just inside of the kerfing. |

1/3/10 - I rough cut the scallops on the scroll saw, and here I am refining them with the spindle sander. The traditional way to do this is to carve/chisel them after they are glued to the top. I don't have the curved chisel to do that, and at $60 I decided to take a different approach. I will refine them with a regular chisel later. |
1/3/10 - Gluing in the X-brace. These and the shoulder brace are radiused as shown earlier. The smaller braces will be glued in flat. |
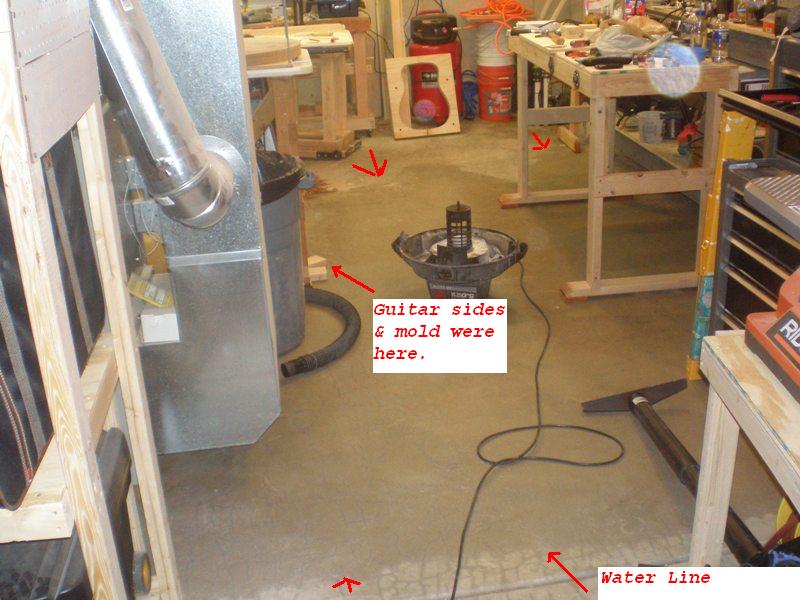
1/10/10 - Came down to find water had been leaking from the furnace humidifier for 24 hours. Click on the picture to see where I note the water line. About 1/2" covered this area. I had accidentally pulled the drain tube off when I checked it the day before. |
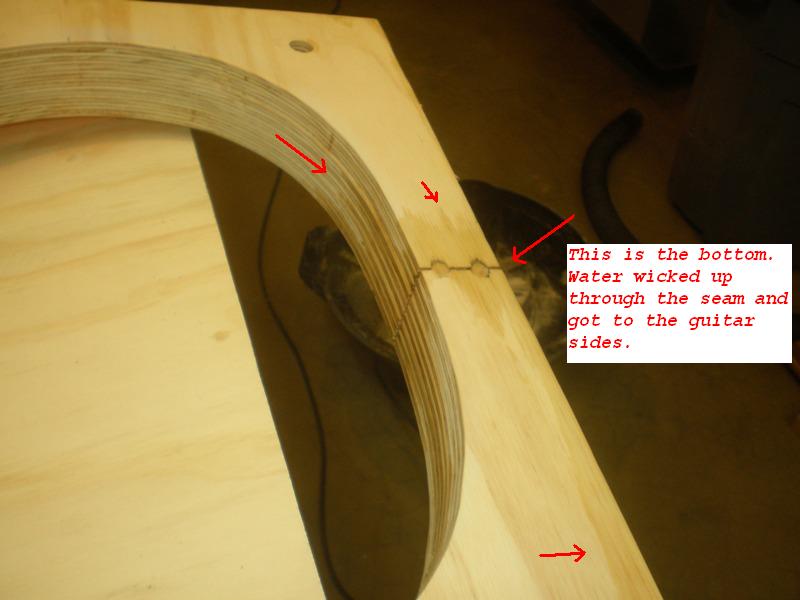
1/10/10 - Unfortunately, the mold with the guitar sides was on the floor, resting against a workbench. I had the thought to pick it up the other day so I wouldn't step on it or something. I wish I had! The water wicked up through the seam and got to the guitar sides. Fortunately, this was the only damage. Everything else that got wet isn't important. |

1/10/10 - Here is the water mark on the sides. The larger picture is marked. This was taken about an hour or so after I pulled it out of the mold, and it was already dry to the touch. |
1/10/10 - After 2 hours of water cleanup, finally some actual guitar work. Here I am shaving the ends of the braces down to final thickness. |
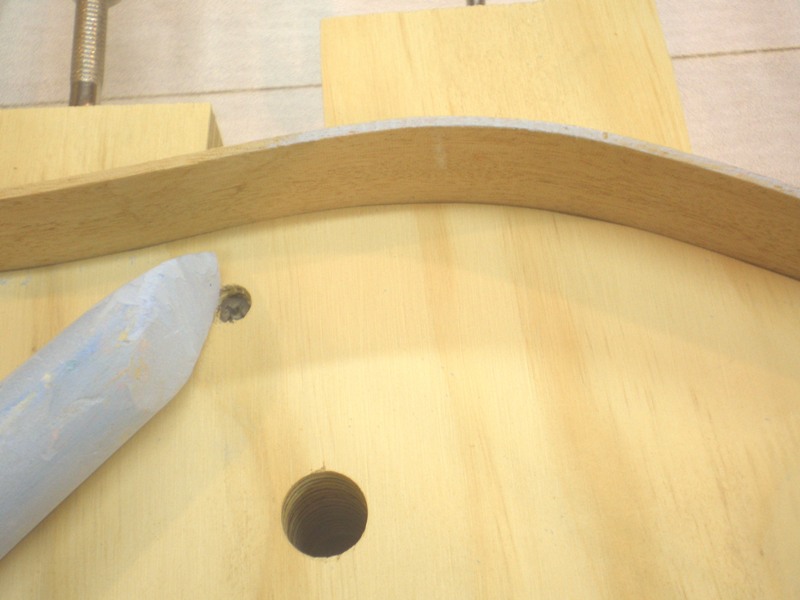
1/17/10 - The top is now finished. The bottom tone bar is now carved. and I put a hole in the shoulder brace above the sound hole to allow for an allen wrench to get to the truss rod in the neck after assembly. I should have drilled that hole prior to gluing the brace on, it would have been easier. All that is left is to clean up the pencil marks and sign the inside of the top. |
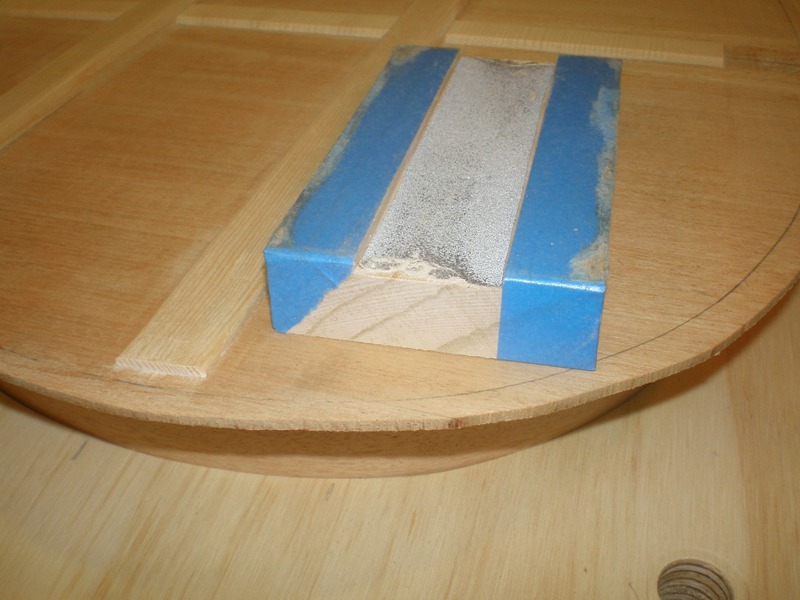
1/17/10 - The brace ends are sanded to the final thickness. I made the block on the right with a groove down the center. That groove is .10" (3/32). The tape protects the back. When the tape touches the back it smudges the pencil lines and I know to stop. |

1/17/10 - Now the block is used to set the depth of the router bit.I am using an additional piece of plywood with a slot in it to give me more surface for the router to ride on. |
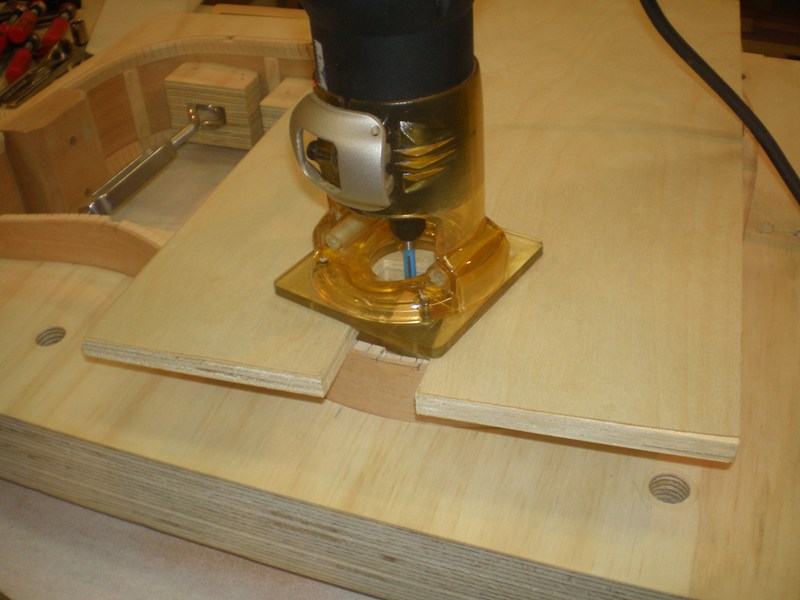
1/17/10 - Now I use the router to cut the notches in the kerfing where the brace ends will meet it. Without the plywood I would be trying to balance the router on an edge that is just 3/8" wide. |
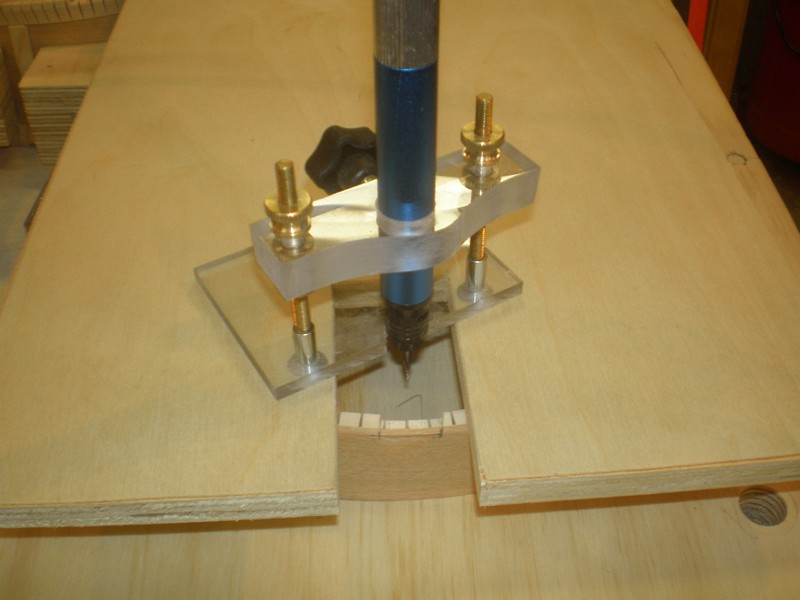
1/17/10 - I also used this high speed rotary tool with a tiny bit to get in the corners... |
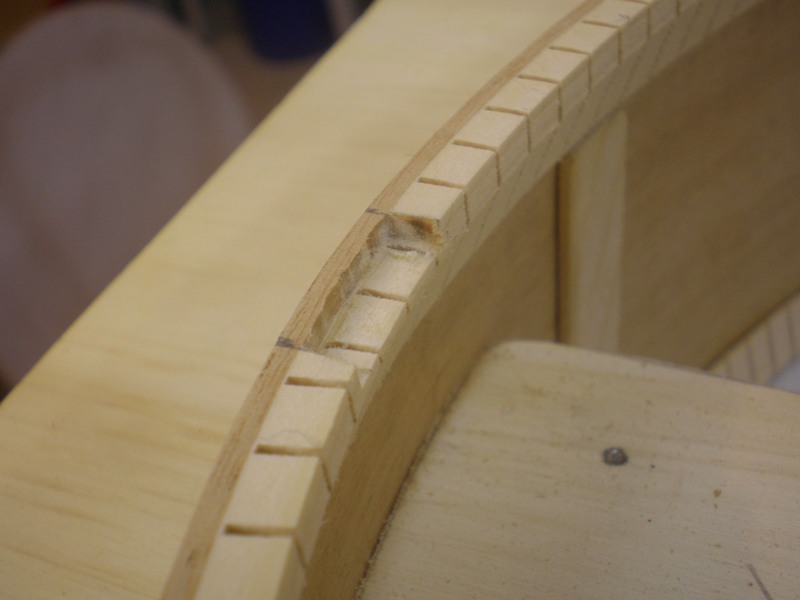
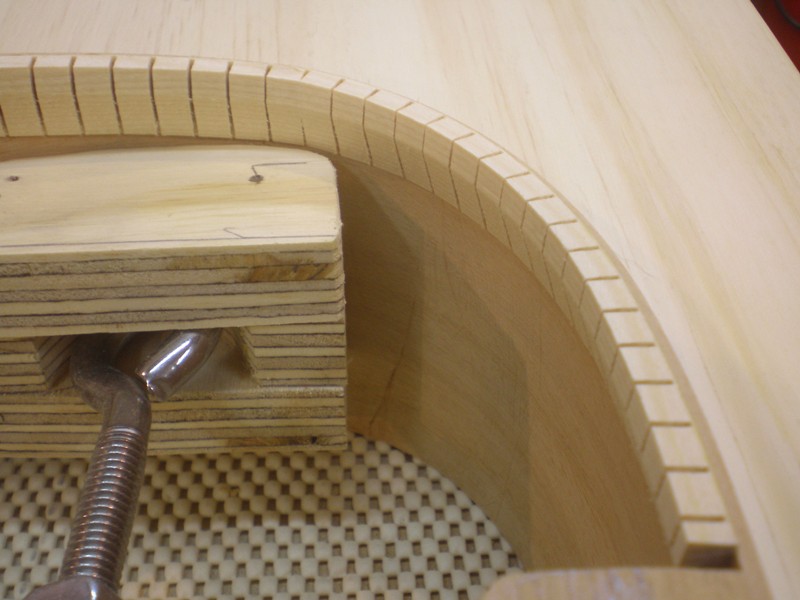
1/17/10 - ...and here is why. I chose to only rout the kerfing and not the guitar side too. I then cut the brace end so that it meets the side. Most builders just cut the notch all the way through. |

1/17/10 - And now the back fits and is ready to be glued on. |
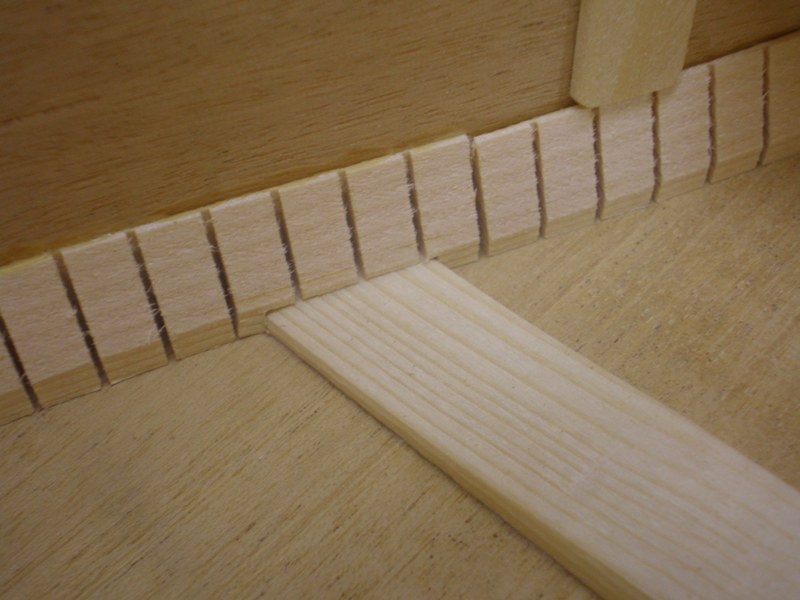
1/17/10 - Here is what the brace looks like in the notch. |
1/17/10 - A little wider view. |

2/28/10 - I finally made it back down to the shop. Here I am pre-forming the purfling that will later be glued around the edges of the top. These are made of wood, and I wanted to get them formed to the shape. It will make it easier to install later. |
2/28/10 - They were starting to twist and curl a little. This is just insurance that they will make these bends later. |
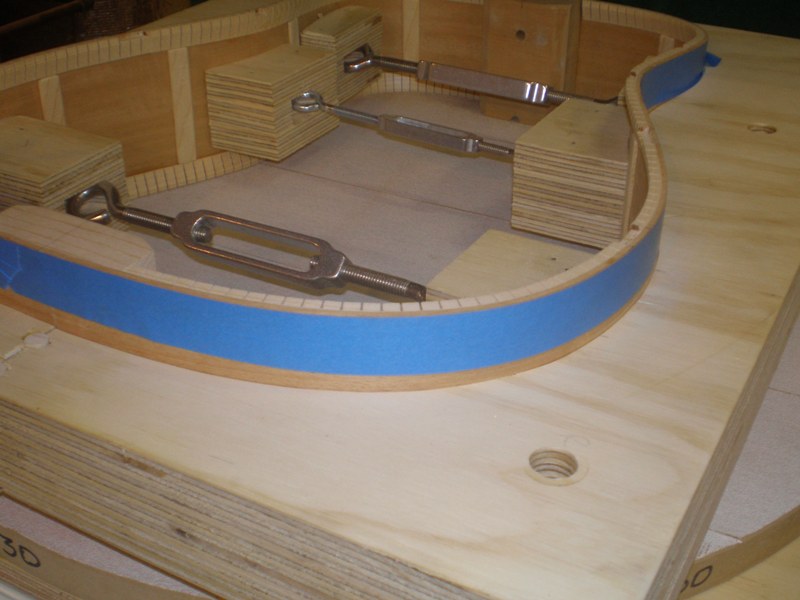
2/28/10 - Getting ready to glue the back on. The tape is to protect the sides if excess glue drips on them. |
2/28/10 - I cut the darker ring out of masonite so the rods wouldn't leave marks in the back. (or break it!) |
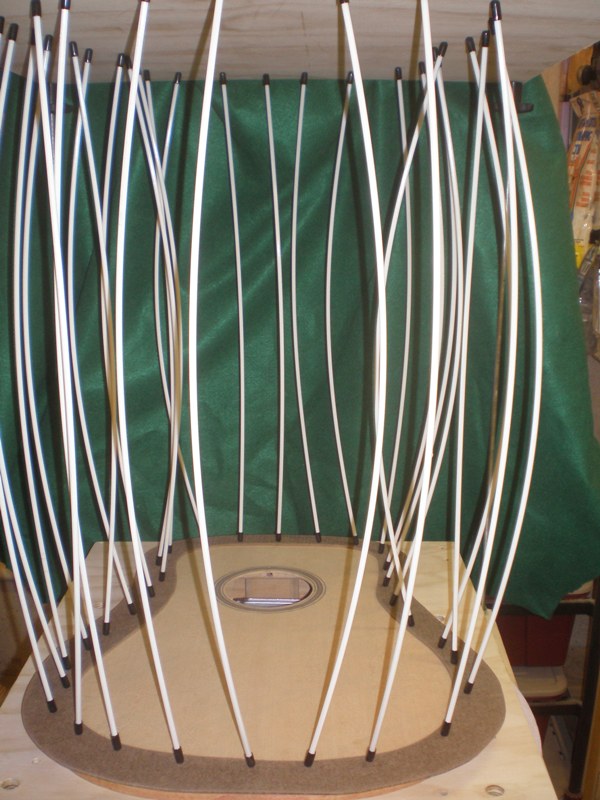
2/28/10 - All glued up. I ordered more bars awhile ago so I would have enough for this step. |
2/28/10 - Several hours later and the back is glued on successfully. Here you can see how well the braces fit in the notches. I have a little excess glue to clean up, but I am happy with this progress. |
3/10/10 - Time to glue the top on. I did forget to do something before I did this, but I can work around that mistake. |
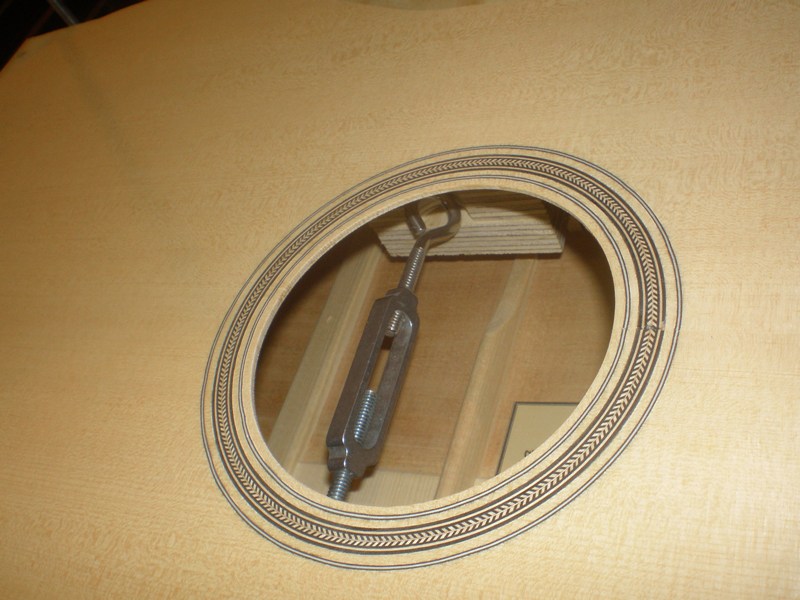
3/10/10 - After a few hours for the glue to dry, it is finally time to remove the spreaders. I made sure they were small enough to fit through the soundhole before I glued the top on. It wasn't easy reaching my arm to the furthest one, but they came out ok. |
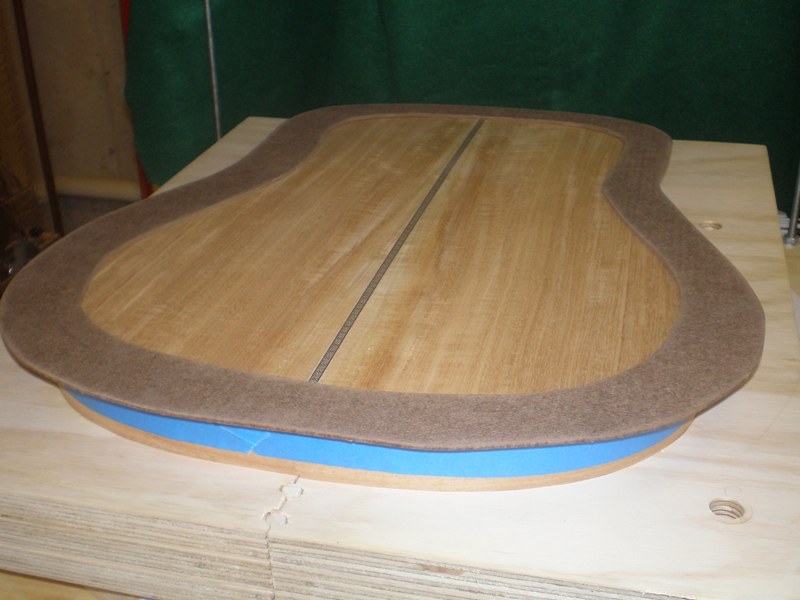
3/10/10 - Before removing the body from the mold, I needed to trim off the excess on the top and bottom. |
3/10/10 - Here you can see the progress. |

3/10/10 - A milestone! The body is out of the mold. Next up for it will be purfling and binding. |
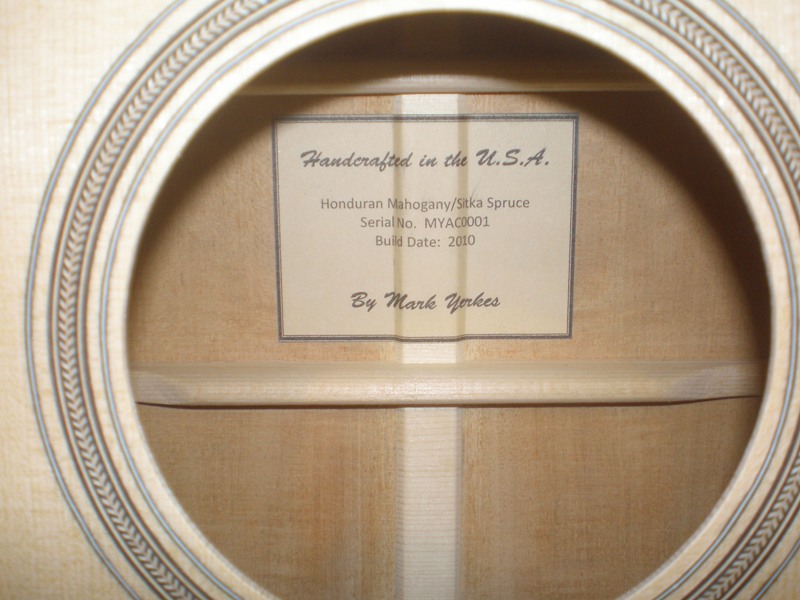
3/10/10 - The label I made for the inside. I also signed the inside of the top, which is traditional for luthiers to do. |
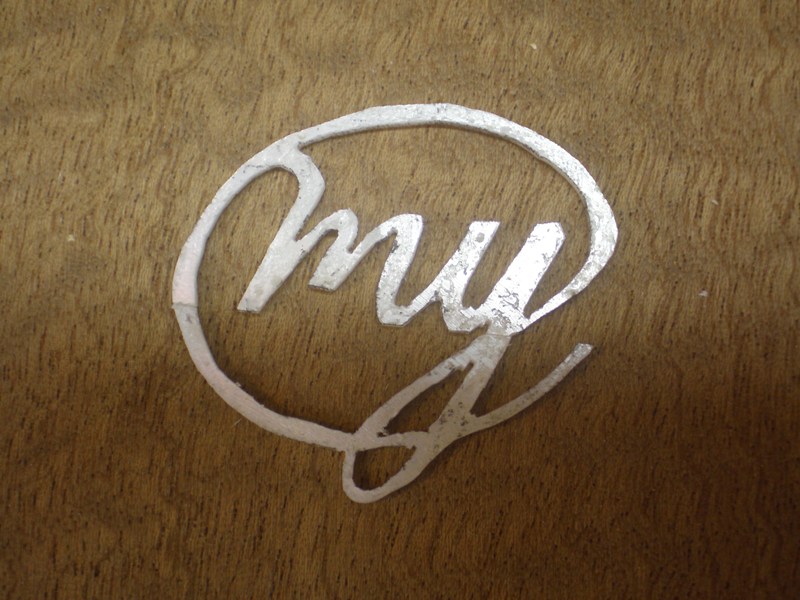
3/10/10 - Also today I cut out my logo. This is pearl shell (it comes from the inside of shells). It is only partially shiny because there is residue on it from the paper I had glued on it. I will be inlaying this in the headstock. I probably should have made this a little thicker, it would have made routing the inlay easier. |
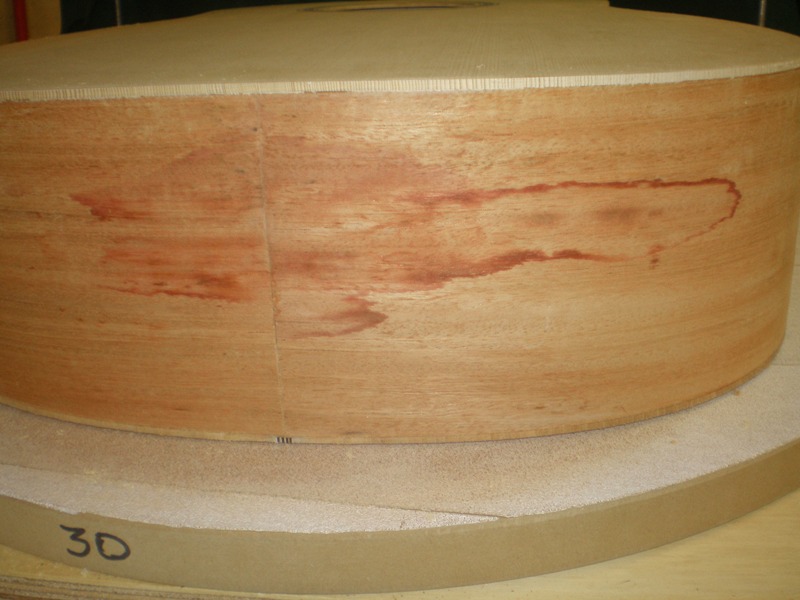
3/10/10 - Another shot of the water damage from January. I hope this sands out, if not I will have to stain the back and sides. |
For multiple reasons, I set this project aside. I fully expected to get back to it, but I didn't imagine it would be over 13 years later! In all honesty, the water stain deflated me and killed my enthusiasm. (See update on that below!) Another reason was that I wasn't entirely happy with the pearl logo inlay for the headstock. I wanted more precision in the finished product. To that end, I added a CNC router to my arsenal of tools in 2022. You can see how that has allowed me to do much more precise inlays here: CNCLogInlay.
A lot else has changed in the shop and I have expanded my capabilities. I have completed two ukulele kits in the last year or so building upon those skills. It is time to return to this guitar and finally finish it.
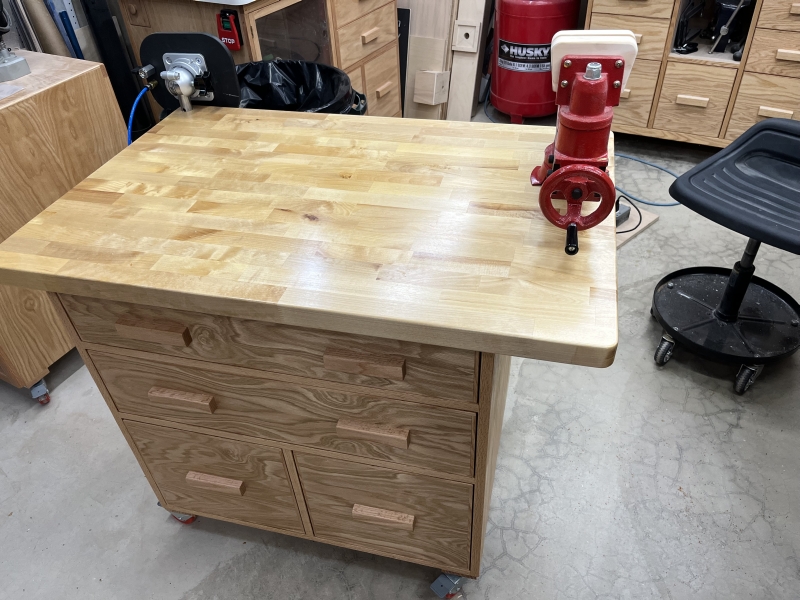 11/18/23 - One of the additions to the shop is a dedicated guitar workbench. Storage underneath is dedicated to tools and jigs specific to guitar building. The vise will hold necks and parts. The top also provides plenty of space for routing binding channels. |
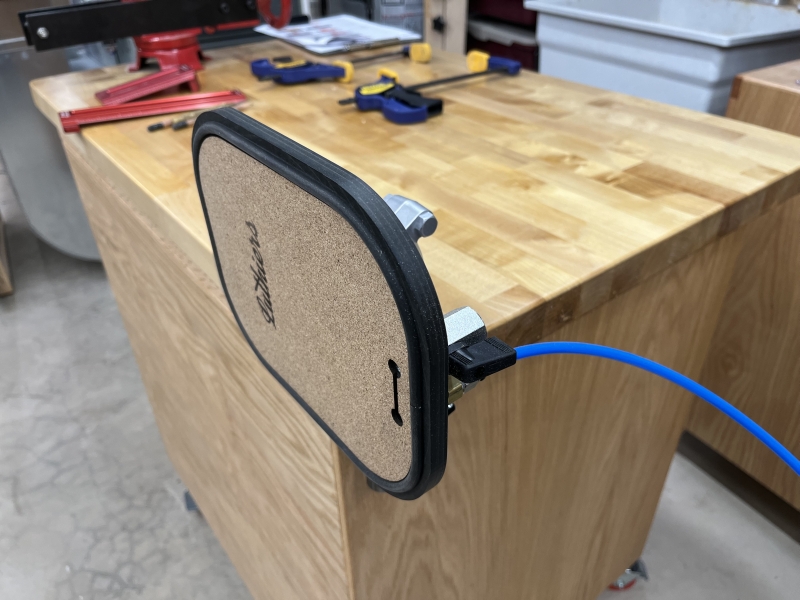 11/18/23 - Another option for work holding is this vacuum clamp. The top pivots and rotates and will hold the body of the guitar vertically or horizontally using vacuum. |
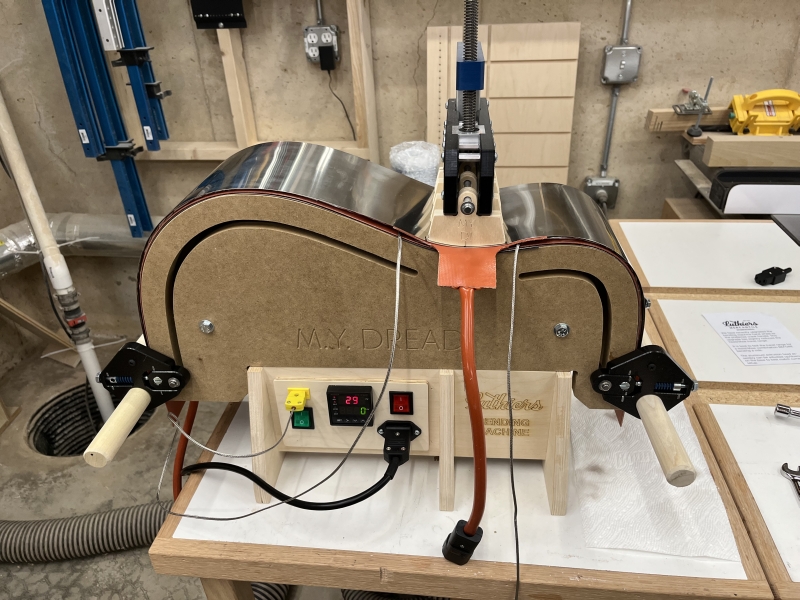 11/18/23 - This was actually added for future builds, but it has already proved handy for this one. It is a jig for bending guitar sides. It uses an electric heating blanket controlled by the electronics to maintain specific temperatures. The wood is moistened and wrapped in foil, then sandwiched with the heating blanket between steel slats. After it heats up, the wood is bent to shape using the top clamp and rollers. I have only bent test sides so far, but I also used it to bend the wood purfling and bindings you'll see installed below. I used the CNC to make the MDF mold, and with some modifications I will also be able to use this to bend ukulele sides. |
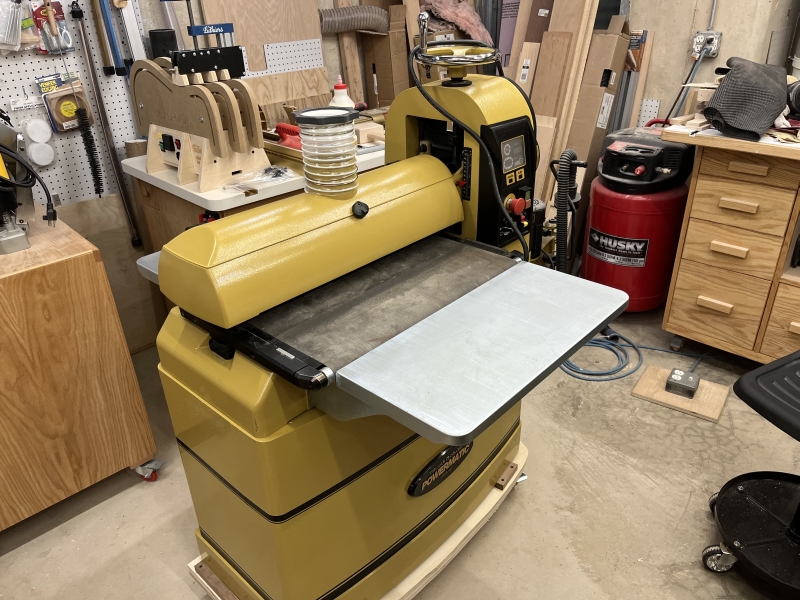 11/18/23 - A huge addition (literally) is this 22" drum sander. This gives me the ability to sand full tops and backs down to final thickness. I can go as thin as .030" (1/32) but typical for sides is around .090" (3/32). It will also let me thickness sand figured woods and end grain without tearout where a planer would fail. |
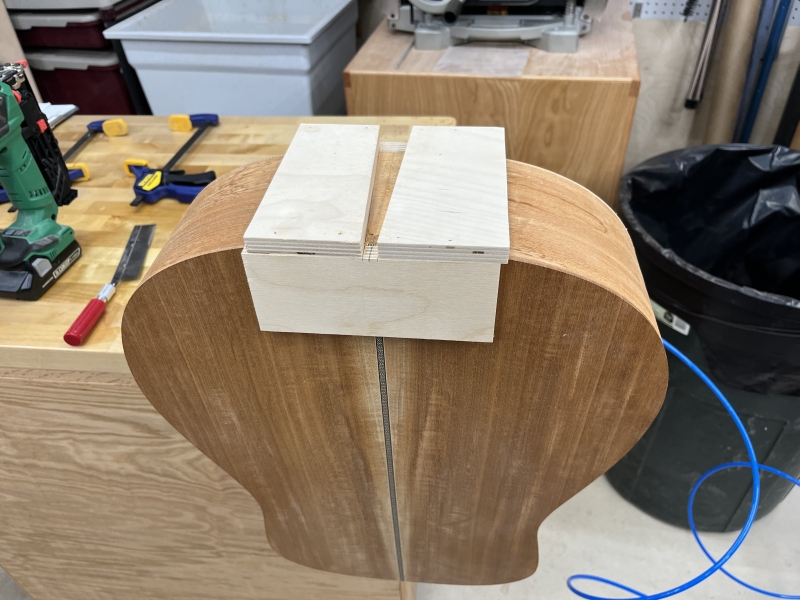 11/18/23 - A momentous occasion - the first work on this in a very long time! I need to cut and install an end wedge. Its purpose is mostly decorative to hide the seam where the sides meet. I made this quick jig so I could use a trim router. |
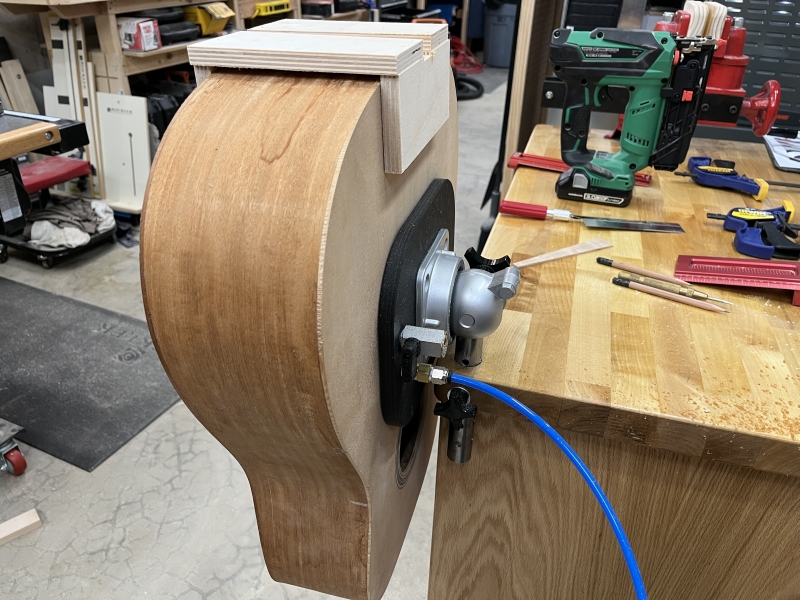 11/18/23 - Here is a view of the vacuum clamp in action. |
 11/18/23 - The jig didn't have enough room for the router bit to get all the way to the back, so I had to finish that by hand with chisels. |
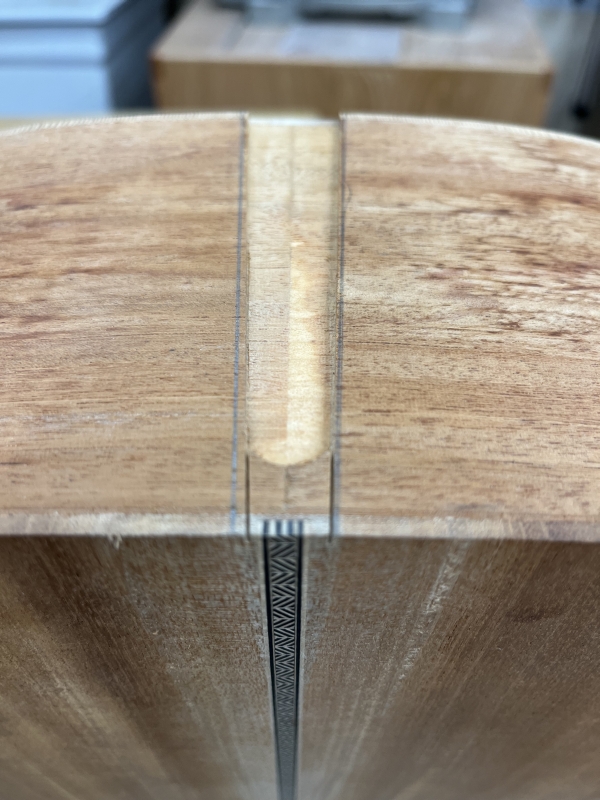
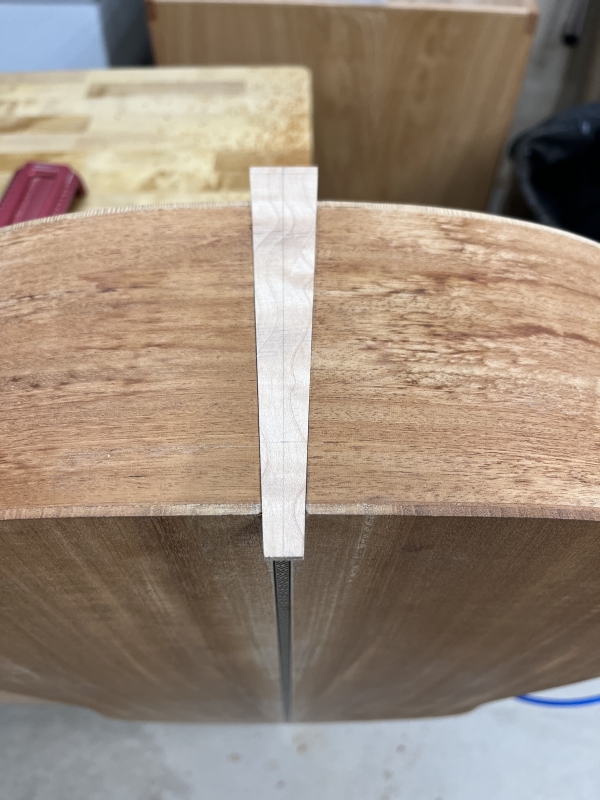 11/18/23 - Test fitting the curly maple end wedge. |
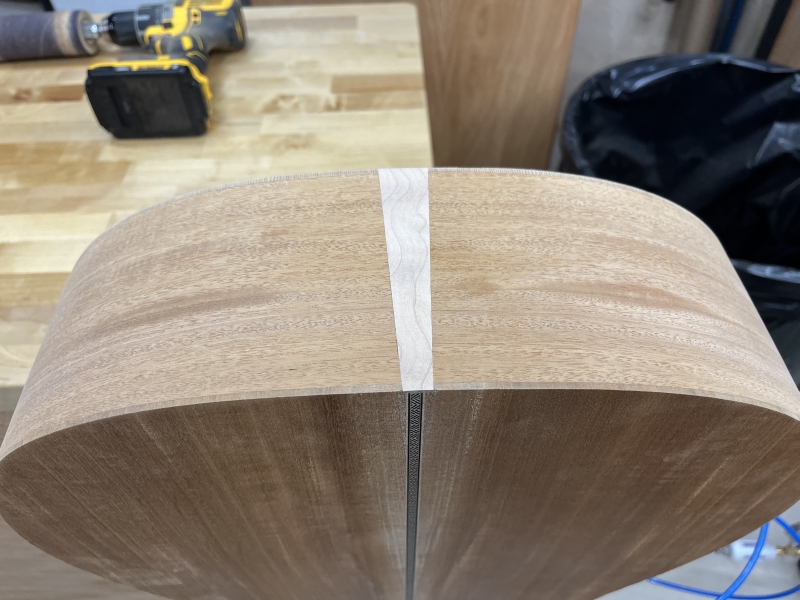 11/18/23 - Glued in and trimmed flush. And look - the water stain sanded out! The darker areas are low spots as I haven't completely sanded the sides yet. But since I had to sand the end wedge flush I did the first sanding on the whole side. |
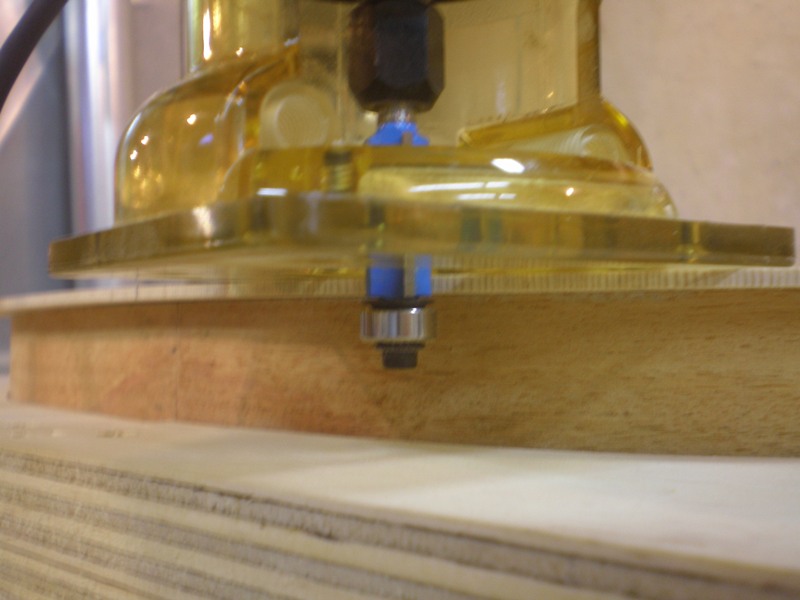
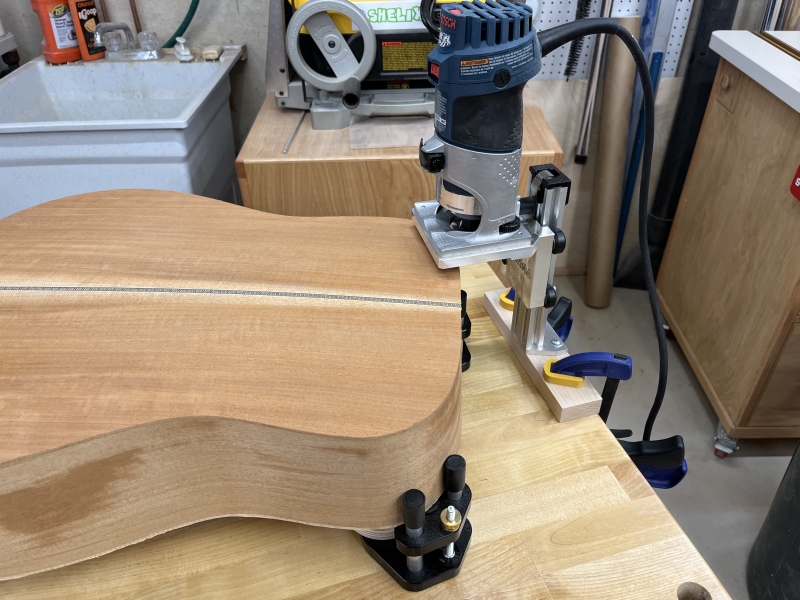 11/18/23 - Another recent tool addition. This is a binding jig. Since the top and back of a guitar aren't flat, you can't just run a router around the edges - the cut would be at different angles. A carrier holds the guitar body so that the sides are vertical. The jig holds the router vertical and a small, adjustable plastic bearing rides on the very edge of the guitar body. |
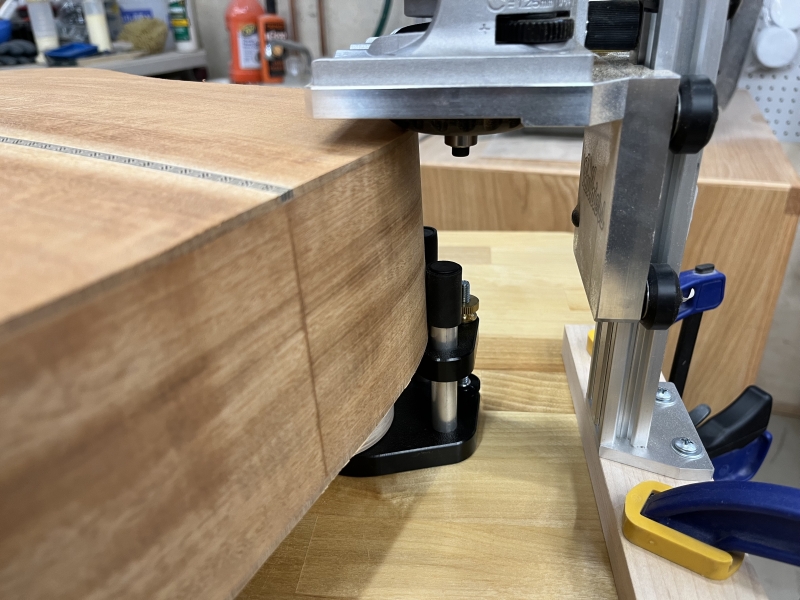 11/18/23 - A close up look at how this works. The router carrier is spring balanced and slides up and down to account for the varying height of the guitar body. |
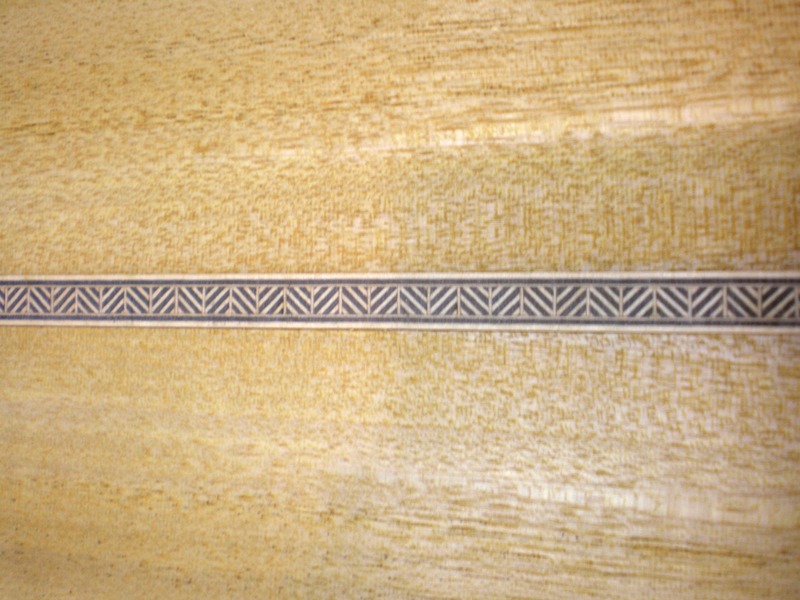
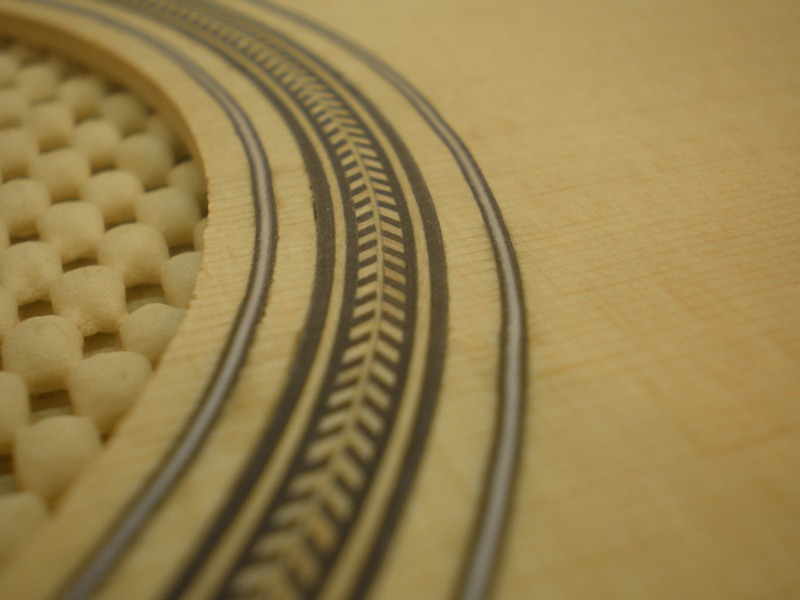
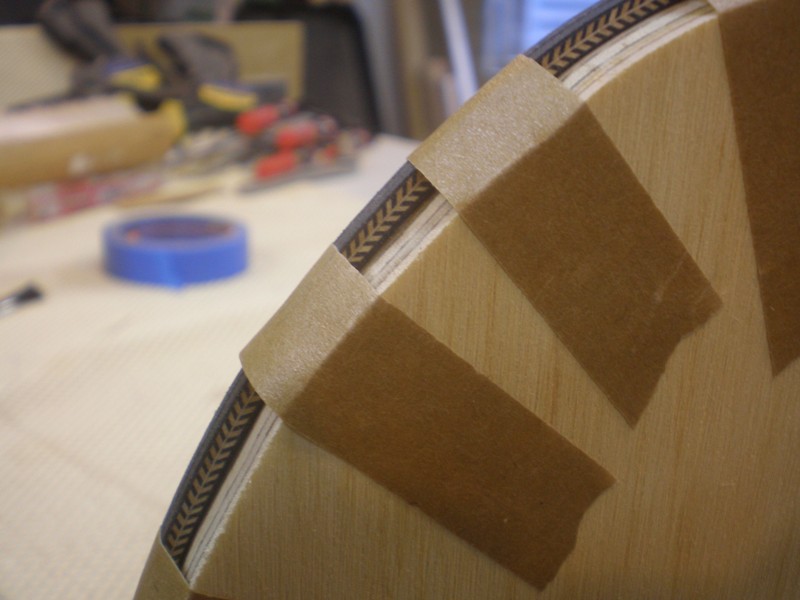
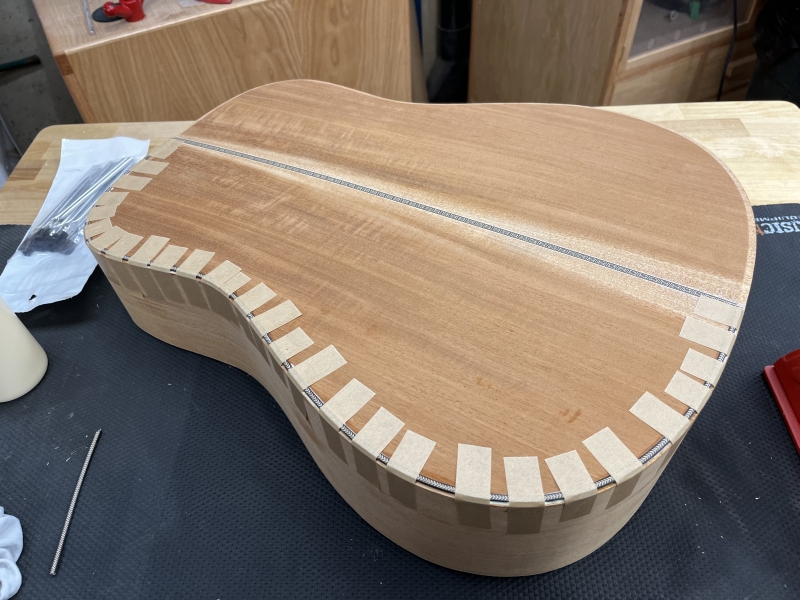
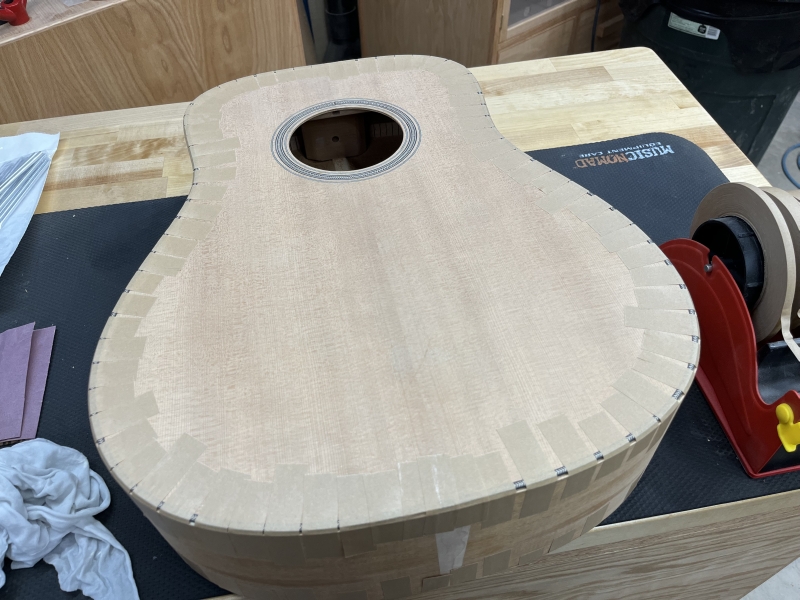
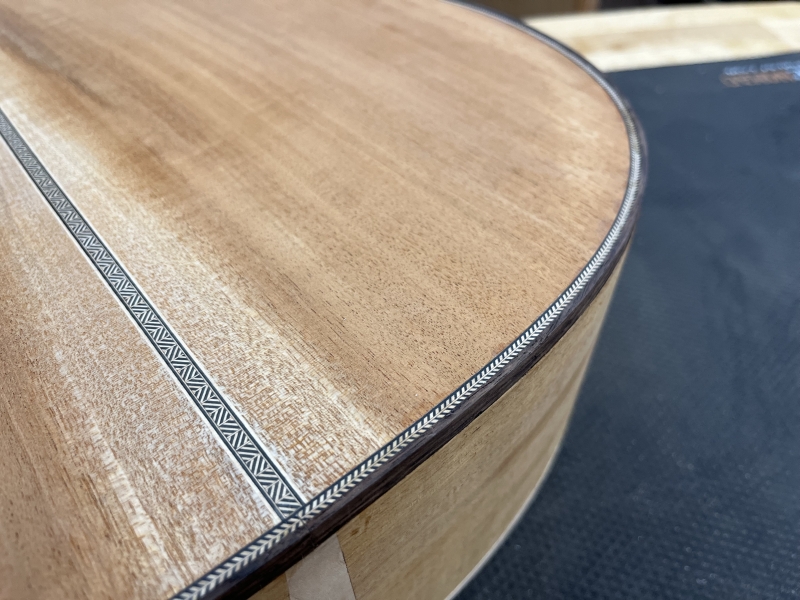
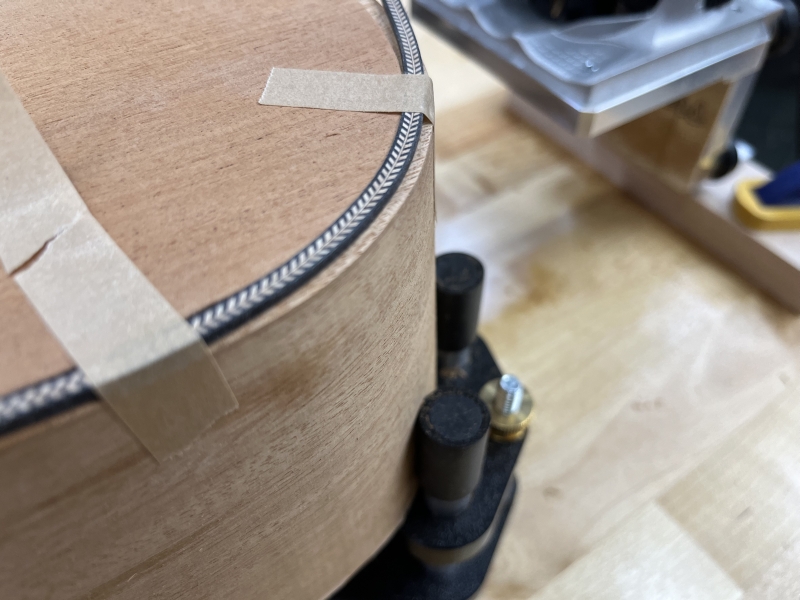 11/18/23 - The first channel is shallow but wide for the herringbone pattern purfling to sit inboard of the binding. This is purely decorative. I chose to use it on both the top and back. I prebent the purfling to make it possible to install without cracking. |
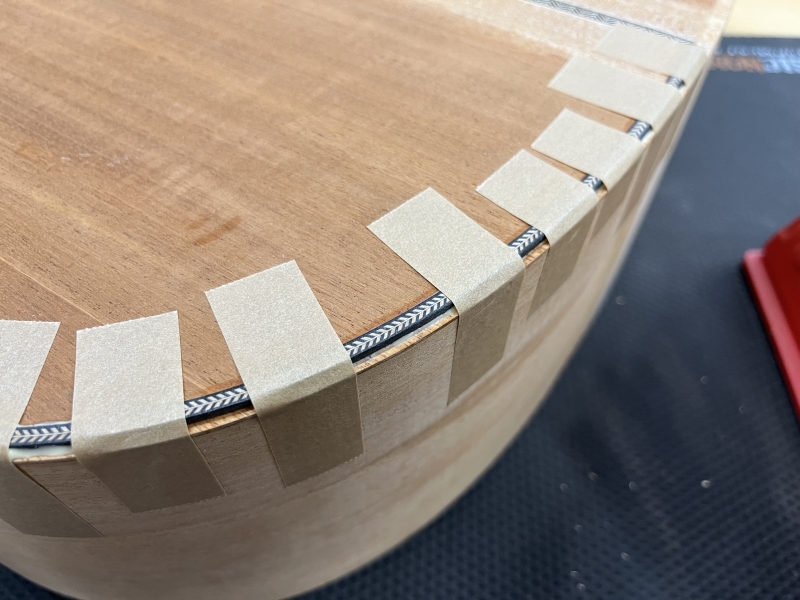 11/18/23 - Gluing the purfling in. The tape used is strong to hold it tight, but the adhesive doesn't pull the wood fibers up when removing it. |
 11/18/23 - One half of the back completed. |
 11/18/23 - All done with the back and top. I left the glue to dry for several hours. |
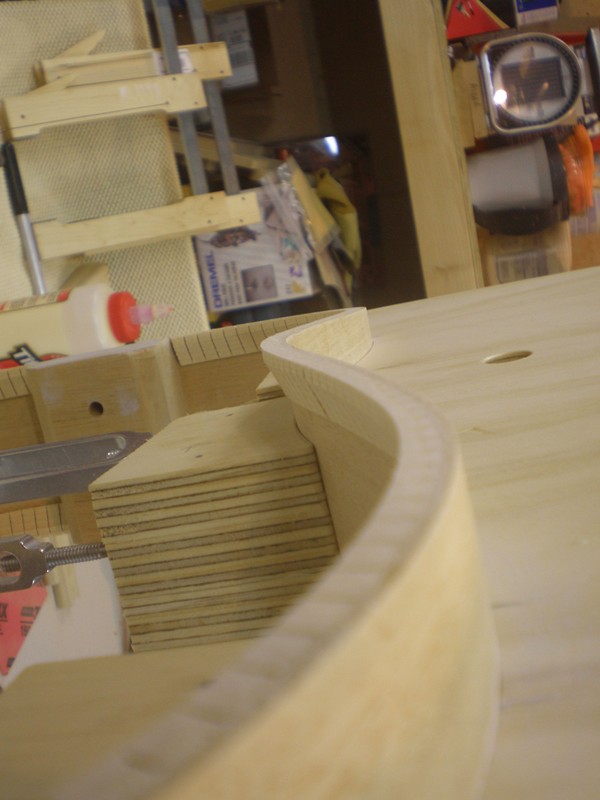
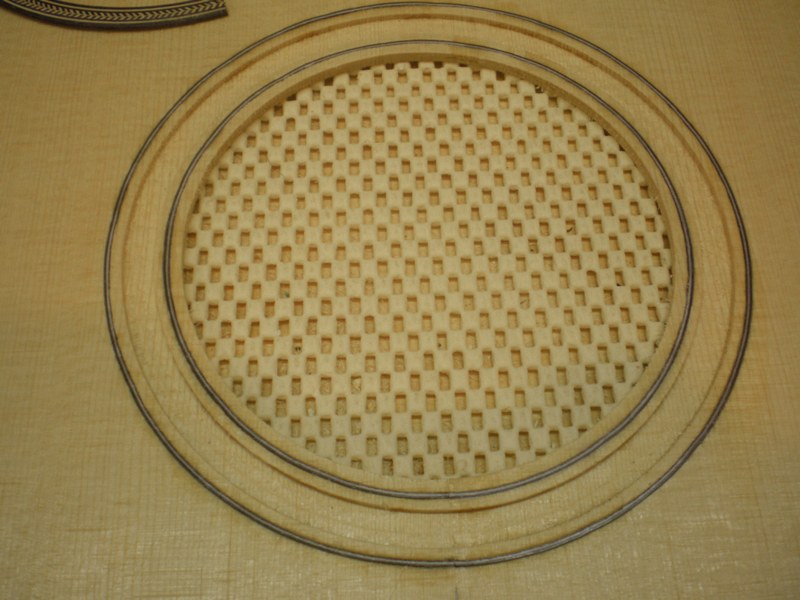
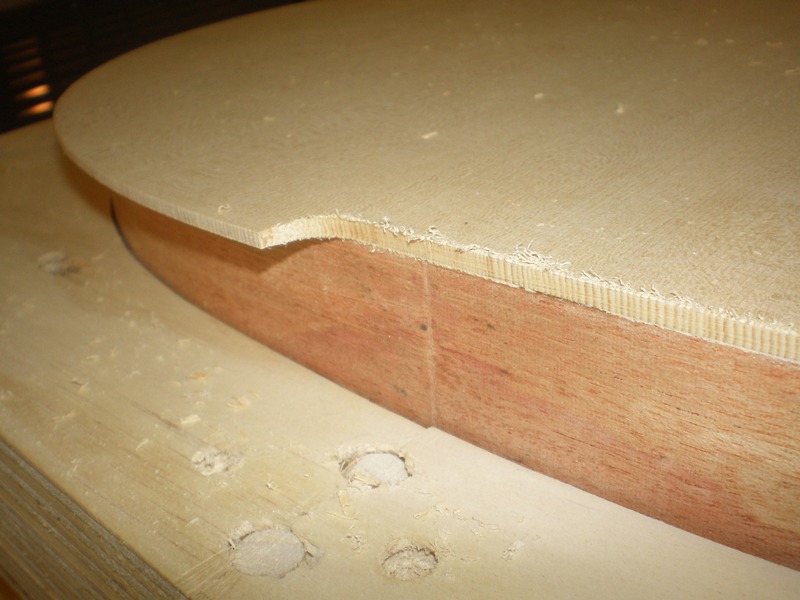
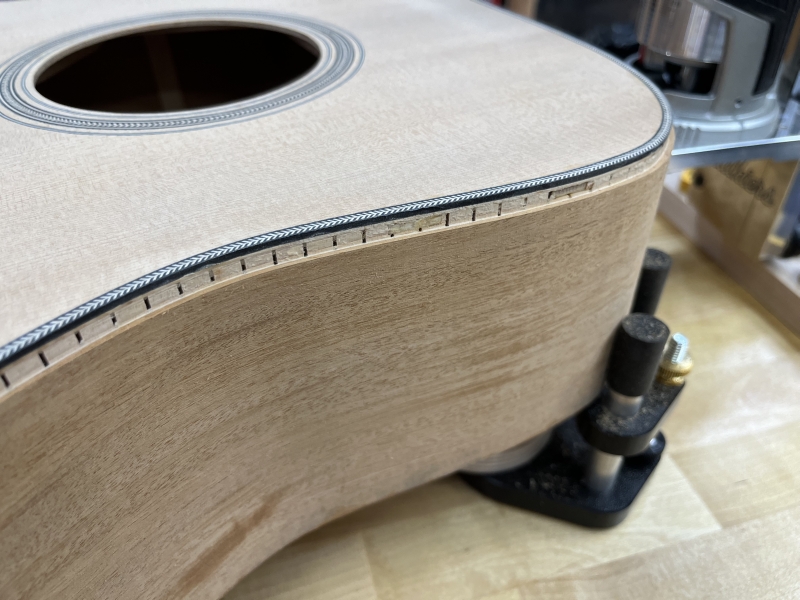 11/18/23 - The next channel is routed deeper for the wood binding. Here you can see it removed the entire side, exposing the internal kerfing. At this point the guitar goes "dead" and tapping on it no longer sounds like a drum because the air escapes through all the slots. |
 11/18/23 - It is a little nerve-wracking cutting into it like this. |
 11/18/23 - When I did the back, a small section of purfling broke out. |
 11/18/23 - I had to cut a small patch with a chisel and glued it in with super glue. |
 11/18/23 - A little blurry, but here is the patch all trimmed up. |
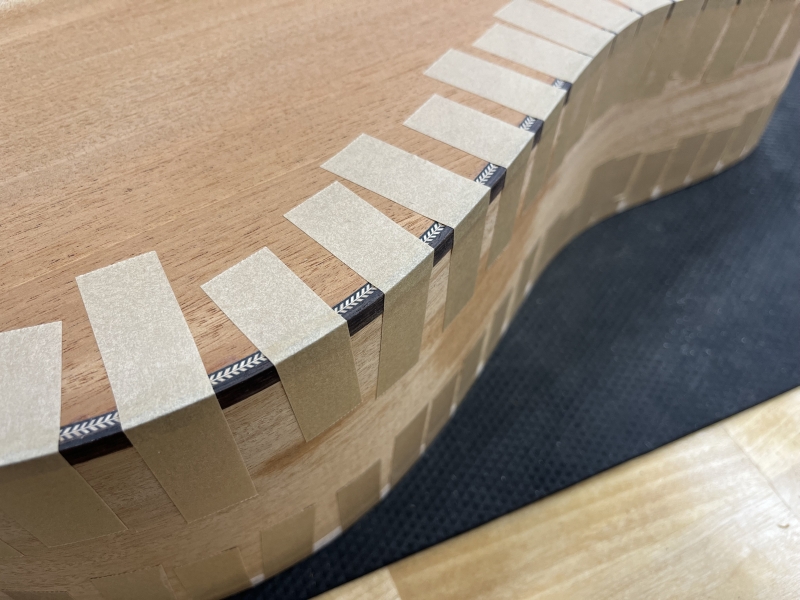 11/18/23 - The prebent wood binding being glued in. More tape! This is a finger workout. |
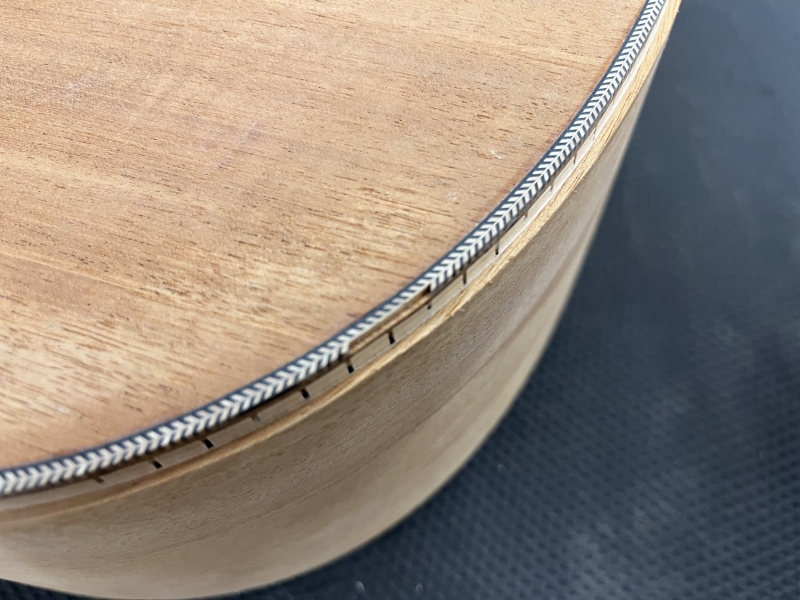
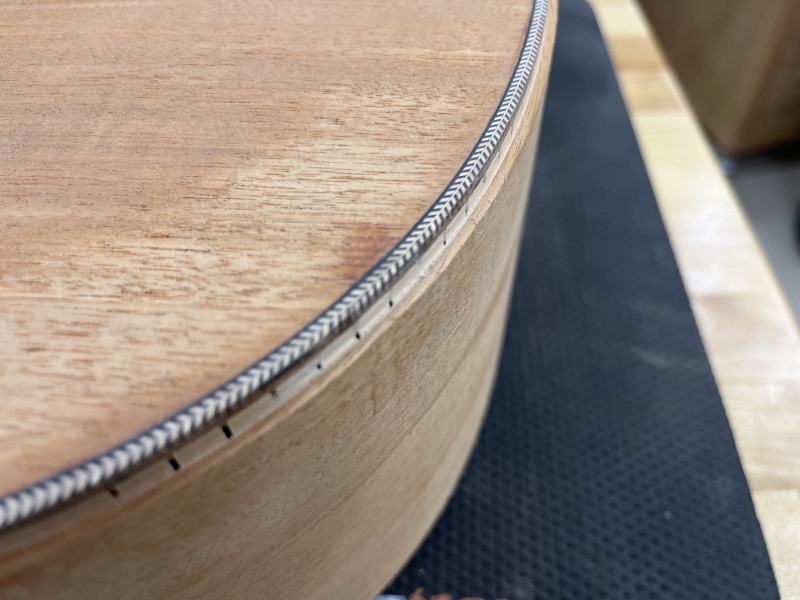
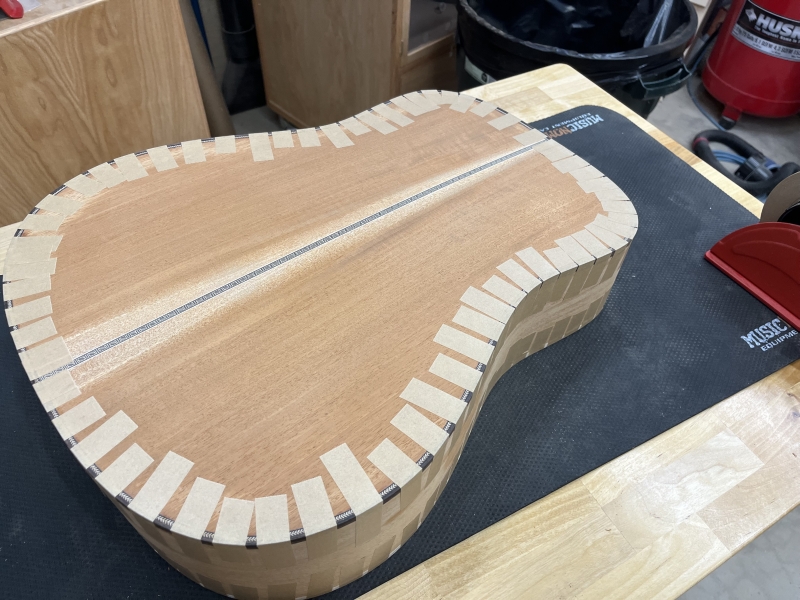 11/18/23 - All glued up. I chose Indian Rosewood binding for the back... |
 11/18/23 - ...and figured Maple for the front. This will contrast nicely with the Mahogany sides/back. |
 11/18/23 - A close up showing how the binding is just a skosh higher than the top and thicker than the sides. This allows it to be sanded flush. |
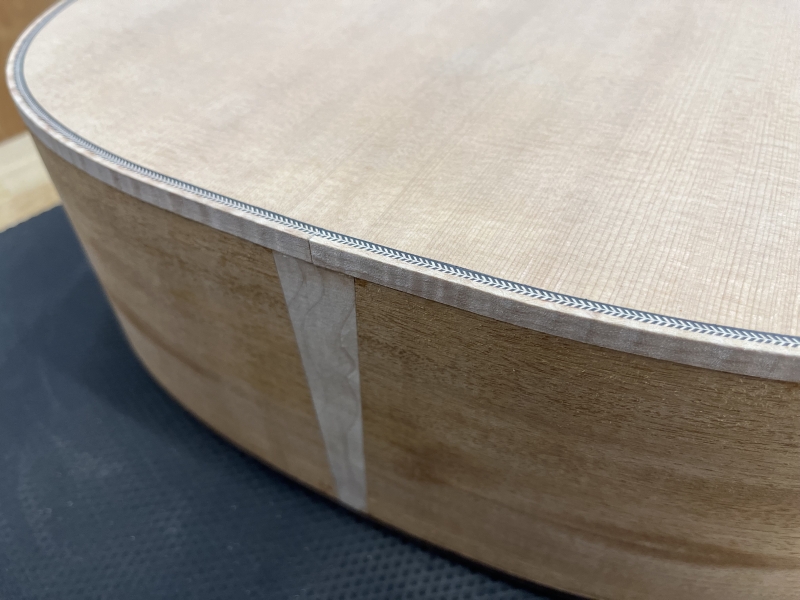 11/18/23 - A close up of the butt end. I chose the curly maple for the end wedge to match the figured maple binding. |
 11/18/23 - The back. Next up will be to scrape and sand the bindings flush and the body is almost complete. Then work can begin on the neck. |